Table Of Contents
What Is Excel Work Breakdown Structure?
The WBS or Work Breakdown Structure in Excel is used to visually represent the ordering of different tasks and project activities schedule of resources during project planning. It allows us to divide or split the project into more manageable parts by classifying the project tasks into a hierarchy of events that are further split into a series of tasks that are not dependent on any other task for completion. Also, it is used to allocate matching equipment, costs, materials, labor, and time duration for the completion of each task.
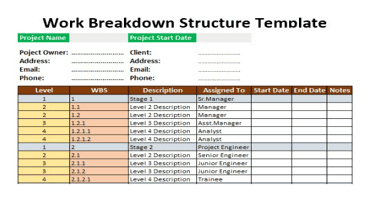
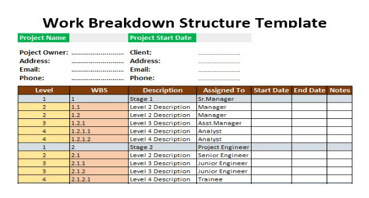
For example, we can create a tabular Work Breakdown Structure to display different levels of management, and the assigned roles, as shown below.
Key Takeaways
- The Work Breakdown Structure in Excel helps users create a project plan and further divisions in Tree or Tabular form.
- Since we can create a WBS using the Tree or Tabular form, identifying the right form for the right project is important.
- For example, we can use the tree structure to illustrate the relationship of deliverables for the project scope.
- The top level of WBS represents the final project. We should build WBS collaboratively with all the members.
- Each task should be unique, there should be no duplicates, and it should not be more than 10 days. That will help in detailed cost estimation.
How To Create A Work Breakdown Structure In Excel?
We can create a Work Breakdown Structure in Excel in 2 ways, namely,
- Tree Structure.
- Tabular View.
Example #1
With the templates available for Excel Work Breakdown Structure, we can create the Tree Structure and the Tabular Structure of Work Breakdown Structures.
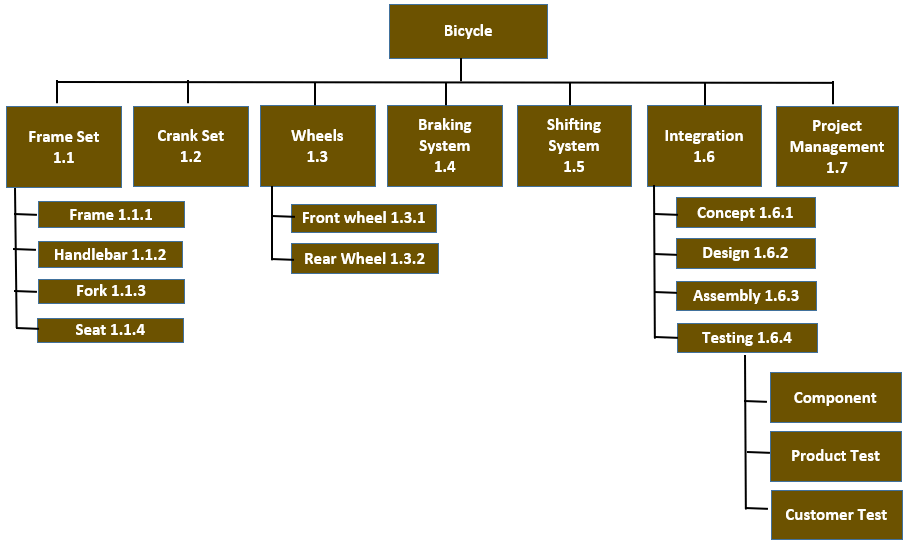
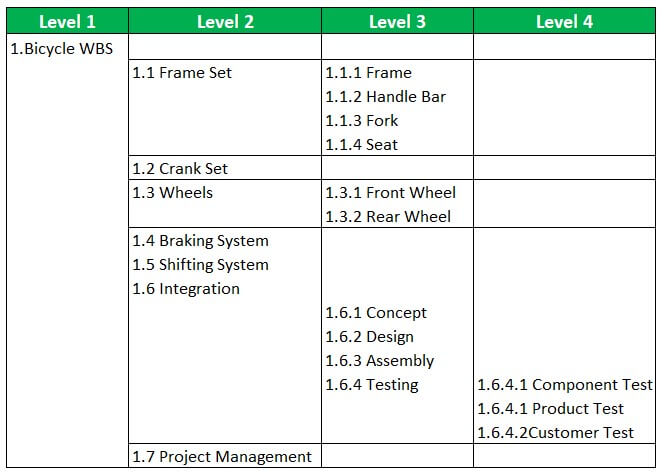
#Tree Structure – The image below shows one main heading, with further three divisions, and so on, in the structure of a tree and its branches.

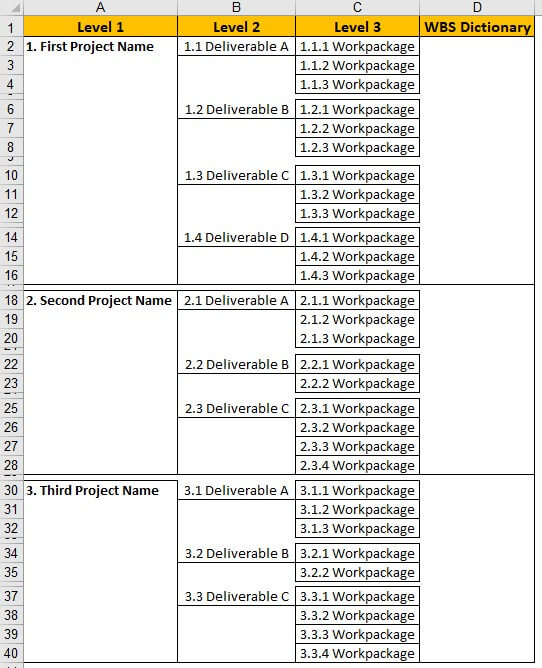
#Tabular View – The image below shows three main hierarchies as level 1, with further divisions as level 2, and level 3, in the table form with rows and columns.
The steps to create the Work Breakdown Structure in Excel are as follows:
Step 1: Gathering inputs.
Before the creation of WBS, several inputs are required, such as,
- Project Scope Statement: It is a detailed description of the tasks and deliverables of the project.
- Statement of Requirements: It is a detailed description of the result that it would deliver.
- Organizational Process Assets: These include policies, guidelines, templates, procedures, and plans of the organization.
- Project Scope Management Plan: It helps to understand how changes to the project’s scope can be dealt with.
Step 2: Gathering Team and Stakeholders – It involves identifying who can help create the WBS, which requires collaboration with team members. For instance, the team members can help jot down all the tasks for project completion.
Step 3: Determining representation and approach of WBS. The representation could be a tabular view or a tree structure described above. For instance, for a particular project, the two views of WBS are as follows:
Step 4: Defining the main deliverables and levels.
It includes breaking down the main deliverables into additional components and levels. There are three levels in a WBS, the first one is the complete project, the second includes all the deliverables required for project completion, and the third includes the division or breakdown of deliverables into smaller parts like work packages. The work packages have a rule associated with them, i.e., they should not be completed in less than 8 or more than 80 hours. This 8/80 rule applies only to work packages as these are the elements assigned to team members and an assigned deadline.
Step 5: 100% Rule - It states that each breakdown level in the WBS must have all the deliverable elements representing 100% of its parent deliverable, and it is essential to ensure that there are no duplicates. Therefore, it is necessary to ensure that the sum of all WBS’s deliverables adds up to 100% of the complete project.100% should be applied to all the sub-levels for optimal results.
Step 6: Numbering Scheme.
After defining the WBS components, each component is assigned a number that can be referred to as a WBS ID. It represents the location in the WBS structure at which each level of WBS is placed. In the first level, the first number or ID should be 1, and the following components numbered after that sequentially. For instance, it would assign 1.1 for the first sub-level element and 1.1.1 for other sub-level elements. 1.2 would be assigned for another first-level sub-element.
Step 7: WBS Dictionary - – It is a document that describes all the elements of WBS.
The final WBS template would like below:
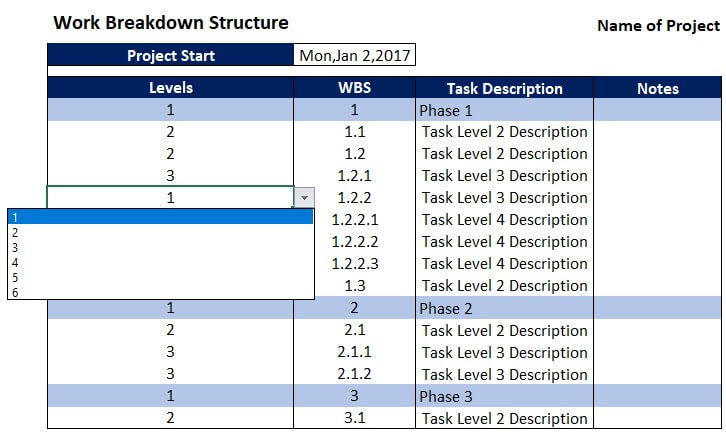
The task descriptions can be indented manually using the “Indent” buttons on the “Home” tab or conditional formatting. Also, another approach could be to create a list in which the numbering scheme is also a part of the task description so that no extra indenting is required.
Example #2
We now set up Excel to decompose the project for accessing or receiving the data. Now, let us see below how we can create one such template in Excel:
Step 1: Create the below columns across the top:
- Task ID
- Task Description
- Predecessor
- Owner
- Role
- % Completion
- Start Date
- End Date
- Deliver To
Step 2: After creating these columns, the cells are to be formatted.
- First, we format the cell Task ID. To format it, we first highlight the column designated for Task ID numbers by clicking on the letter at the top of the column.
- Next, right-click on the selected column, select "Format Cells" -> "Number," and set decimal places to 1.
- Then, we format column: Predecessor, which will track task dependencies. We should set it up the same way as “Task ID.” “Start Date” and “End Date” are to be set up to accept dates entered.
Step 3: Enter the data, as shown below.
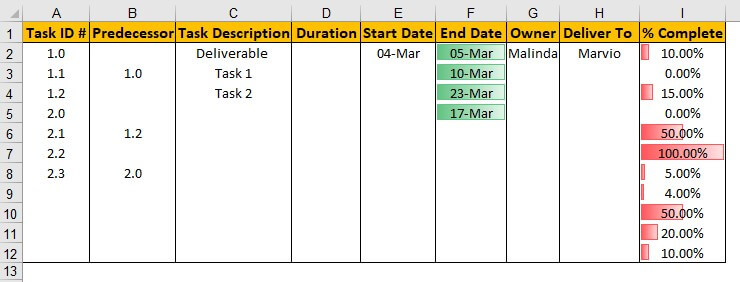
Step 4: Next, we can use conditional formatting for various tasks. For instance, we wish to highlight tasks associated with a particular deliverable, assigned to a particular member, or tasks due within a given time range.
Step 5: We can also see the “data bar” feature graphically representing a column like “% Complete.” We can access this feature in the “Conditional Formatting” dropdown.
Important Things To Note
- For creating an efficient WBS, we should use nouns rather than verbs to keep the focus on deliverables.
- While drilling down through levels of WBS, we should follow the 100% rule.
