Table Of Contents
Excel VBA Write Text File
In VBA, we can open or read or write a text file. To write a text file means the data we have in an Excel sheet, and we want it to be a text file or a notepad file. Therefore, there are two methods: the FileSystemObject property of VBA and the Open and Write method in VBA.

In most corporate companies, once finalizing the report, they look to upload the report to the database. They use the "Text Files" format to update the database to upload to the database. We usually copy the data from Excel and paste it into a text file. We rely on text files because they are very easy to work with because of their lightweight and simpler ways. By using VBA coding, we can automate the task of copying data from an Excel file to a text file. This article will show you how to copy or write data from an Excel file to a text file using VBA code.
How to Write Data to Text Files using VBA?
Writing data from Excel to text is complex and requires very good knowledge of VBA coding. Follow the below steps to write the VBA code to copy data from Excel to a text file.
Before we show you how to write the code, let me explain how to open the text file using an open statement.
Syntax of Open Text File
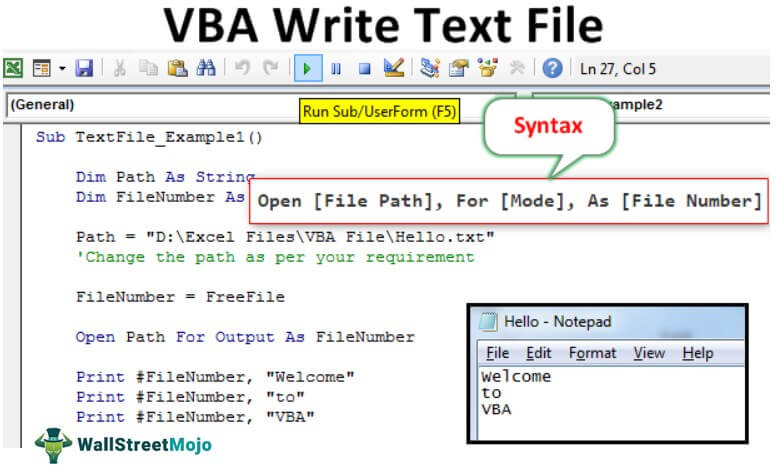
Open , For , As
File Path: The path of the file we are trying to open on the computer.
Mode: Mode is the control we can have over opening text files. We can have three types of control over the text file.
- Input Mode: This suggests "Read-only" control of the opening text file. If we use "Input Mode," we cannot do anything with the file. Instead, we can just read the contents of the text file.
- Output Mode: We can write the content on this option. We need to remember that it will overwrite all the existing data. So, we must be wary of the possible loss of old data.
- Append Mode: This mode is completely the opposite of the Output Mode. Using this method, we can write the new data at the end of the existing data in the file.
File Number: This will count the text file number of all the opened text files. It will recognize the opened file numbers in integer values from 1 to 511. However, assigning the file number is tricky and leads to confusion. For this, we can use the free File function.
Free File returns the unique number for the opened files. This way, we can assign the unique file number without duplicate values.
Example #1
Follow the below steps to write the code to create a new text file.
Assume you already have a text file named "Hello.txt" in your computer storage, and we will show you how to write the data in it.
Step 1: Declare Variable
Declare the variable to hold the file path as String.
Code:
Sub TextFile_Example1()
Dim Path As String
End Sub
Step 2: Determine File Number
To determine which file number we refer to, declare one more variable as Integer.
Code:
Sub TextFile_Example1()
Dim Path As String
Dim FileNumber As Integer
End Sub
Step 3: Assign File Path
Now, assign the file path with a name for the Path variable.
Code:
Sub TextFile_Example1()
Dim Path As String
Dim FileNumber As Integer
Path = "D:Excel FilesVBA FileHello.txt"
'Change the path as per your requirement
End Sub
Step 4: Assign Free File Function
Now, assign the function "Free File" to store unique file numbers for the File Number variable.
Code:
Sub TextFile_Example1()
Dim Path As String
Dim FileNumber As Integer
Path = "D:Excel FilesVBA FileHello.txt"
'Change the path as per your requirement
FileNumber = FreeFile
End Sub
Step 5: Open Text File
Now, we need to open the text file to work with it. As we have explained, we need to use the OPEN statement to open the text file.

Step 6: Use the Print/Write Method
Once the file opens, we need to write something in it. We need either the "Write" or "Print" method to write in the text file.
Code:
Sub TextFile_Example1()
Dim Path As String
Dim FileNumber As Integer
Path = "D:Excel FilesVBA FileHello.txt"
'Change the path as per your requirement
FileNumber = FreeFile
Open Path For Output As FileNumber
Print #FileNumber, "Welcome"
Print #FileNumber, "to"
Print #FileNumber, "VBA"
End Sub
First, we need to mention the file number (here, we have assigned the file through the "FileNumber" variable), then we need to add the content we want to add to a text file.
Step 7: Save and Close Text File
Once we write the content in a text file, we need to save and close the text file.
Code:
Sub TextFile_Example1()
Dim Path As String
Dim FileNumber As Integer
Path = "D:Excel FilesVBA FileHello.txt"
'Change the path as per your requirement
FileNumber = FreeFile
Open Path For Output As FileNumber
Print #FileNumber, "Welcome"
Print #FileNumber, "to"
Print #FileNumber, "VBA"
Close FileNumber
End Sub
Now, run the code manually or through the shortcut excel key F5. It will write the mentioned content in the mentioned text file.

Example #2
Now, we will see how to write the data of the Excel sheet into a text file.
For this example, we have created simple data in Excel like below.

Step 1: With the continuation of the old example, define two more variables as Integer to find the last row and last column.
Code:
Sub TextFile_Example2()
Dim Path As String
Dim FileNumber As Integer
Dim LR As Integer
Dim LC As Integer
End Sub
Step 2: Find the last used row and column in the worksheet.

Step 3: Now, assign the file path and file number.

Step 4: Use the OPEN statement to open the text file.

Step 5: We need to loop through rows and columns, so declare two more variables as Integer.

Step 6: Now, open the loop to loop through the row (For next loop in VBA)

Step 7: To loop through columns, open one more loop inside the existing loop.

Step 8: We need to write the same data line until it reaches the last column. So for this, apply the IF statement in VBA.

Step 9: Now, save and close the text file.

This code will write the details to a text file, but to open the text file after writing, we need to use the below code.

Code:
Sub TextFile_Example2() Dim Path As String Dim FileNumber As Integer Dim LR As Integer Dim LC As Integer Dim k As Integer Dim i As Integer LR = Worksheets("Text").Cells(Rows.Count, 1).End(xlUp).Row LC = Worksheets("Text").Cells(1, Columns.Count).End(xlToLeft).Column Path = "D:Excel FilesVBA FileHello.txt" FileNumber = FreeFile Open Path For Output As FileNumber For k = 1 To LR For i = 1 To LC If i <> LC Then Print #FileNumber, Cells(i, k), Else Print #FileNumber, Cells(i, k) End If Next i Next k Close FileNumber Shell "notepad.exe " & Path, vbNormalFocus End Sub
So, run the code using the F5 key or manually. Then, it will copy the data below.


