Table of Contents
VBA Code to Send Emails From Excel
In VBA, to send emails from Excel, we can automatically automate our mailing feature to send emails to multiple users at a time. However, to do so, we need to remember that we may do it by outlook, another product of outlook, so we need to enable outlook scripting in VBA. Once done, we use the .Application method to use outlook features.
VBA's versatility is just amazing. VBA coders love Excel because by using VBA, we not only can work within Excel. Rather, we can also access other Microsoft tools. For example, we can access PowerPoint, Word, and Outlook by using VBA. So I was impressed when I heard of sending emails from Excel. Yes, it is true. We can send emails from excel. This article will show you how to send emails from Excel with attachments using VBA Coding.

Set Reference to Microsoft Office Library
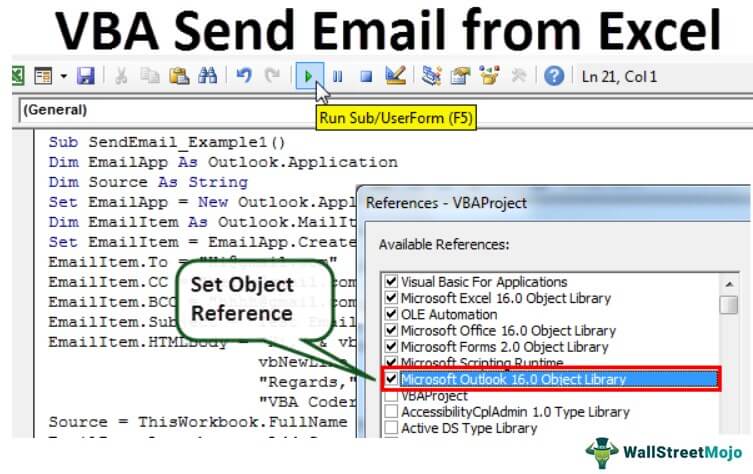
We need to send emails from Outlook. Since Outlook is an external objec, we first need object reference to “Microsoft Outlook 16.0 Object Library.”
1. In VBA, Go to Tools > References.

2. Now, we will see the object reference library. In this window, we need to set the reference to “Microsoft Outlook 16.0 Object Library.”

3. After setting the object reference, click on “OK.”
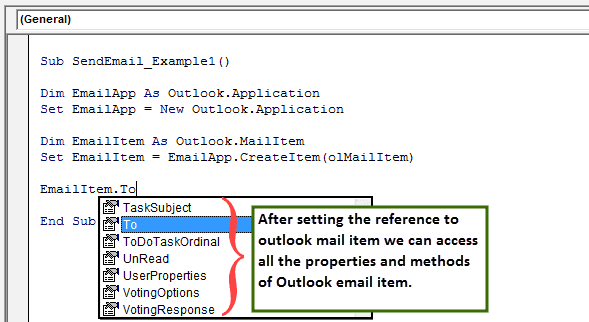
Now, we can access Outlook objects in VBA coding.
While VBA can help send emails from Excel, there are multiple other functions that you can perform using Excel VBA. To get an idea of how certain events get automated and triggered using the tools, you can have a look at this Excel Events Automation Using Advanced VBA Functions Course.
13 Easy Steps to Send Emails from Excel
Writing the code to send an email with an attachment from Excel is quite complicated but worth spending some time.
Follow the below steps to write your first email excel macro.
Step #1
Start the sub procedure in VBA.
Code:
Sub SendEmail_Example1()
End Sub

Step #2
Declare the variable Outlook.Application
Code:
Dim EmailApp As Outlook.Application 'To refer to outlook application

Step #3
The above variable is an object variable. Therefore, we need to create an instance of a new object separately. Below is the code to create a new instance of the external object.
Code:
Set EmailApp = New Outlook.Application 'To launch outlook application

Step #4
Now, to write the email, we declare one more variable as “Outlook.MailItem”.
Code:
Dim EmailItem As Outlook.MailItem 'To refer new outlook email

Step #5
To launch a new email, we need to set the reference to our previous variable as “CreateItem.”
Code:
Set EmailItem = EmailApp.CreateItem(olMailItem) 'To launch new outlook email

Now, the variable “EmailApp” will launch outlook. In the variable “EmailItem,” we can start writing the email.
Step #6
We need to be aware of our items while writing an email. First, we need to decide to whom we are sending the email. So for this, we need to access the “TO” property.

Step #7
Enter the email ID of the receiver in double quotes.
Code:
EmailItem.To = "Hi@gmail.com"

Step #8
After addressing the main receiver, if you would like to CC anyone in the email, we can use the “CC” property.
Code:
EmailItem.CC = "hello@gmail.com"

Step #9
After the CC, we can set the BCC email ID as well.
Code:
EmailItem.BCC = "hhhh@gmail.com"

Step #10
We need to include the subject of the email we are sending.
Code:
EmailItem.Subject = "Test Email From Excel VBA"

Step #11
We need to write the email body using HTML body type.
Code:
EmailItem.HTMLBody = "Hi," & vbNewLine & vbNewLine & "This is my first email from Excel" & _ vbNewLine & vbNewLine & _"Regards," & vbNewLine & _"VBA Coder" 'VbNewLine is the VBA Constant to insert a new line

Step #12
We are working on if we want to add an attachment to the current workbook. Then, we need to use the attachments property. First, declare a variable source as a string.
Code:
Dim Source As String

Then in this variable, write ThisWorkbook.FullName after Email body.
Code:
Source = ThisWorkbook.FullName

In this VBA Code, ThisWorkbook is used for the current workbook and .FullName is used to get the full name of the worksheet.
Then, write the following code to attach the file.
Code:
EmailItem.Attachments.Add Source

Step #13
Finally, we need to send the email to the mentioned email IDs. We can do this by using the “Send” method.
Code:
EmailItem.Send

We have completed the coding part.
Code:
Sub SendEmail_Example1() Dim EmailApp As Outlook.Application Dim Source As String Set EmailApp = New Outlook.Application Dim EmailItem As Outlook.MailItem Set EmailItem = EmailApp.CreateItem(olMailItem) EmailItem.To = "Hi@gmail.com" EmailItem.CC = "hello@gmail.com" EmailItem.BCC = "hhhh@gmail.com" EmailItem.Subject = "Test Email From Excel VBA" EmailItem.HTMLBody = "Hi," & vbNewLine & vbNewLine & "This is my first email from Excel" & _ vbNewLine & vbNewLine & _ "Regards," & vbNewLine & _ "VBA Coder" Source = ThisWorkbook.FullName EmailItem.Attachments.Add Source EmailItem.Send End Sub
Run the above code. It will send the email with the mentioned body with the current workbook as the attachment.
If you're working with a large contact list, personalizing your emails becomes essential. With VBA, you can automate the process of sending individualized emails directly from your Excel workbook. But if you need to personalize emails further using data from a spreadsheet, you may want to explore how to do mail merge in Excel. Mail merge allows you to create customized emails for each recipient, making your communication more personal and effective.

