Table Of Contents
Insert Row with VBA Excel
We can perform almost all our actions in Excel with VBA coding. For example, we can copy, paste, delete, and do many more things through the VBA language. “Inserting Row” is one such method we often do in Excel. This article will show you how to perform the insert row method in VBA.
Table of contents
How to Insert Row in Excel VBA?
Below are the various methods of using VBA to insert a row in Excel.
Method #1 - Using the Insert Method
In VBA, we need to use a similar technique in the Excel worksheet to insert a row. In VBA, we need to use the range object to insert the row.
For example, look at the below code.
Code:
Sub InsertRow_Example1()

  Range("A1").Insert

End Sub
This code will move down cell A1 to the B1 and insert the only cell.
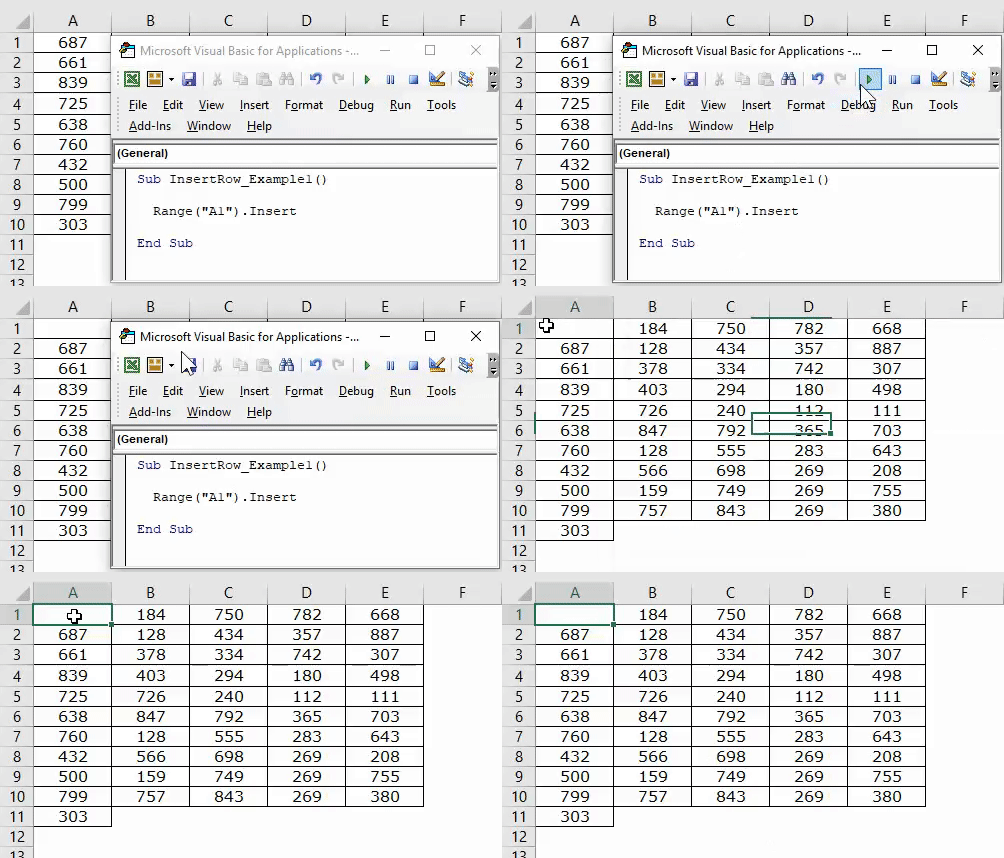
It will cause so many problems in terms of handling the data. It will just move the mentioned cell down, and all associated columns remain the same.
Method #2 - Using Entire Row Property
In the top insert row, we can use several methods. The below method will insert the entire row above the selected cell.
Step 1: Mention the cell address first.
Code:
Sub InsertRow_Example2()

  Range("A1").

End Sub
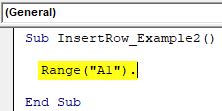
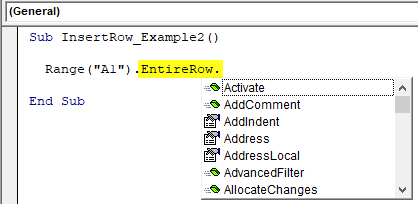
Step 2: Instead of just selecting the “Entire Row” property.
Code:
Sub InsertRow_Example2()

  Range("A1").EntireRow.

End Sub
Step 3: After accessing the entire row property,use the insert method.
Code:
Sub InsertRow_Example2()

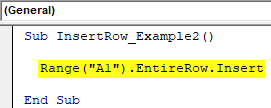
  Range("A1").EntireRow.Insert

End Sub
It will insert the row above cell A1. Since A1 is the first row, it will move down the A1 cell to B1.
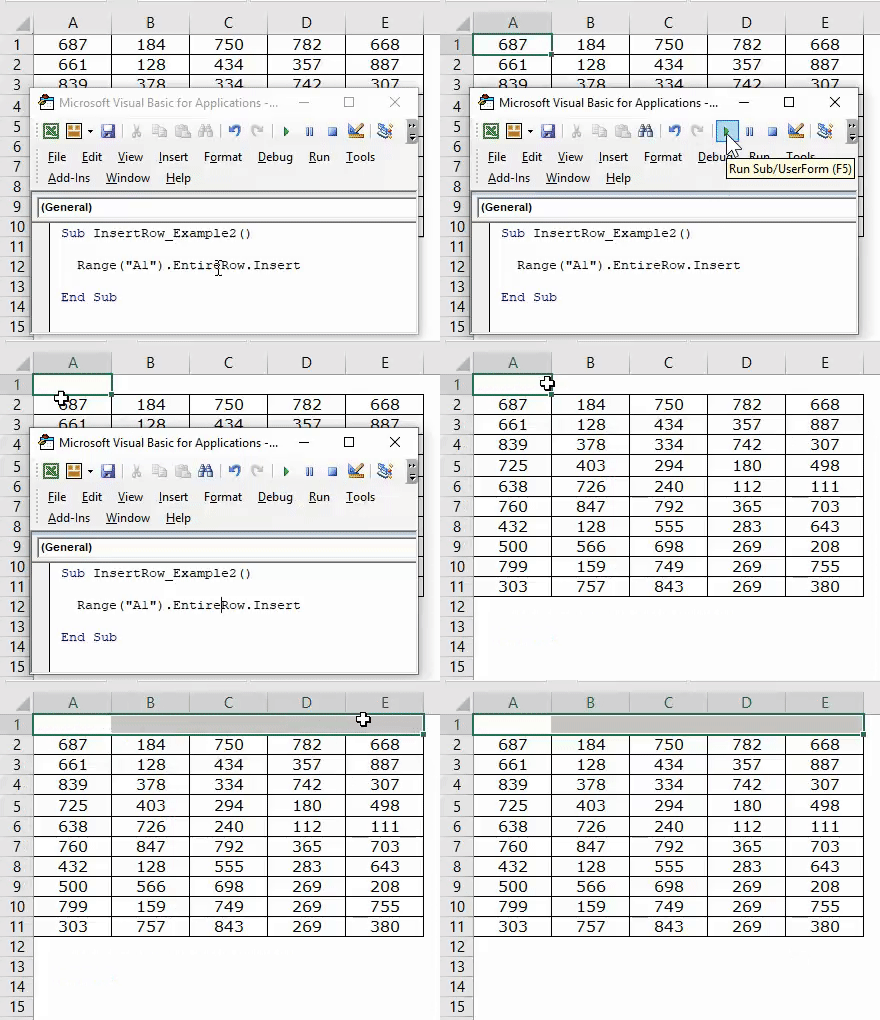
As you can see in the above image, it has to insert the entire row, not the single cell.
Method #3 - Using Row Numbers
In the above example, we have just used the single-cell address and inserted the row. However, we can also insert it by using row numbers.
Assume you want to insert a row below the 5th row. First, we need to mention the row numbers using the RANGE object.
Code:
Sub InsertRow_Example3()

  Range("6:6").

End Sub
Since we have mentioned the entire row as 6:6, we need to use the Entire Row property here. Then, we can use the “INSERT” method.
Code:
Sub InsertRow_Example3()

  Range("6:6").Insert

End Sub
It will also insert the entire row, not the single cell.
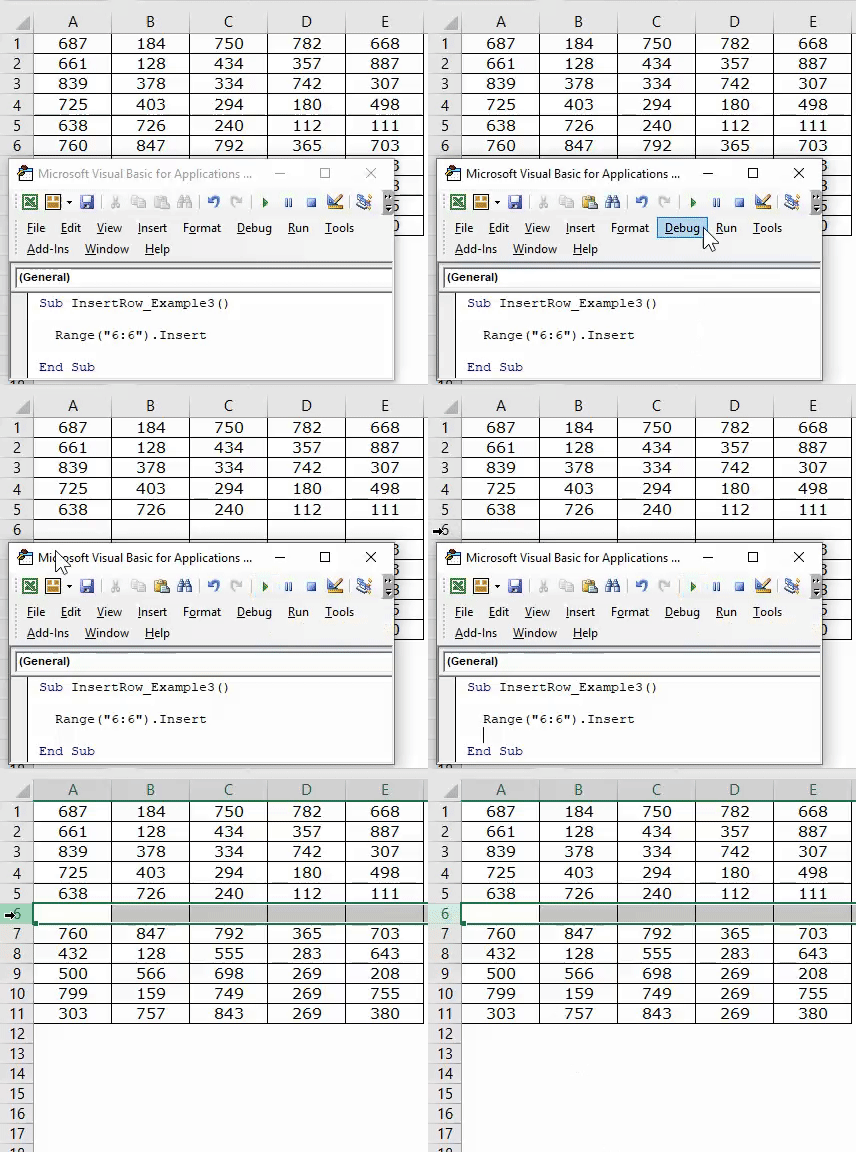
If you want to insert two rows below the 5th row, we need to select 2 rows first and then use the INSERT method.
Sub InsertRow_Example3()

  Range("6:7").Insert

End Sub
It will insert two rows below the 5th row.
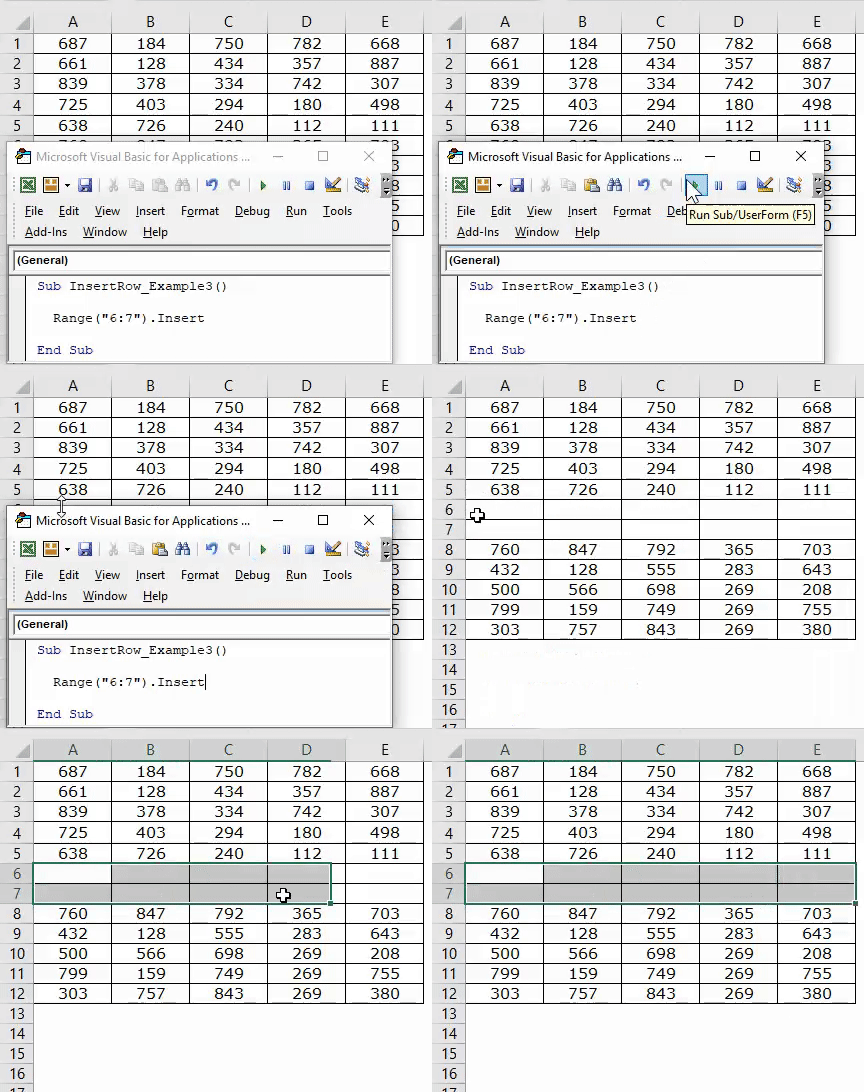
Like this, we can insert as many rows as possible in the worksheet.
Method #4 - Using Active Cell Property
We can use the Active Cell VBA property to insert rows. The active cell is nothing but a presently selected cell.
Assume you are in cell B5 and want to insert a row above. Then, you can use the ActiveCell property.
Sub InsertRow_Example4()

  ActiveCell.EntireRow.Insert

End Sub
It will insert the row above the active cell.
Method #5 - Using Active Cell Property with Offset Function
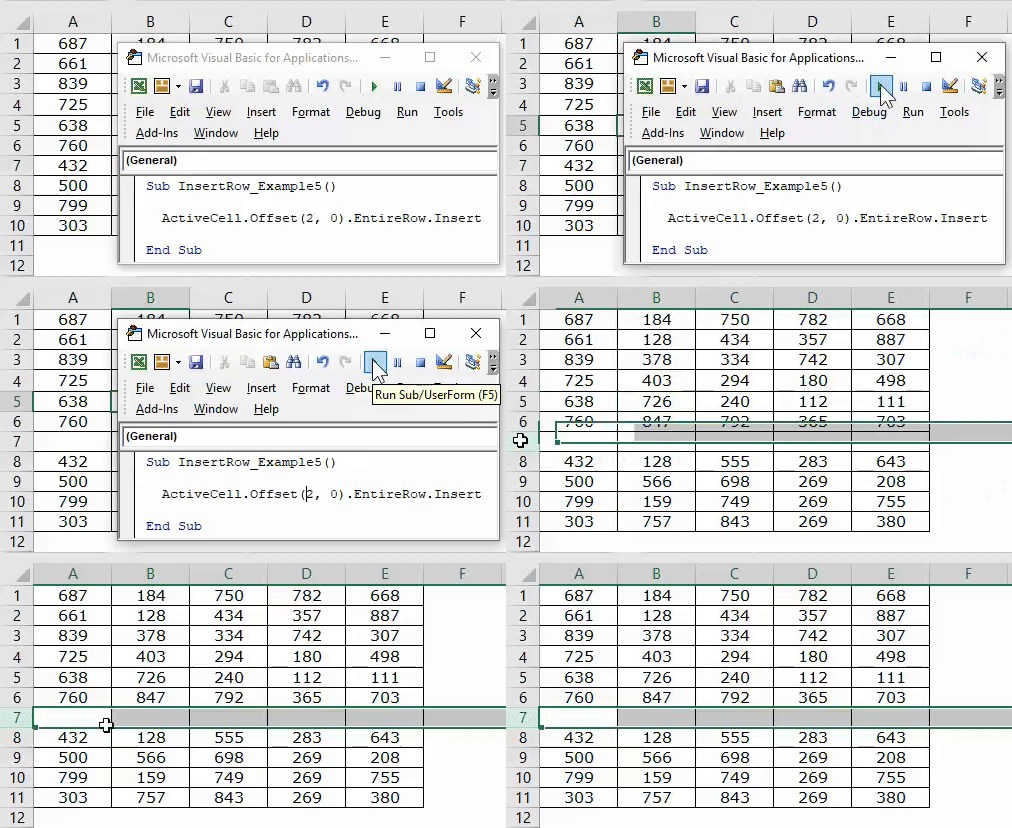
Assume you want to insert a row after two rows of the active cell. We need to use the Offset function to offset the number of rows.
Assume you are in the B5 cell.
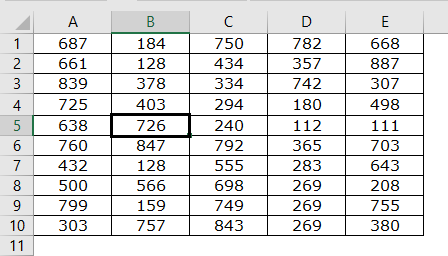
We can use the code below if you want to insert the row after the 2nd row from the active cell.
Code:
Sub InsertRow_Example5()

  ActiveCell.Offset(2, 0).EntireRow.Insert

End Sub
It will insert a row after the 6th row.
Insert Alternative Rows
Inserting alternative rows is what we have come across many times. For example, look at the below data image.
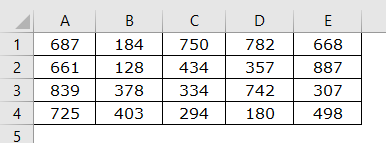
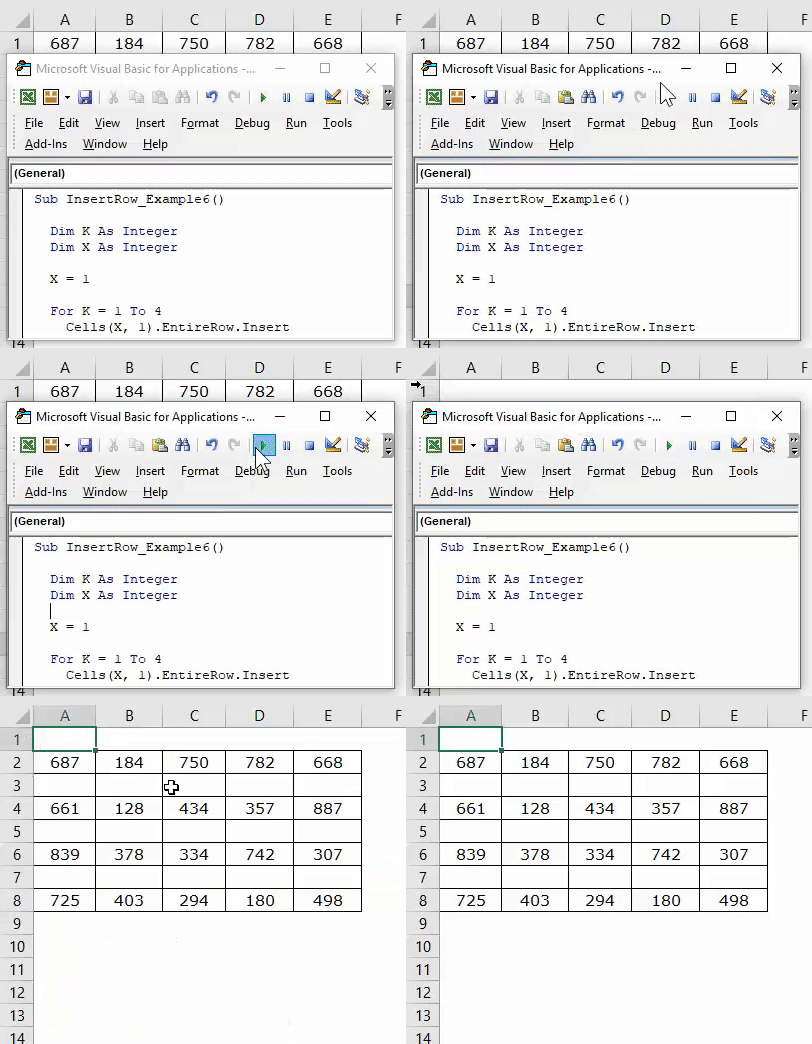
Now, we need to insert alternative rows. Finally, we need to use loops to insert every alternate row.
Code:
Sub InsertRow_Example6()
  Dim K As Integer
  Dim X As Integer

  X = 1

  For K = 1 To 4
    Cells(X, 1).EntireRow.Insert
    X = X + 2
  Next K
End Sub
This will insert rows like this.
You can download this VBA Insert Row Excel here. VBA Insert Row Excel Template
Recommended Articles
This article has been a guide to VBA Insert Row. Here, we learned the top 5 methods to Insert Row in Excel VBA, some practical examples, and a downloadable Excel template. Below are some useful Excel articles related to VBA: -
