Table Of Contents
Remove Spaces in Excel
While importing or copy-pasting the data from an external source, extra spaces are also copied in Excel. This makes the data disorganized and difficult to be used. The purpose of removing unwanted spaces from the excel data is to make it more presentable and readable for the user.
For example, if a cell contains “ rose,” the leading spaces may be visible to the reader. However, if “rose ” is written in a cell, the two trailing spaces may not be easily caught by the user.
Since extra spaces may render the Excel formulas incorrect, it is essential to eliminate them.
Top 5 Methods to Remove Spaces in Excel
The five methods to remove extra spaces in Excel are listed as follows:
- TRIM function
- “Delimited” option of text to columns wizard
- “Fixed width” option of text to columns wizard
- Find and replace option
- SUBSTITUTE function
The user can select any of the techniques depending on the requirement. Let us discuss all the methods one by one, along with examples.
#1 - TRIM Function
The TRIM function removes all spaces from a text string except for the single space between the words.
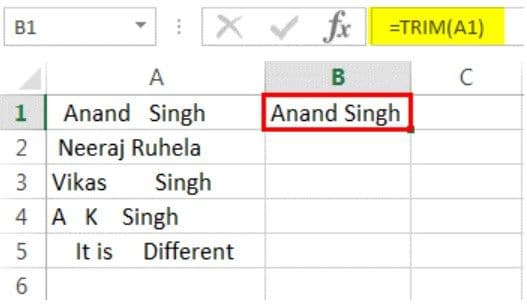
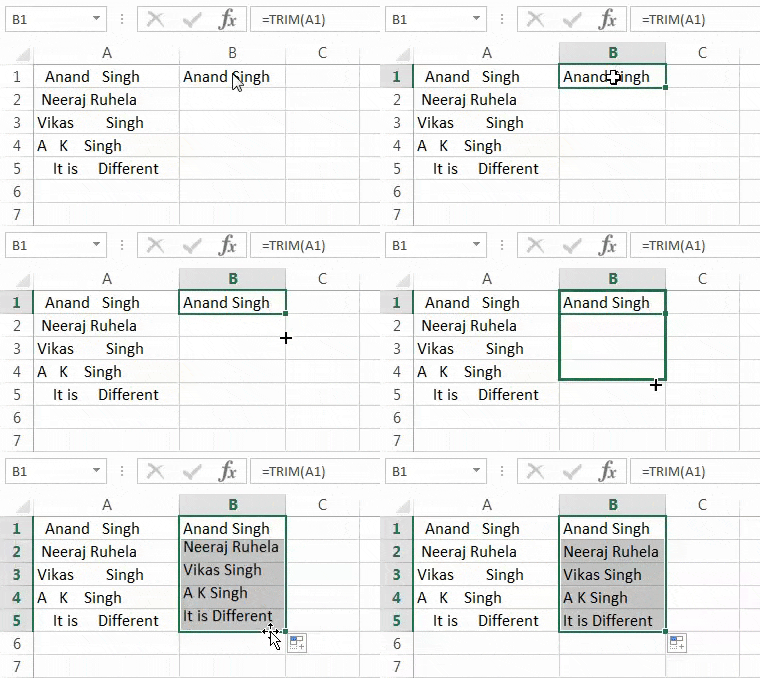
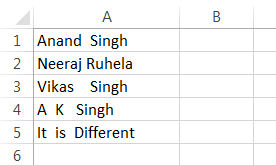
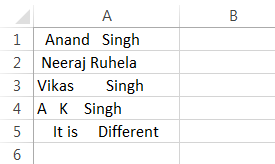
The following data contains extra spaces in column A. We want to rewrite the data without these spaces in column B with the help of the TRIM function.
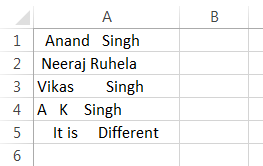
Step 1: In cell B1, enter the TRIM function.

Step 2: Select the cell A1.
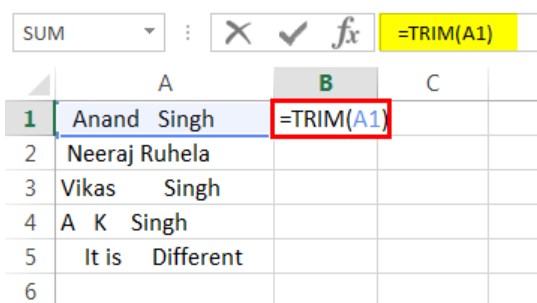
Step 3: Press the “Enter” key. The extra spaces from the name are removed in cell B1, as shown in the following image.
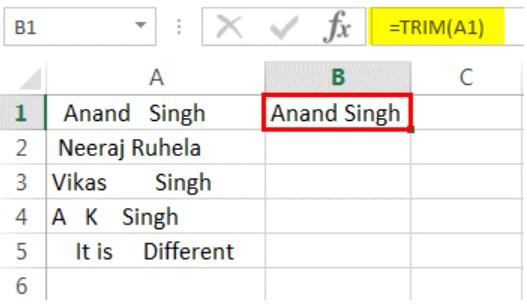
Step 4: Copy or drag the formula to the remaining cells, as shown in the following image.
#2 - “Delimited” Option of Text to Columns Wizard
The text to columns wizard helps remove spaces in excel by splitting the data strings into separate columns. It works on cells containing numerical and textual values.
The following data contains spaces in column A. We want to split the words of column A into separate cells in such a way that the space between the strings is eliminated.
Use the “delimited” option of the text to columns wizard.
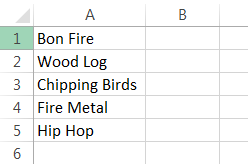
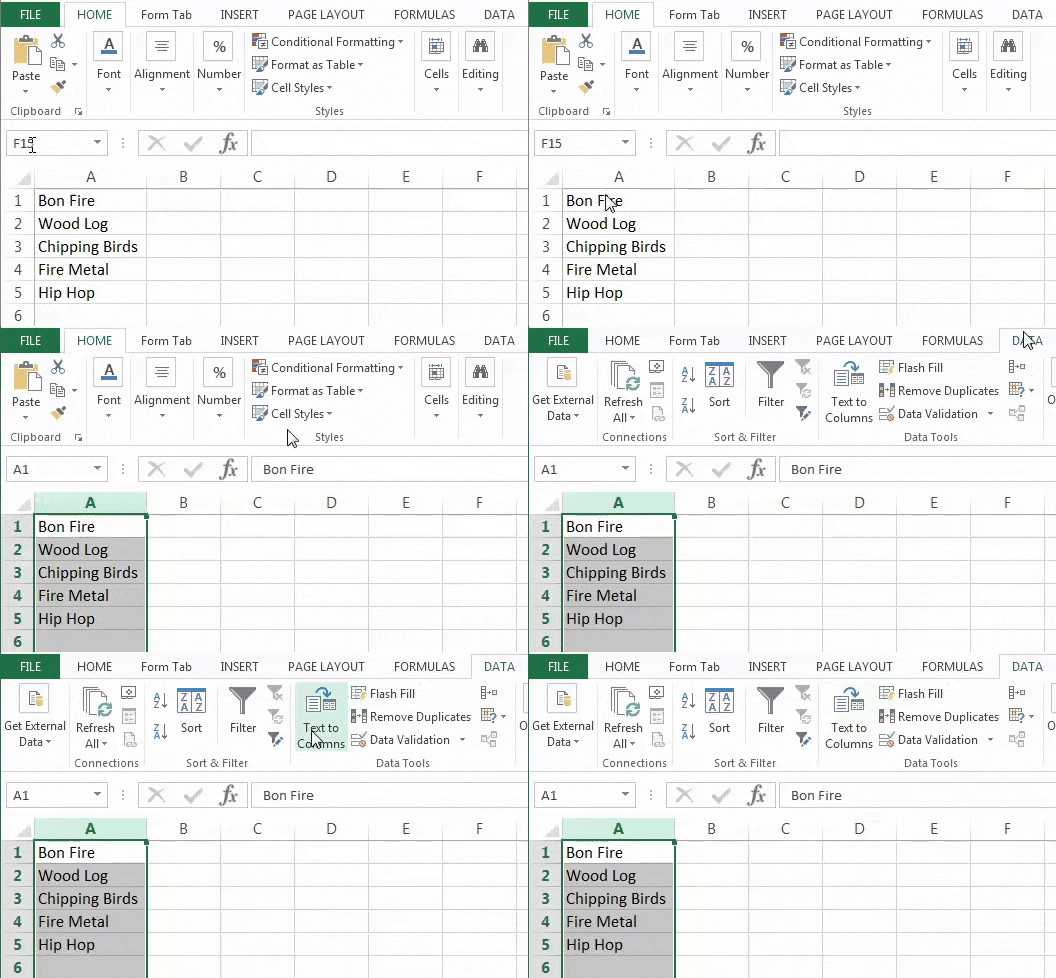
Step 1: Select column A. In the Data tab, click “text to columns” from the “data tools” group. The same is shown in the following image.
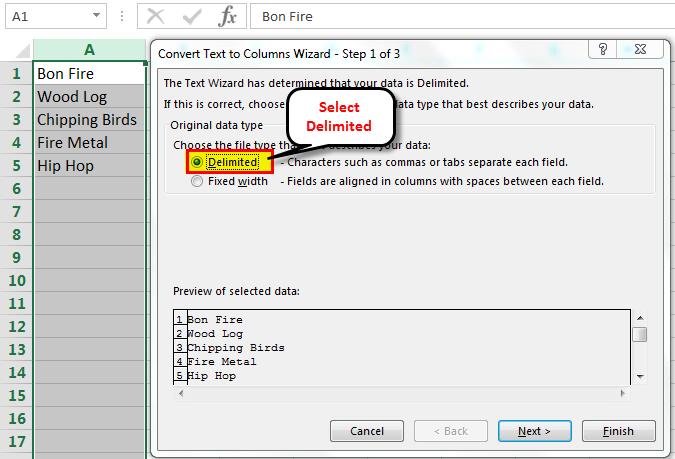
Step 2: The “convert text to columns wizard” appears, as shown in the following image. Select the option “delimited” in “choose the file type that best describes your data.” Click “next.”
Step 3: Select “space” as the delimiter and click “finish.”
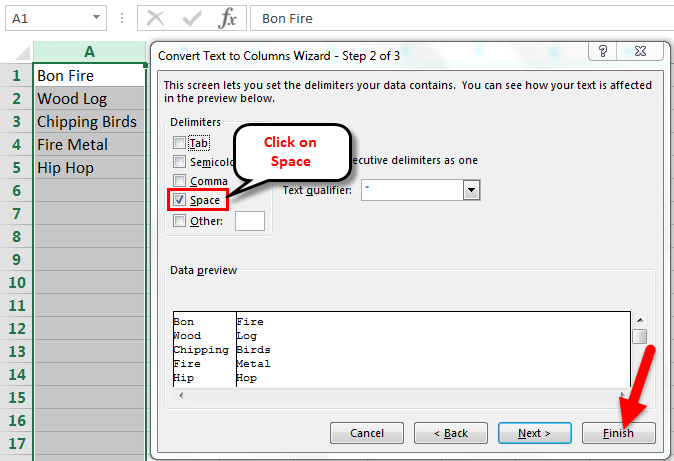
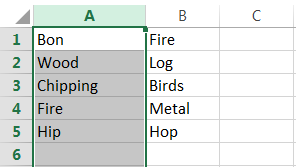
Step 4: The text strings of column A are split into two columns. The second half of the strings is placed in column B. The spaces between the strings have also been removed.
#3 - “Fixed Width” Option of Text to Columns Wizard
The “fixed width” option of the text to columns wizard helps remove extra spaces from numerical and textual data in Excel. For this, all the strings before the space should contain the same number of characters.
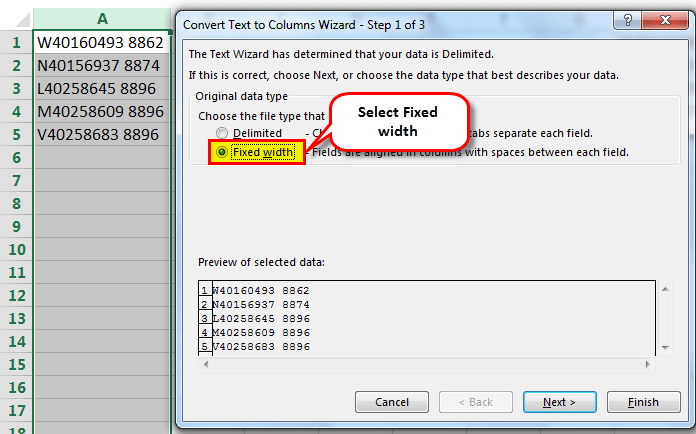
The following data contains random text and numbers with spaces in column A. We want to remove the spaces and split the strings into two separate columns.
Use the “fixed width” option of the text to columns wizard.
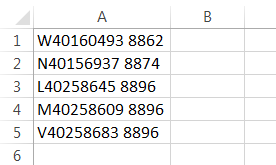
Step 1: Select column A. In the Data tab, click “text to columns” from the “data tools” group. The same is shown in the following image.
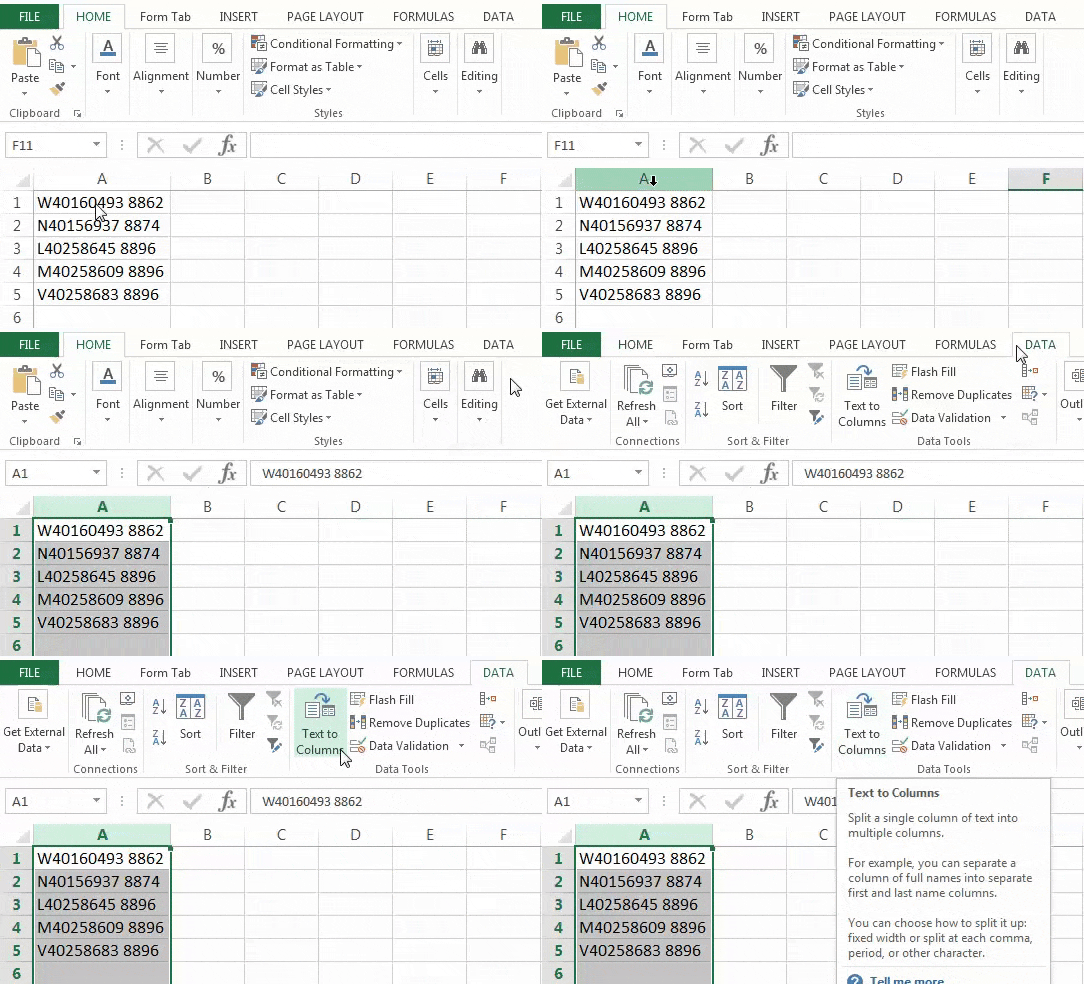
Step 2: The “convert text to columns wizard” appears, as shown in the following image. Select the option “fixed width” in “choose the file type that best describes your data.” Click “next.”
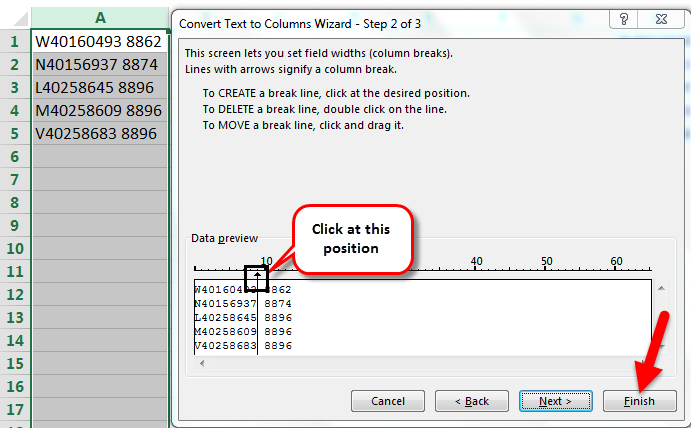
Step 3: Place the cursor at the position of the space. Click “finish.”
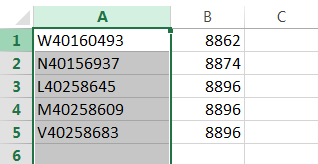
Step 4: The strings of column A are split into two columns. The second half of the strings is placed in column B. The spaces between the strings have also been removed.
Note: The text to columns wizard (methods #2 and #3) splits the data into different columns.
#4 - Find and Replace Option
The find and replace option helps remove spaces from numerical and textual data in Excel.
Working on the excel data under the heading “TRIM function” (method #1), we want to remove spaces with the find and replace option.
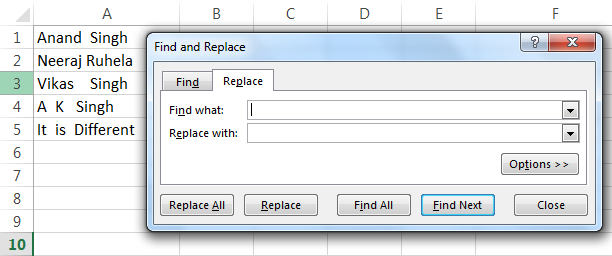
Step 1: Press “Ctrl+H” and the “find and replace” dialog box is displayed, as shown in the following image.
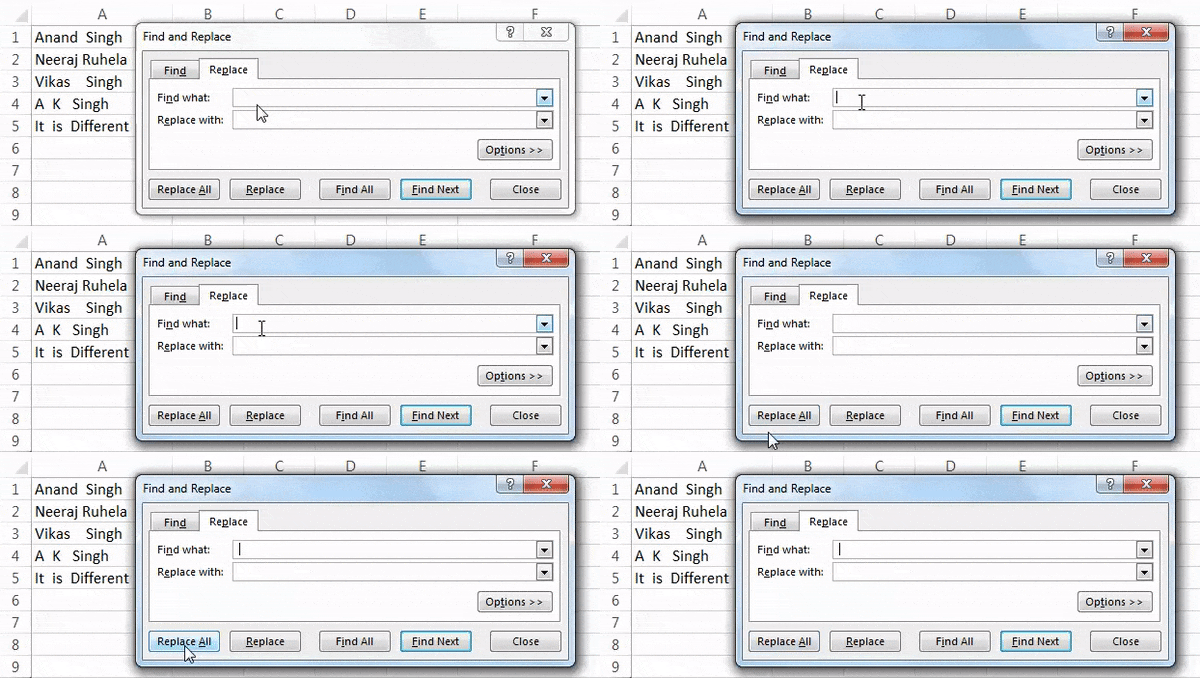
Step 2: Enter a space in the “find what” box. Leave the “replace with” box blank. Click “replace all.”
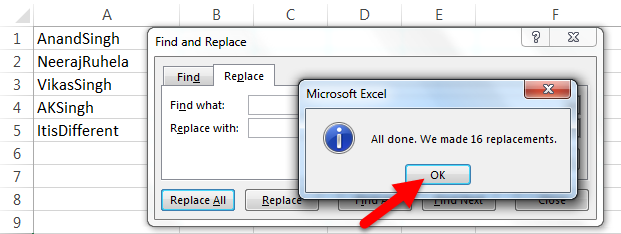
Step 3: Excel displays a message stating the number of replacements. Click “Ok.”
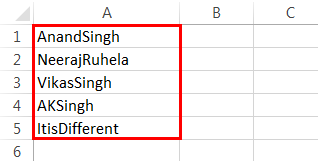
Step 4: All the spaces in column A have been removed, as shown in the following image.
#5 - SUBSTITUTE Function
The SUBSTITUTE function helps remove the spaces by replacing them with the existing data string.
Working on the data under the heading “TRIM function” (method #1), we want to remove spaces in excel with the SUBSTITUTE function.
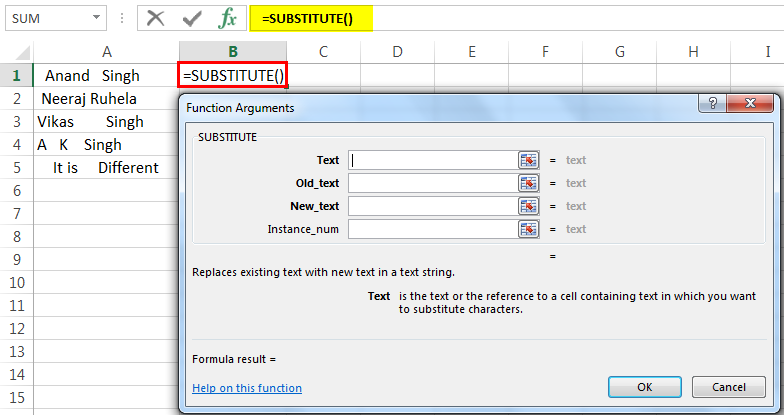
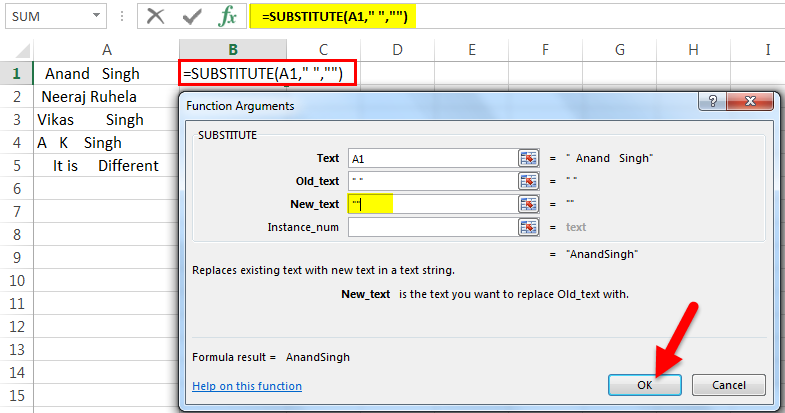
Step 1: In cell B1, enter the SUBSTITUTE function. Click “insert function” in the Formulas tab. The “function arguments” dialog box appears, as shown in the following image.
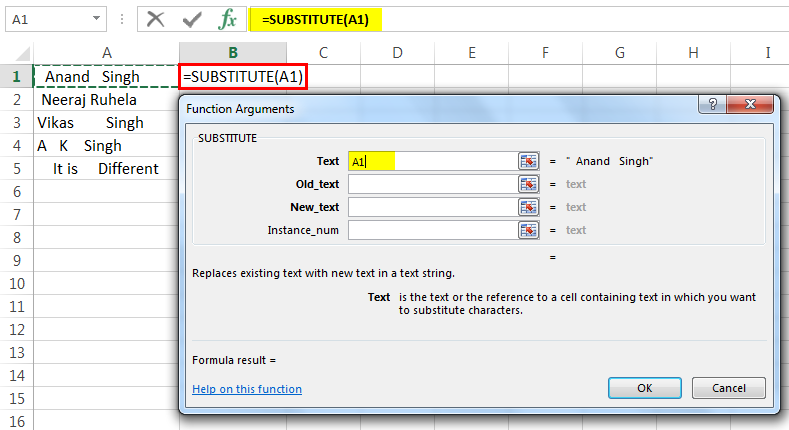
Step 2: Since the text in which characters are to be substituted is present in cell A1, enter the same in the “text” box.
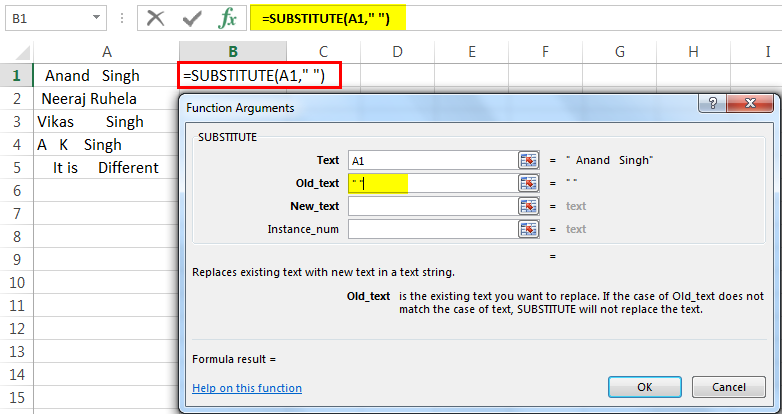
Step 3: Since extra spaces are to be removed, enter “ ” in the “old_text” box. The blank between a pair of double quotation marks refers to a space.
Step 4: Since the space character is to be replaced with the existing text, enter “” in the “new_text” box. The pair of double quotation marks with no character in-between implies no spaces. Click “Ok.”
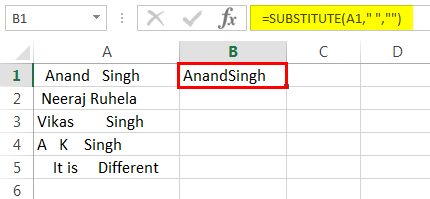
Step 5: The extra spaces from the name are removed in cell B1, as shown in the following image.
Step 6: Copy or drag the formula to the remaining cells, as shown in the following image.
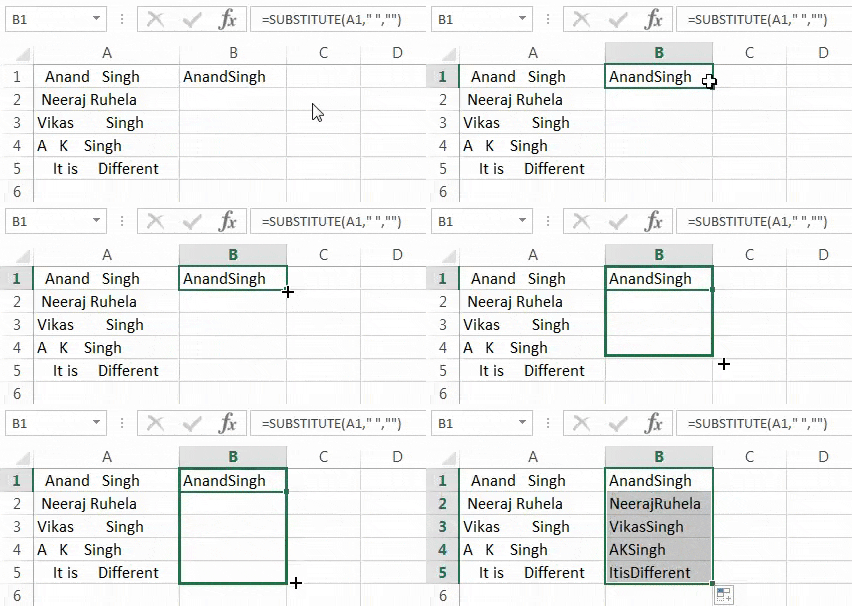
Note: The find and replace option and the SUBSTITUTE function (methods #4 and #5) display the entire text string together without spaces.
