Table Of Contents
How to Remove Leading Spaces in Excel Cell?
In Excel, unwanted space characters often take considerable time to clean and make the data perfect. One of the biggest problems with these unwanted leading spaces in Excel cells is that we cannot simply recognize a space in it. It adds to the misery.
Table of contents
#1 - Remove Unwanted Leading Spaces in Excel Cell Using TRIM Function
Let us start.
- Yes, you could argue why we don’t replace space with anything. But the problem is it will also replace all the necessary spaces. For example, look at the below sentence in a cell.

In the above sentence, we need one space character after each completed word to make the sentence proper. We have only one extra space after the word “Capital.” - To deal with these unwanted space problems, we have a built-in function called TRIM in Excel, which can remove all the unwanted spaces in the Excel cells.

- The syntax is very simple. We need to select the required cell to be trimmed. The TRIM function removes all the spaces except the single space after each word. Let us apply the TRIM formula in Excel to remove all kinds of spaces in a cell.

- This TRIM function removed the spaces between “Capital” and “is.”

#2 - Remove Non-Breaking Leading Spaces in Excel Cell
It is very easy to remove normal leading spaces in the Excel cell. However, the TRIM function goes wrong in the case of non-breaking leading spaces. For example, look at the below image.
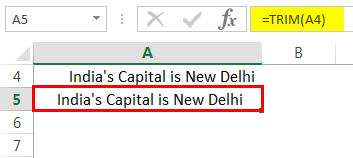
Even after the TRIM function is applied, we do not see the perfect sentence here. It is a problem with non-breaking leading spaces in an Excel cell.
Non-Breaking Leading Spaces in Excel Cell usually comes when we download the data from a web made up of the character CHAR (160). Therefore, we must use TRIM and SUBSTITUTE excel functions in these cases together.
Firstly, open the TRIM function.
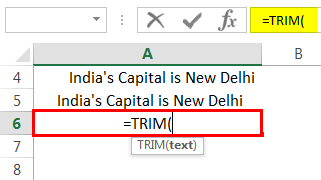
Now, apply the SUBSTITUTE function.
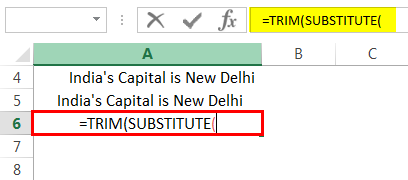
We need to select the text now, so select the A4 cell as the reference.
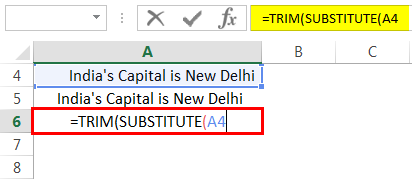
What is the old text we need to remove here? The old text is CHAR (160).

New text to be a substitute is nothing, so mention double quotes (“).

Close the bracket and press the "Enter" key. We will get a proper sentence now.

This way, we can deal with breaking spaces in the Excel cell. If the TRIM function cannot give accurate results, use this technique.
#3 - Remove Double Spaces Using Excel FIND & REPLACE Method
We can remove double spaces in cells using the Excel find and replace method. For example, assume below is the data we have in Excel.
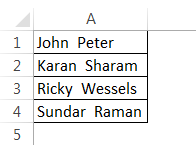
Here, we have a first name and last name together. After the first name, we have two spaces instead of one space. Instead of the TRIM function, we can use the find and replace method in these cases.
Step 1: Select the required area’s double space to be removed.
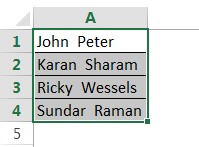
Step 2: Now, press "CTRL + H."

You will see below the "Find and Replace" window.
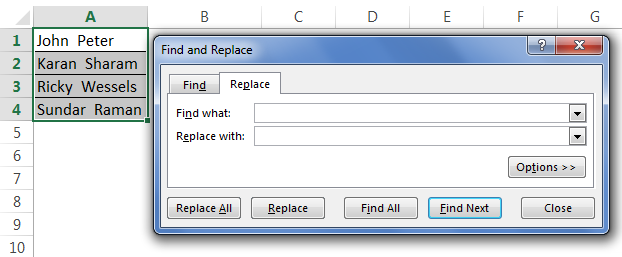
Step 3: Type two space characters in the "Find what:" box.
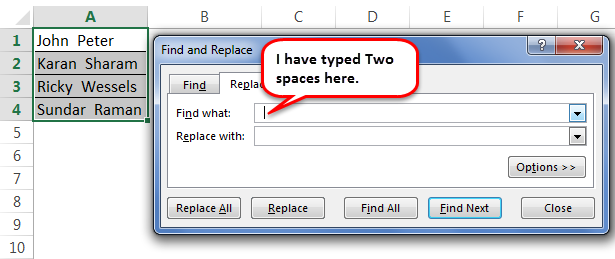
Step 4: Now, in the "Replace with:" type only one space character.
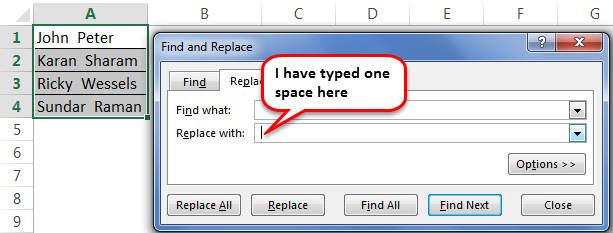
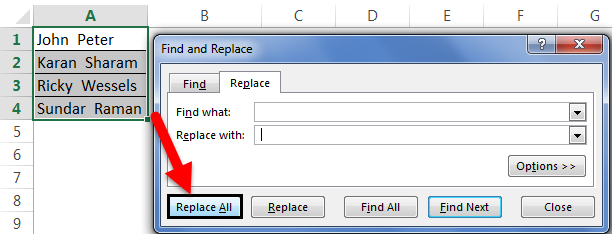
Step 5: Now, click on "Replace All."
Step 6: Excel will show you how many replacements it has made.
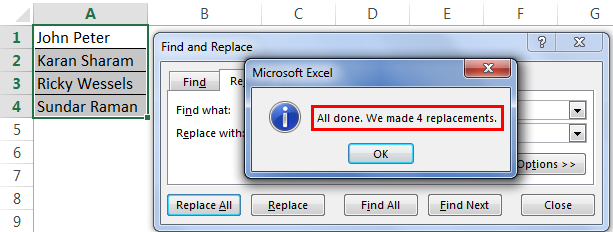
Step 7: It has removed all the double spaces in the Excel cell and replaced them with a single space. So, we have proper names now.
#4 - Remove All Leading Spaces Using Excel FIND & REPLACE Method
Assume you are working with numbers. You have many spaces between the numbers, as shown in the image below.
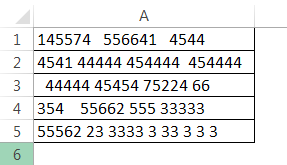
We have abnormal Excel leading spaces between, before, and after the numbers. In these cases, we need to remove all the spaces. So use the "Find and Replace" method.
- Step 1: Select the data first.
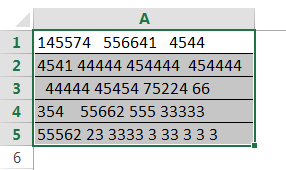
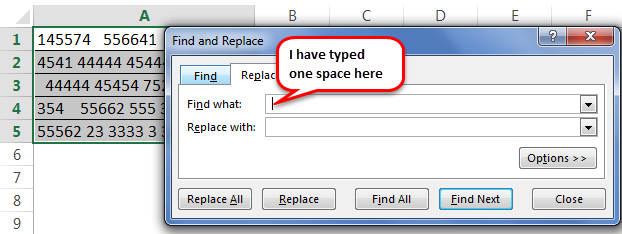
- Step 2: Press "Ctrl + H" and type a single space in the "Find what:" box.
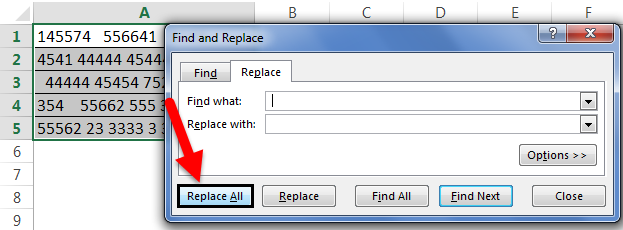
- Step 3: Do not insert anything in the "Replace what:" box. Just click on "Replace All."
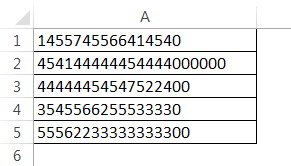
- Step 4: It will remove all the leading spaces in the Excel cell. We have numbers in order now.
Things to Remember
- If the FIND and REPLACE method is used to remove leading spaces in an Excel cell, selecting the range and performing the operation is important.
- If downloading the data from the web and encountering the same space problem, we must use the SUBSTITUTE function to remove CHAR (160) along with the TRIM function.
- To remove non-printable characters, we must use the CLEAN Excel function.
Recommended Articles
This article is a guide to Remove Leading Spaces in Excel Cell. Here, we discuss how to remove leading spaces in Excel along with practical examples and a downloadable Excel template. You may learn more about Excel from the following articles: -
- VBA Hyperlink
- Remove Watermark in Excel
- Delete Blank Rows in Excel
- How to Remove Duplicates in Excel?
