Radio Button in Excel (Options Button)
Publication Date :
03 Dec, 2018
Blog Author :
Edited by :
Reviewed by :
Share
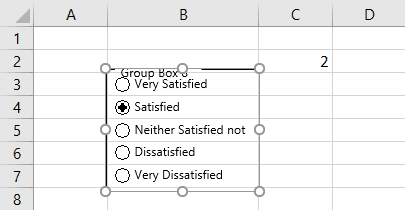
Table Of Contents
Radio Button in Excel
A radio button in Excel is also called the "Option" button. It is used to select one of the various options. We have seen it on hundreds of web pages where we are asked to choose an option by clicking on a small round shape next to the text. When we choose it, it gets a black dot (an indication that it is marked).
How to Insert a Radio Button in Excel?
We must have the "Developer" tab to insert a radio button in Excel. To get the same, the steps are:
Below are the steps to insert a radio button in Excel: -
- First, right-click anywhere on the ribbon.

- Choose 'Customize the Ribbon in Excel' from the list. It will open the "Excel Options" dialog box. On the right side, ensure the "Developer" tab's checkbox is ticked, and then click on "OK."

- The "Developer" tab is now visible.

- To insert the radio button in Excel, we will choose the "Insert" option in the "Form Controls" group on the "Developer" tab.

- It will create after choosing the radio button from the Form Controls in excel, clicking anywhere on the worksheet, or options button in Excel.

- As we can see, the caption (label) for the options button is by default "Option Button 1." We can rename this by right-clicking and choosing "Edit Text."

We can also resize the "option button" along with the gridlines of the cells. For doing the same, the ALT key is very helpful. While pressing the "ALT" key, if we resize the "option button" in Excel, it is automatically adjusted along with gridlines.
As the name indicates, we create option/radio buttons in Excel to choose one of the various options. That is why only one option button in Excel is not enough. We need to create more. For example, we can develop using "Ctrl+D" or Copy-Paste (Ctrl+C and Ctrl+V).
The main feature of an option button in Excel is : if we select one, others are deselected automatically. So how can we get to know which one is preferred? For this, we need to link the options buttons with a cell, where the sequence number of the options button in Excel is displayed. We can use this number for different purposes (dynamic chart in excel, display a message, etc.)
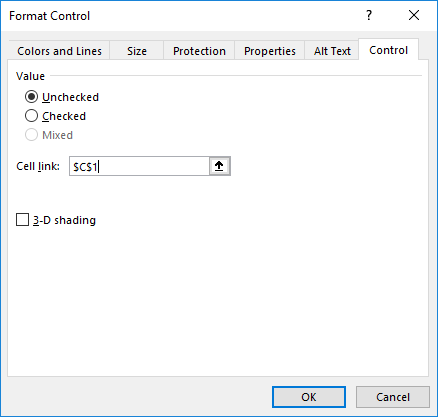
In the “Format Control” dialog box, please select the cell link under the “Control” tab and click "OK."
Now, the value of the C2 cell is changed according to the options button in Excel.

As we can observe, all option buttons in Excel are linked to only one cell. However, what if we have 10 questions in a survey and 4 options for each question? Then we want to have 10 answers. In that case, we need a "Group box" to group the option buttons in Excel. We can find the same in the Developer Tab -> Controls group -> Insert Command – Group Box (Form Control).
We need to cover all 5 options buttons in the Excel group box.
We can delete the label of the group box using the "Edit Text" contextual command and the "Delete" button and resize the group box using the "ALT" key.
In the same way, we can create more option buttons in Excel and group boxes.
Create Dynamic Chart Using Radio Buttons in Excel (Options Buttons)
Suppose we have procurement data of an organization as below:
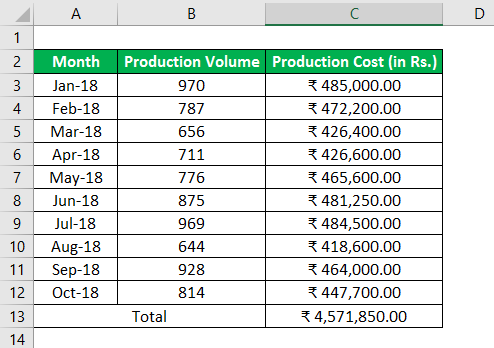
We need to make a dynamic chart so that if the user wants to view the chart based on either Production Volume or Production Cost, he can.
For this,
- We need to copy the first column of the table except the "Total" row to a new range.
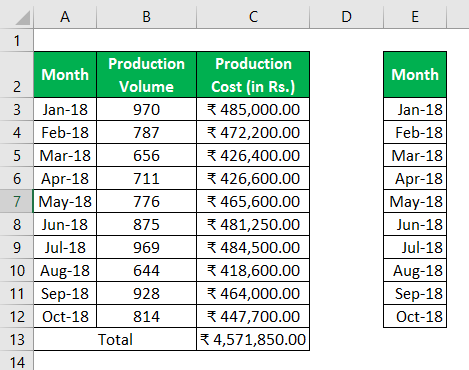
- Then, we will create two option buttons in Excel captioned as "Production Volume" and "Production Cost."

- We will link the "Option" buttons to ‘C1.’
- Now, we will use the value of the C1 cell (1 for "Production Volume" and 2 for "Production Cost") to display the data in the second table and then make the dynamic chart.
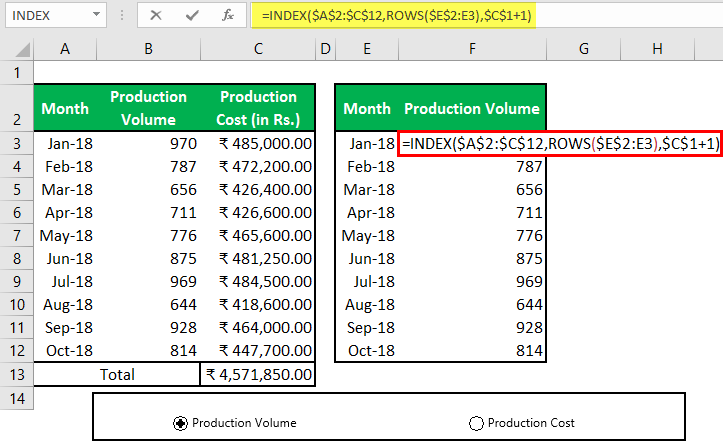
- We have used the '=INDEX($A$2:$C$12,ROWS($E$2:E2),$C$1+1)' formula for the range 'F2:F12' for showing data according to the selection of the radio button in Excel. (learn more about Index Excel Function and Row function in excel)
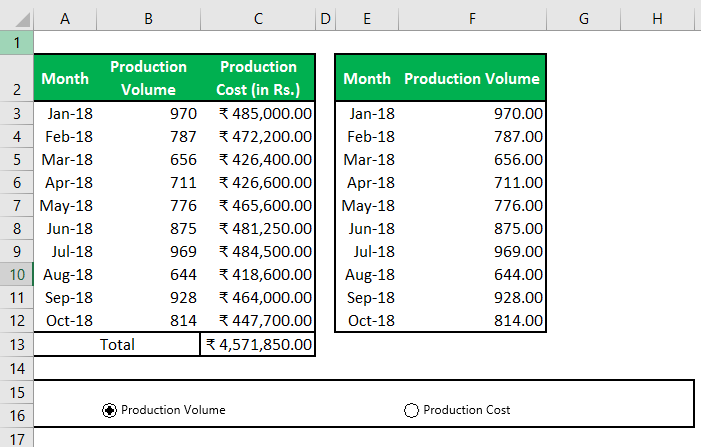
We can copy the formatting of the last column of Table 1 using the copy and Paste Special –> Format command.
- Now, using the new table, we can create the "Clustered Column" chart using the Insert tab -> Charts group -> Recommended Charts -> Clustered Column excel chart. Make sure you follow these steps after selecting the new table. We will be formatting the chart according to our choice.
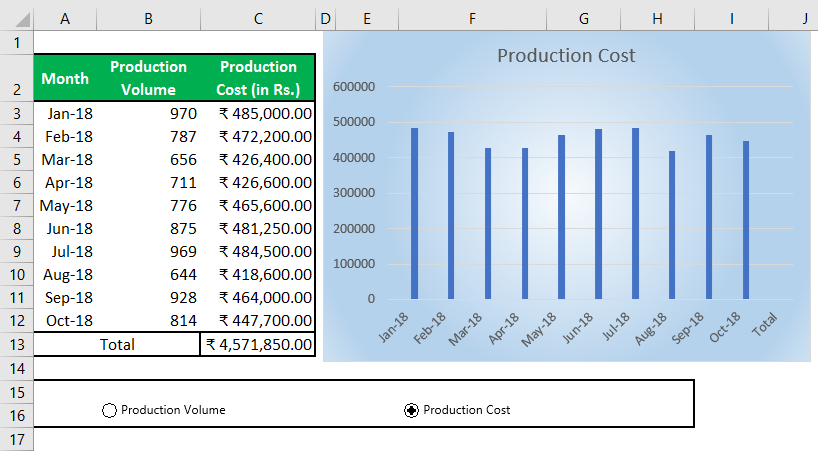
- Now, we will adjust the "Option" buttons in Excel and wrap their location with cell borders and make the font color white of the C1 cell so that this is not displayed to the user (The user does not get confused). It should show him only the required information.
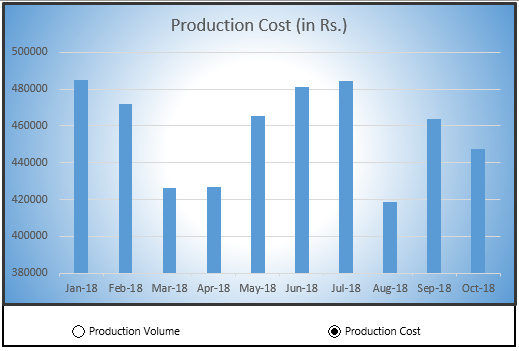
Whether we select "Production Volume" or "Production Cost," the data in the table and chart is displayed accordingly.
Changing Cell Background Color with Radio Buttons in Excel using ActiveX Control
Following are the steps to do the same:
- We need to create three ActiveX Radio buttons using Developer tab -> Controls Group -> Insert Command -> Option Button (ActiveX Control).
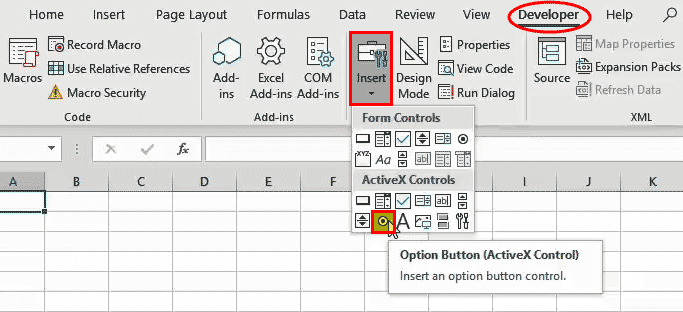
- Please copy the first radio button using Ctrl+C and paste it to the second twice using Ctrl+V. You can resize the "Option" buttons in Excel using the "ALT" key.
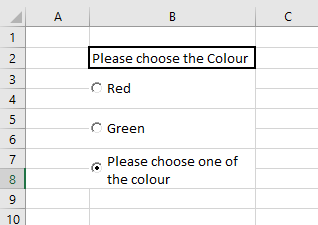
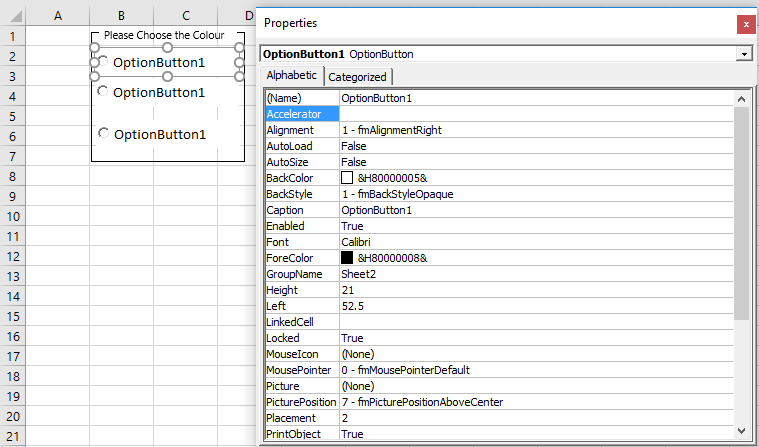
- Using the contextual menu, we need to change the caption and name for all three radio buttons in Excel. First, ensure the "Design Mode" is activated. Then, in the "Contextual" menu, choose "Properties" and change the (name) and caption using the "Properties" dialog box.
 .
.
Radio Button using Excel VBA
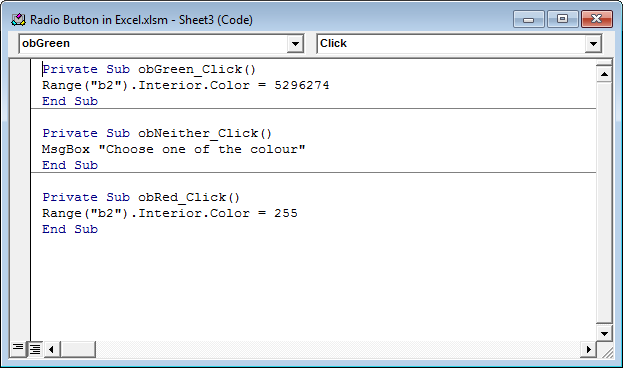
- Double click on each "Radio Button in Excel" to insert the coding area and paste the following code between the sub-procedures.
For 'Red' Radio Button in Excel
Range("b2").Interior.Color = 255
For 'Green' Radio Button in Excel
Range("b2").Interior.Color = 5296274
For 'Please choose one of the colour' radio button in excel
MsgBox “Choose one of the colour”
- Save the Excel workbook with the .xlsm extension.
Now, if we click on the "Red," the background color of the B2 cell changes to "Red," and if we select the "Green," then the background color of the B2 cell changes to "Green." In addition, if we choose the third radio button in Excel, a message box is displayed showing the message "Choose one of the colors."
