Table Of Contents
What Is The Quick Access Toolbar (QAT) In Excel?
Quick Access Toolbar, or QAT in Excel, is a toolbar available on the Title Bar of an Excel window, where we can position our important shortcuts and use them much easier whenever necessary. It is a customizable toolbar containing a set of commands visible at the top of the ribbon, which is independent.
For example, we can add or remove the buttons of our choice by customizing the toolbar, but we cannot resize it, as shown below.
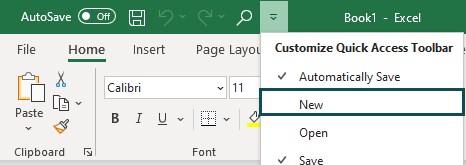
Now, when we select the “New” option, it gets ticked, i.e., added to the QAT, as shown below.
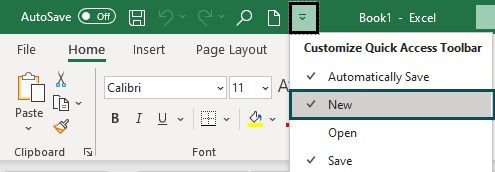
We can create custom tabs and groups to choose the frequent and repeatedly used commands.
Table of contents
- The Quick Access Toolbar in Excel (QAT) is a feature found, by default, at the top of the Office application window. The toolbar can be placed above or below the ribbon, and can even be hidden.
- We can choose the commands we use frequently, such as Save, Undo, Redo, etc.
- It is a useful feature, because most of the time, we may not remember the shortcut keys for repeatedly used commands. It helps us use it instantly and saves time.
- We can add/remove commands as per our use and requirement. Then we can Export/Import our customized settings for future use on different computers.
How To Use Quick Access Toolbar In Excel?
We can use the Quick Access Toolbar from two possible locations: one at the top of the ribbon and the other at the top of the workspace area.
- QAT in excel is a shortcut tool to avoid searching for the commands we frequently use in working on the documents.
- If we have mistakenly typed the word or made any other errors while making the document, we do not need to search the undo tool available on this toolbar. Instead, click on it at the top.
- It helps us to simplify accessing the commands of the document.
Examples
We will consider examples of using the Excel Quick Access Toolbar.
Example #1 – Customizing QAT
The steps to Customizing QAT, i.e., to click the appropriate tab or group on the ribbon to display the command we want to add to the toolbar, are as follows:
- Choose the left-click command on the Excel Quick Access Toolbar shortcut menu. Then, customize QAT to more commands like “Open,” “Save,” “Undo,” “Redo,” etc., by clicking the left click on the “Commands.”

- If the command is already available in the toolbar in Excel, it shows a tick mark at the left of the tab. We can remove the command if we do not need it.
- Suppose we want to add more commands not displayed in the list. Do not worry. Click on the “More Commands” button to add or remove the commands at the bottom of the tab.

- The “Excel Options” window will appear if we choose the “More Commands” tab.

- If we select the commands from the drop-down menu, we can choose the menus we want to add. By default, it shows the popular commands mostly recommended by the users.
- We can select the reference tabs if it is difficult to find the commands to search for.

- To add or remove the tools in the toolbar, select the command we have to insert at the left side window. Then, select “Add.” As a result, the chosen command will display in the right-side window. Then, click “OK” to finish the customizing process once we complete it.

- If we have to reset all customizations, select the “Reset” icon, then select “OK” to customize the toolbar to default.

- We can choose the customizations for a single workbook too. If we do not want other files to perform the customizations we selected, then select the “Customize Quick Access Toolbar” drop-down menu, then choose “XXXX” (filename) as shown below.

Example #2 – Changing the Position of QAT
We can only place the toolbar in two positions: one at the top of the ribbon and the other at the top of the workspace area.
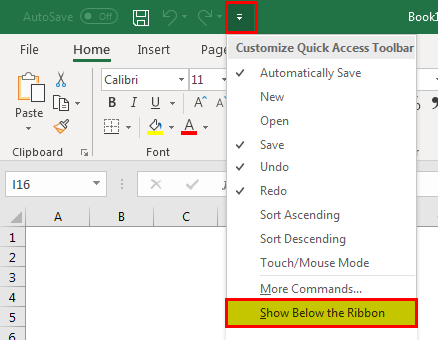
- To replace the position of the toolbar, right-click on the drop-down icon and select “Show Below the Ribbon” to replace, as shown below.
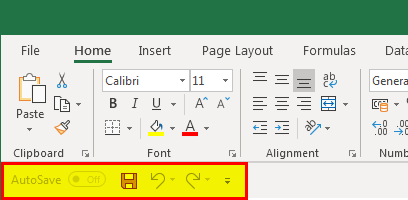
- Then, the status of the toolbar will change as below.
- If we want to replace it with its default position, we must perform the same again. This time, it shows, as shown above, the ribbon.
Example #3 – Customizing the toolbar by Options Command
The steps to Customize the toolbar by Options Command are as follows:
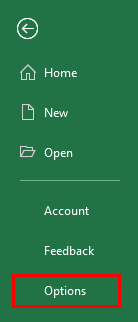
- Click the “File” tab, and then click “Options” to customize the toolbar in Excel.
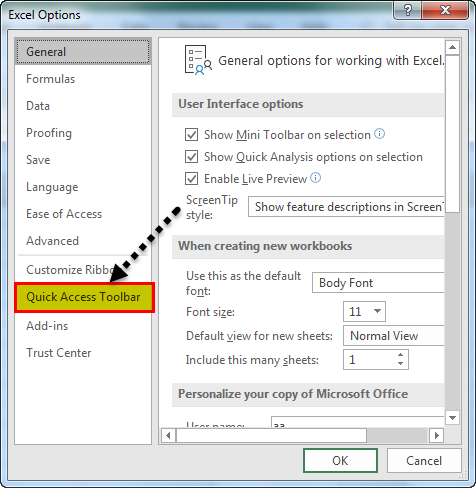
- Then, click the “Quick Access Toolbar, and make the changes we want as we wish to ease access to the commands.
Example #4 – Changing the Order of the Commands
The steps to Change the Order of the Commands are as follows:
- Choose the left-click command on the QAT shortcut menu, then click more commands on the “Customize Quick Access Toolbar.”
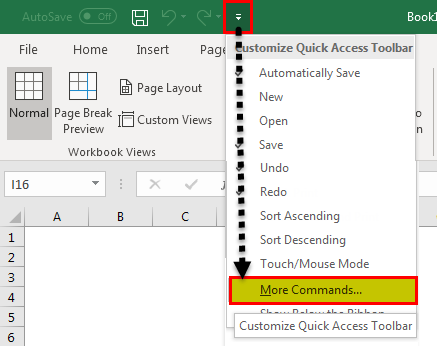
- Then, click the toolbar on the menu to replace the position of the commands for ease of access.
- Under the “Customize Quick Access Toolbar”, click the command we want to move, then click move up or move down.
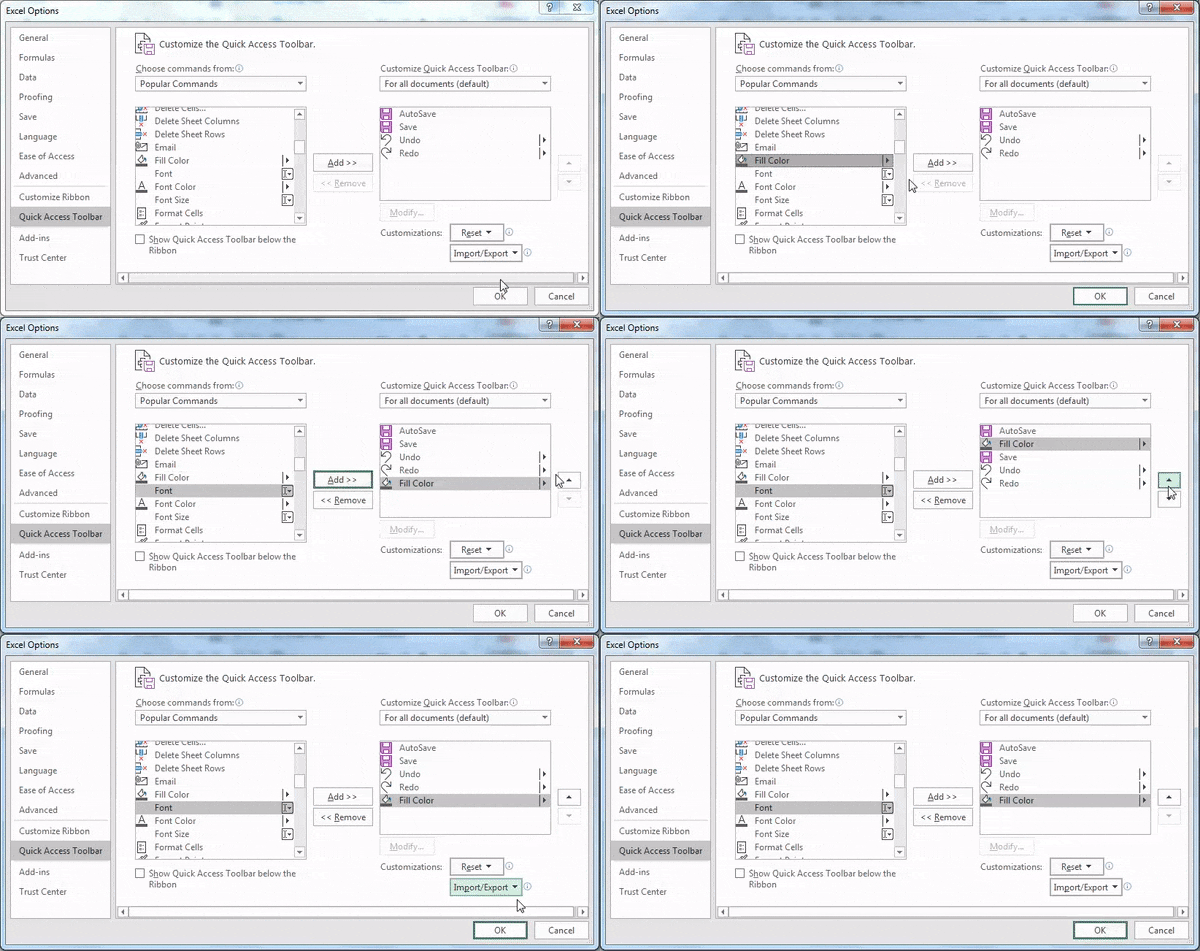
- Then, click “OK” to see the customizations on our screen.
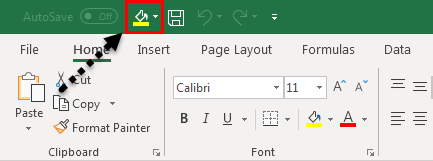
Example #5 – Export a Customized Quick Access Toolbar
We can export our ribbon and toolbar customizations into a file that can be imported and used by a team member on another PC.
- Click the “File” tab. Then, under “Help,” click “Options,” click “Quick Access Toolbar.” Then, click “Import/Export” and “Export all customizations.”
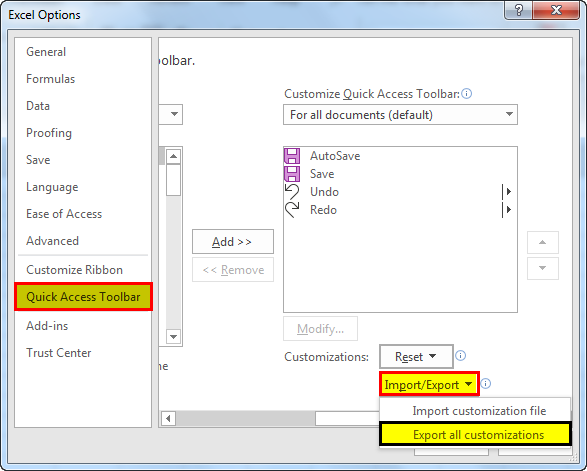
- Then, share the exported file with the user who wants to perform the customizations.
Important Things To Note
- We can add multiple commands in this toolbar, but remember that it is a shortcut tool for simplifying the job. So, please do not choose the list of commands we use in long intervals, making it uncomfortable when we search for the command frequently.
- We must use regular usage commands to display the same icons, which makes it easy to retrieve the command while using a file.
Frequently Asked Questions
The Quick Access Toolbar is found on the left side of the Title Bar of any MS application window. It depends on the positioning, as shown in the images below.
At the top of the ribbon.
• Below the ribbon, on top of the workspace area.
• We can also hide the QAT as follows:
Right-click on the QAT - select the “Hide Quick Access Toolbar” option, as shown below.
Then, the QAT is hidden, not seen anywhere on the ribbon, as shown below.
For example, let us consider the data with numeric values given below.
• First, click the “Customize Quick Access Toolbar” option drop-down, and select the “Sort Ascending option”, as shown below.
The “Sort Smallest to Largest” button appears on the top of the Excel Ribbon, as shown below.
• Next, select the cell values from A2:A6, and click the “Sort Smallest to Largest” button on the ribbon.
We will get the above output, i.e., the numbers are now in ascending order.
A few reasons the QAT may not work are as follows:
• The user might have changed his system and forgot to Import/Export the customized settings.
• The QAT is hidden, so the options are not visible for usage.
Recommended Articles
This article is a guide to Quick Access Toolbar(QAT) in Excel. Here we add, move, customize QAT, import/export settings, examples, downloadable excel template. You may learn more about Excel from the following articles: -
- Auto Format Excel
- "Save As" Excel Shortcut
- Make Gridlines in Excel
- Infographics in Excel
