Table Of Contents
What Is The Print Area In Excel?
The print area in Excel is where we want to be printed instead of the whole workbook or the worksheet. We can set up a print area from the “Page Layout” tab. Also, we can have multiple print areas in one worksheet by simply pressing the “Ctrl” key while selecting the print area. Then, when we check the print preview, we will find that it will print the data in the print area rather than the whole worksheet.
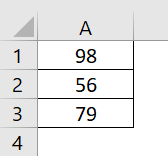
For example, consider the below example showing numbers in cell range A1:A3. Now, instead of printing the whole worksheet, we can easily print only the cell range.
To begin with, simply click on Print Area → Set Print Area option under Page Setup group in Page Layout tab.
As shown in the image below, we can see only cell range A1:A3 in the print preview.

Likewise, we can use print area in Excel.
Table of contents
- Print area in Excel is a feature used to select the area in the worksheet which we want to print.
- It helps us avoid printing the entire worksheet.
- To set print area, we need to click on Page Layout → Print Area in Page Setup group.
- In excel print area means designated cells that are frequently printed.
- For example, if we want to print any specific data, we can select those particular cells as the print area.
How To Set & Change Print Area In Excel?
Setting and changing print area in Excel takes only a few steps. Now, let us learn how to do it with the following examples.
Examples
Below are examples of the print area in Excel.
Example #1
Below are the steps to set and change the print area in Excel:
- First, go to the "Page Layout" tab. Then, click on a "Print Area" under the "Page Setup" section in the "Page Layout" tab.
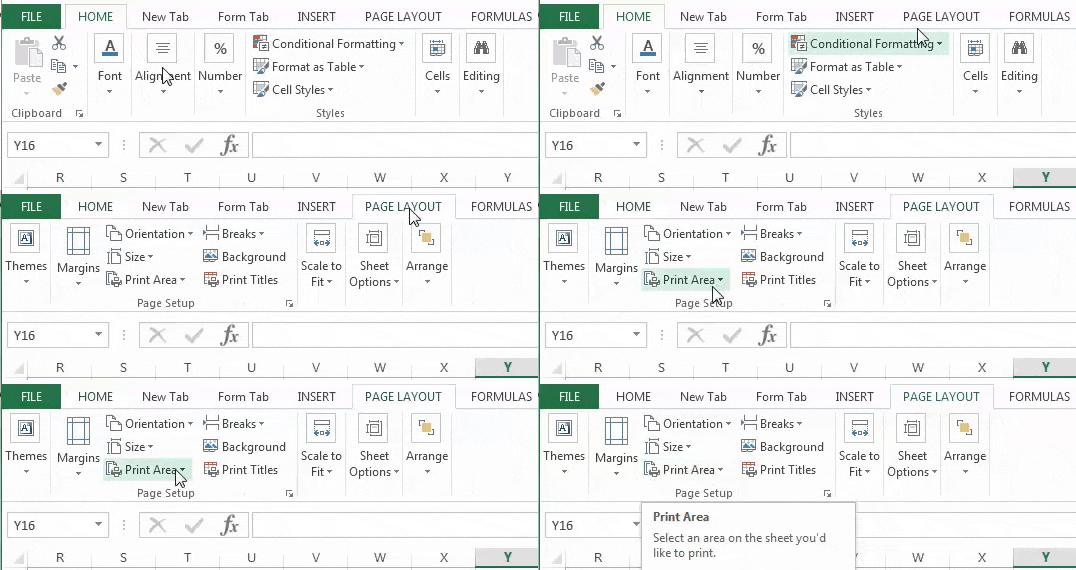
- Next, select the cells we want to print. Then, in the "Print Area," click on "Set Print Area."

- Now, press "CTRL + P" for the print option. A dialog box appears.

We can see only the chosen specific cells are displayed in Excel’s “Print Preview” section. - If we want to print different cells, we can clear the print area by clicking on the "Print Area" and selecting a "Clear Print Area."

Example #2
Consider the below example showing restaurant bill. But, assume that we want to print only the bill instead of the full worksheet. So, have a look at the data below.

Now, we want to print only the bill.
- First, select the range of the cells which need to be printed. Then, in the “Page Layout” tab under the “Page Setup” section, click on the “Print Area,” then click on the “Set Print Area.”
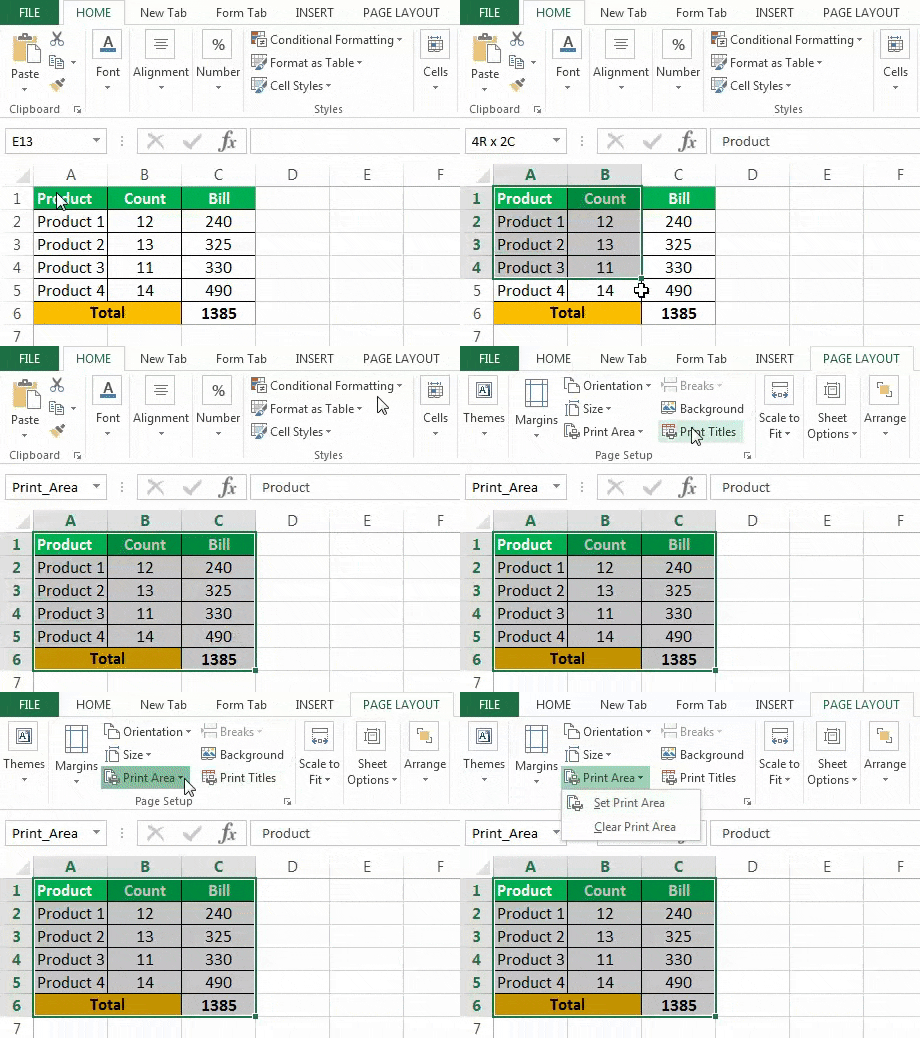
- To check the selected data, press “CTRL + P” and see the print preview to check.

We can see that we are only printing the bill but not the price list.
Example #3
The following example shows an employee’s performance. However, HR does not want to include the weight part of the report.
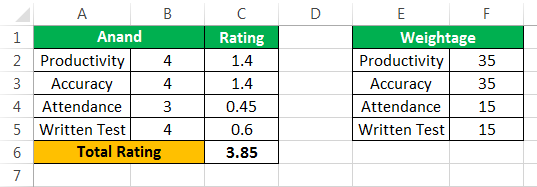
- To start with, first, select the data we want to print. Then, in the “Page Layout” tab under the “Page Setup” section, click on “Print Area,” then click on “Set Print Area.”
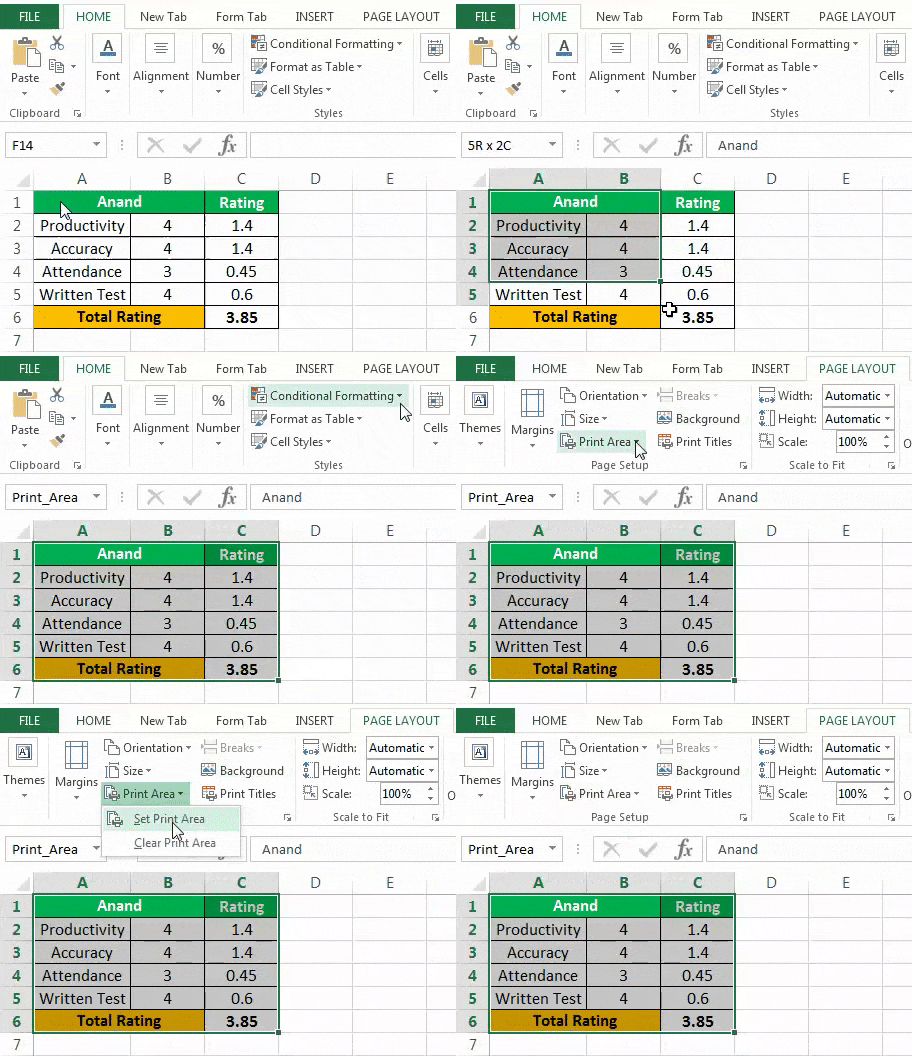
- To check the data we selected is being printed, press excels shortcut key “CTRL + P” and see the print preview to check.
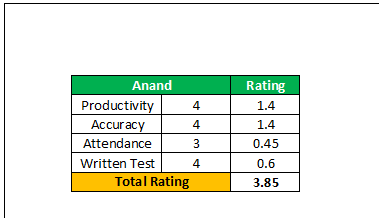
We can see that we are printing the performance card but not the weight part.
Example #4
We take the same data as from example 3 and suppose that HR now wants to include the weight part also in the report card.
We repeat the same process:
- First, select the data which needs to be printed. Then, in the page layout tab under the page setup section, click on the “Print Area” and then click on “Add to Print Area.”

- To check the selected data, press “CTRL + P” and see the print preview to check.
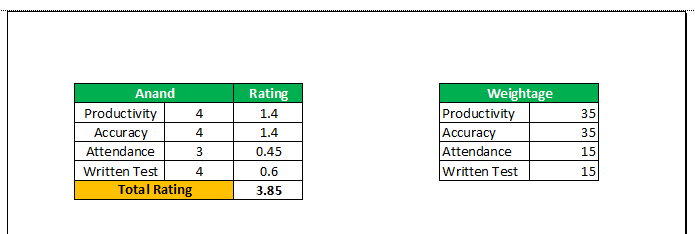
We can see that we are now printing all the data.
Explanation
We know that using print area, we can select the designated area we want to print.
For example, assume that we want to print only the specific data. Therefore, we can select those particular cells as the print area.
Important Things To Note
- A worksheet can have multiple print areas.
- Each print area will print as a different print page.
- To set print area, simply click on Print Area option under Page layout tab.
Frequently Asked Questions (FAQs)
Print area in Excel helps users select specific area to be printed. This option is very useful as irrespective of the data, we can avoid printing the whole worksheet.
We can set Print area in Excel with a few steps. Consider the below example showing the mark list of students.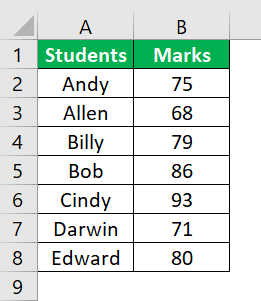
The steps are:
Step 1: To start with, select the data to print. For this example, select the cell range A1:B8.
Step 2: Next, press Page Layout → Print Area → Set Print Area under Page Setup group.
We can see the print area is selected.
Likewise, we can use print area in Excel.
We can clear print area in Excel by selecting Page Layout → Print Area → Clear Print Area under Page Setup group.
Likewise, we can clear the print area in Excel.
Recommended Articles
This article is a guide to Print Area in Excel. Here, we discuss how to set and change print areas in Excel, practical examples, and downloadable Excel templates. You may learn more about Excel from the following articles: -
