Table Of Contents
What is Power BI Workspace?
Power BI workspace is the way of sharing the end report or content with a group of users. Workspace is the place to collaborate with the team members and end-users of the report to create a collection of dashboards, reports, and data insights. The workspace is a shared environment of having a group of people in the same space. We can add users who can access, edit, and read the content in the workspace.
Every representation application or programming language needs a space to save the data, dashboards, reports, and other things. Similar to that, we have a workspace in Power BI. Here, we can add other users so multiple users can use a single workspace and edit or view the dashboards and other features.
Under one workspace, we can create multiple dashboards, reports, and data sets. However, to work with the workspace, we need to publish the dashboard we have created in Power BI desktop.
Table of contents

Publish Dashboard to My Workspace
To publish the dashboard created in the desktop version to the Power BI service, open the dashboard on the Power BI Desktop.
- After opening the dashboard, go to the "Home" tab and find the "Publish" option.

- First, you must log in to the Power BI services account with your registered email ID. Then, it will ask you to select the destination file. Finally, click on "Select."

- After selecting, it will take some time to upload. We may get the below confirmation message when the report gets published to Power BI services.

Click on “Got it” to close this window.
Log in to Power BI Services
After publishing, log in to the Power BI services account.
- To log in, click on your username and select the "Power BI service" option from the dashboard.

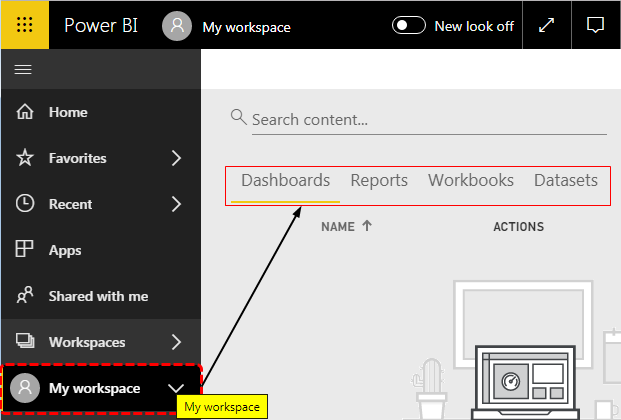
In the Power BI service account, our published dashboards and reports, by default, sit under "My workspace." It is similar to our "My Documents" folder on our computers and laptops.
- Select the "My workspace" folder. You can see four tabs: "Dashboards," "Reports," "Workbooks," and "Datasets."

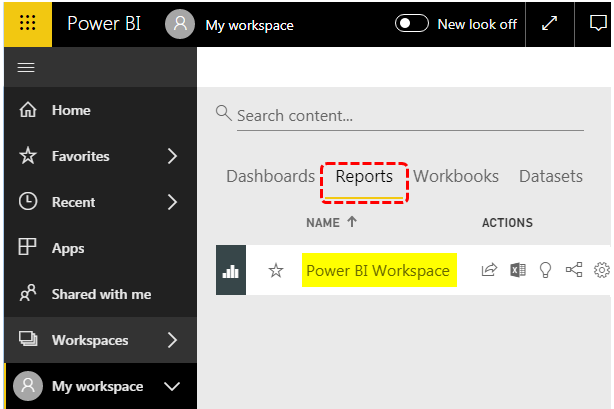
- Click on “Reports” to see the name of our published report. Click on this to view the report in detail.

We should not use the "My workspace" tab to share the content with others because this is a personal workspace that may also contain other reports.
So, by creating a new workspace, we can share the content with team members.
How to Create a New Power BI Workspace?
To create a new workspace, you need to follow the below steps.
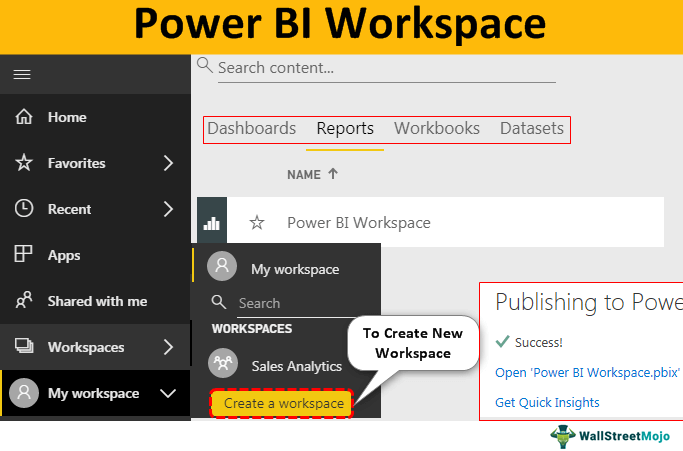
- First, click on the "My workspace" tab from Power BI services and select "Create a workspace."

- If you are not a pro member, it will ask you to subscribe to the "Power BI Pro" membership. Then, either you can select the "Upgrade account" or "Try Pro for free."

- If you opt for a "free trial," it will be a 60-day free Pro trial.

- After the free trial subscription process is over, click on "Create a workspace" again. This time, the "Create a workspace" option will open up to the right side of your window.

- The first thing we need to do is to give a name to our new workspace. So, enter the name. This name is visible to the people with whom you share.

- Now, click on "Advanced" to see more advanced options. First, we need to mention the "Contact list" for those who can access this report. We have two options: "Workspace admins" and "Specific users and groups."

If you choose “Workspace admins,” then only admins can see this report, and if you want to share with other users and groups, then you need to enter those users and groups in the box. - Click on "Save." Now, we will navigate to "New workspace" from "My workspace."

We do not see any documents, dashboards, reports, workbooks, and data sets in this tab. For this, we need to republish from the Power BI Desktop. - After opening the dashboard, go to the "Home" tab and find the "Publish" option, this time. You will have two destination folders: "My workspace" and "Sales Analytics." Select "Sales Analytics" and click on "Select."

- It will publish in a new workspace folder.

Note: "Sales Analytics" is the name we had given to the new workspace while creating the new Power BI workspace. - Now, come back to the "Power Services" account. Now, under the "Sales Analytics" workspace, we can see the "Dashboards," "Reports," "Workbooks," "Datasets," and "Dataflow" options.

Things to Remember
- Workspace is available under the "Power BI service" account of Pro membership.
- Pro membership is not a free version, so you need to pay for it.
- We can mention the users or group names of those who can access this report or content.
Recommended Articles
This article has been a guide to Power BI Workspace. Here, we discuss how to create a new workspace to collaborate with your team members and end-users of the report to create a collection of dashboards, reports, and data insights. You can learn more from the following articles: -
