Table Of Contents
Installing Power BI Desktop
Power BI is a Microsoft product to visualize the data. So here, we have a tool that can allow us to create an interactive and beautiful dashboard and reports for our data. Power BI comes in three versions: “Power BI Desktop, Power BI Services, and Power BI Premium.” So, “Power BI Desktop” is the free version to start things for beginners.
Excel tends to slow down when the data size is huge because the user cannot read the dashboard contents. Moreover, the kind of visuals we can use with Excel is very limited compared to Power BI. Therefore, this article will show you how to install the Power BI Desktop on your computer.
Table of contents
How to Install Power BI Desktop in Computer?
To install Power BI Desktop first, we need to download the desktop version software from the Microsoft website.
- Search "Power BI Desktop Install" on the internet.
- Click on the first link or simply click the below URL to go to the download page directly.
https://powerbi.microsoft.com/en-us/desktop/
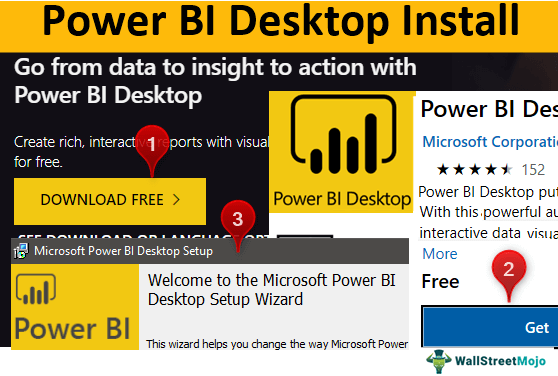
This link will take you to the below page. (Make sure you have an active internet connection in your PC or Laptop). - Click on the "Download Free" option to install Power BI.

This will take you to the below page. - Click on the “Get” option, and the Power BI Desktop setup will get downloaded on your computer.

It would help if you were careful here to make sure what your computer's platform is, whether it is a "32-bit version or 64-bit version". Accordingly, you need to download the Power BI version. - Once the Power BI Desktop is downloaded, click on the "Install" option. You will see the following window.

Click on the "Next" option to complete the installation. - Once the installation is completed, it will take us to the default page of Power BI.

It will ask for your name, the company you are working for, email address, job title, and many other things. However, these are irrelevant at this point, so cancel this window. - Again, it will ask you to sign in to the Power BI Desktop account.

One thing is you have to use only the official company email ID. Here, you cannot use your email ID. Anyways skip this option as well. - We will see the following window now.

We have to work and build our reports and dashboards in this window.
Know your Power BI Desktop Page
You will find Power BI as the advanced version of Excel. Like in Excel Power BI, we have a ribbon with the tabs "Home," "View," "Modeling," and "Help." In addition, on the left-hand side, we have three layouts: "Report," "Data," and "Model."
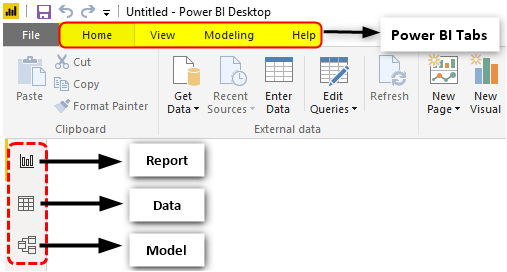
Report Layout: We can build all our Power BI reports and dashboards in this layout.
Data Layout: We can see all our uploaded or created data tables in this layout.
Model Layout:
In this layout, we can create relationships between multiple tables based on the common columns of the different tables.
On the right-hand side in the "Report Layout," we can see three options: "Filters," "Visualizations," and "Fields."
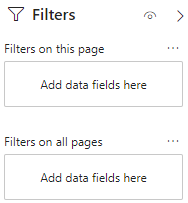
Filters: In this section, we can apply filter columns of the table. Further in this section, we have "Filters on this page," "Filters on all pages," and "Filters on this Visual."
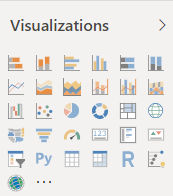
Visualizations: We can use Power BI visualizations from this section and create visuals for our data.
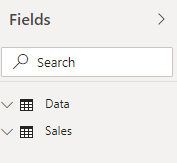
Fields: This section shows all the columns of our data table in A to Z order, not necessarily in the order of table columns.
It is the installation steps and default page view of the Power BI. In the coming articles, we will discuss how to use tabs, import data, build visualizations for Data Tables, etc.
Recommended Articles
This article has been a guide to Power BI Desktop Installation. Here, we show how to install a power bi desktop on your computer and use it for data visualization. You can learn more from the following articles: -
