Table Of Contents
Date Format in Power BI
In this article, we will show you different ways of date formatting in Excel using Power BI. Date and time are sensitive things in MS Excel, and Power BI is no different from this as well. Therefore, you must know several ways to play with the Excel date and time format.
How to Change Date Formatting in Power BI?
You can download the workbook used in this example to practice along with us from the below link.
To show examples, below is the data we are using.
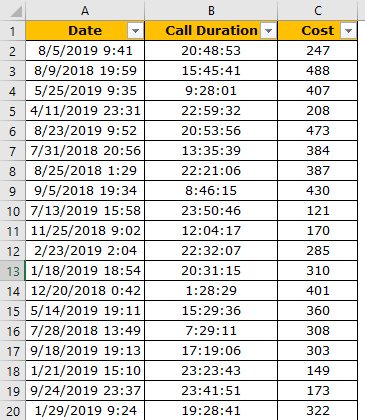
Upload the above table to the Power BI file by following the below steps.
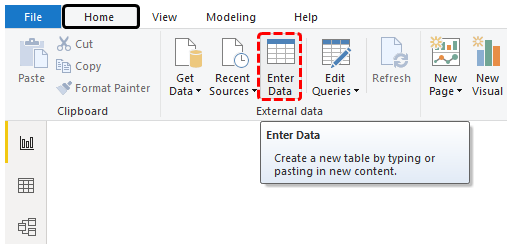
- Open the Power BI file and click on "Enter Data" from the "Home" tab.
- Select the first cell of the table and paste the above-copied table.
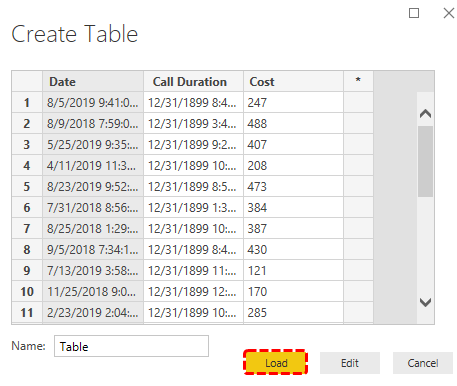
- Click on "Load" to upload the data to Power BI. We can see this table in Power BI's "Data" tab.
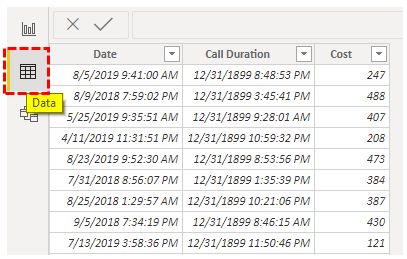
- The above date is "MM-DD-YYYY, HH:MM: SS."
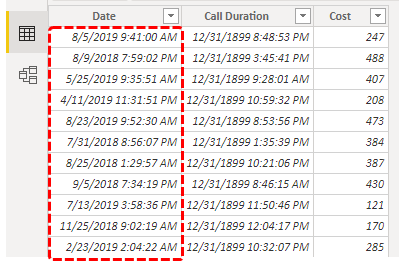
We can play with these dates by changing this format.
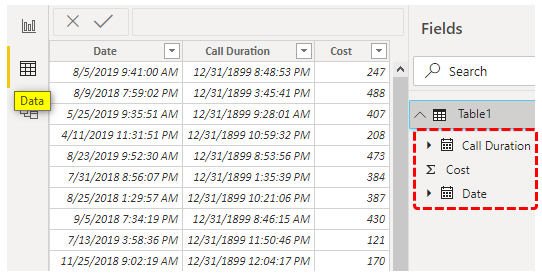
- Go to the "Data" tab and select the table to view.
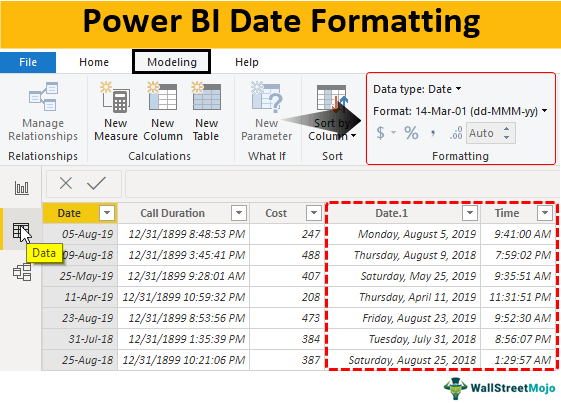
- Now, go to the "Modeling" tab. Under this tab, we have the "Date" formatting section, as it is hidden.

Select the "Date" column from the table to activate this section.
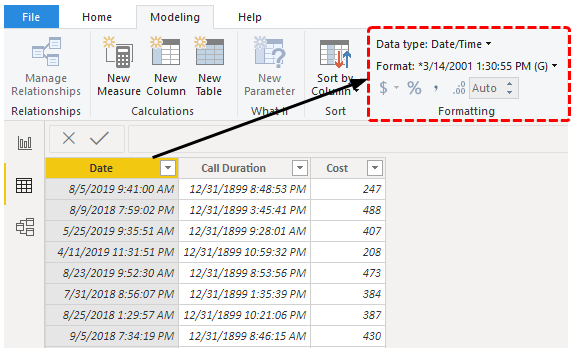
- As you can see above, as soon as we have selected the date column, it has activated. So, this section has the "Data Type" as of now. The data type is "Date / Time" from this drop-down list chooses only “Date.”
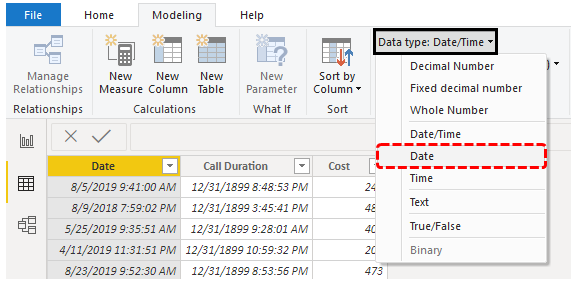
- When you select the data type as "Date" automatically, it will apply these changes to the table. So we can see only "Date" here.
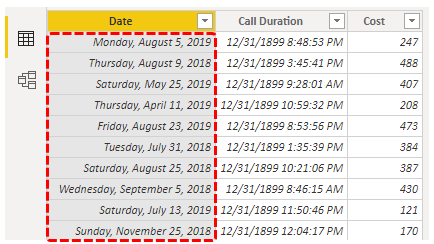
Currently, we have a full-day name, a full month name, along with the date, followed by a year. It looks lengthy.
- To change the date format to "DD-MM-YYYY, click on the dropdown list of the "Format" tab. We have several listed formatting codes here. Choose the "dd-mm-yyyy" format from this list.
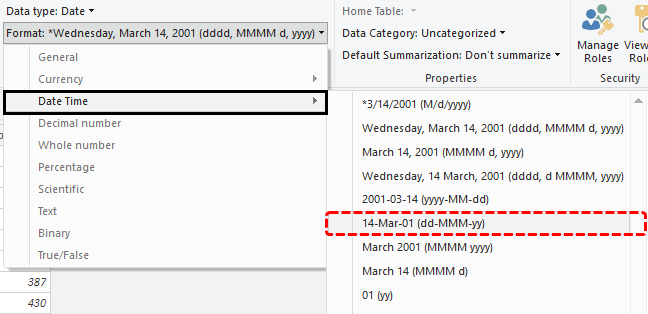
It will change the date to the below format now.
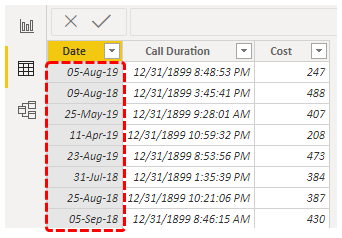
It seems easy but imagine a situation where you need to have time separately, date separately, month separately, and day separately.
We do not have time here in such cases, so we have custom columns. But, first, we need to open the “Power Query” editor.
- Under the “Home” tab, click on "Edit Queries."
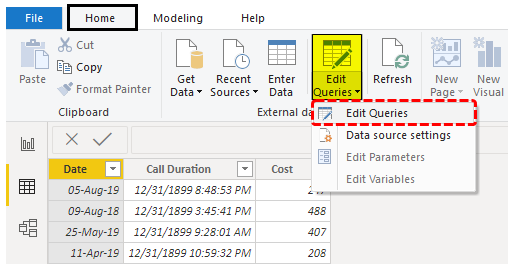
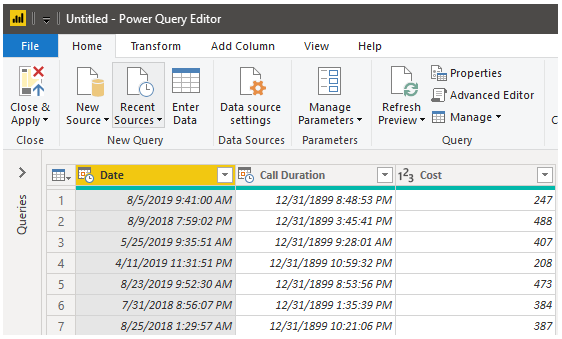
It will open the “Power BI Query” Editor.
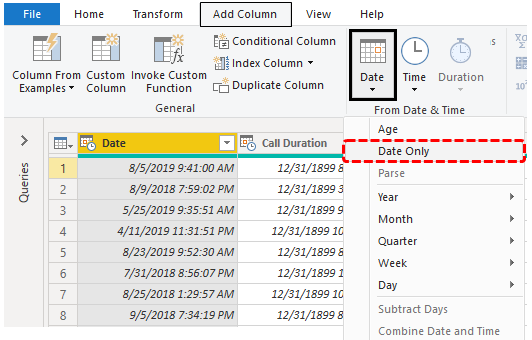
- Choose the "Add Column" tab in the Power Query Editor window. We have a huge list of date formats under this tab.

- Click on the "Date" dropdown list and choose "Date Only."
Now, look at the Data Table. It has a new "Date" column, which contains only "date" values from the date and time columns.
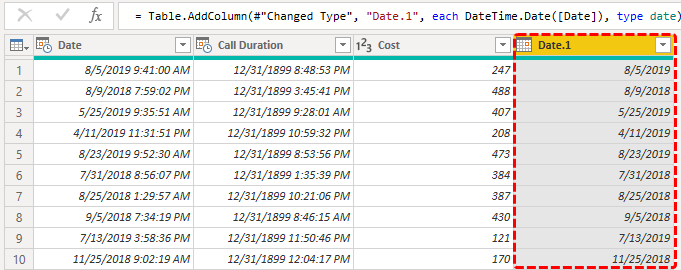
Similarly, after the "Date Only" option, we have options of "Year," "Month," "Quarter," "Week," and "Day." Under each of these, we have several other options as well. Below is the list of these subcategories under this.
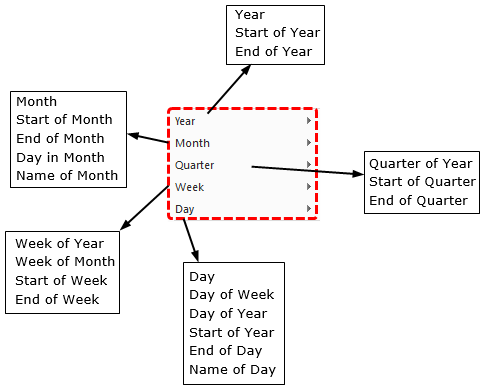
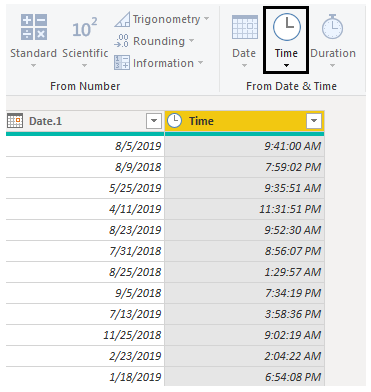
Based on your selection, it will add a new column to the data table without replacing the old column of data. Similarly, using the "Time" option, we can extract the "Time Only" value to the new column.
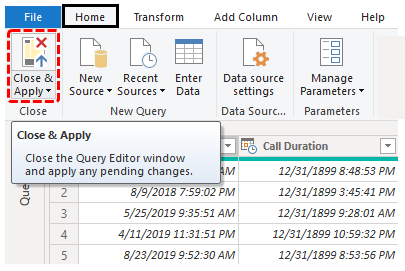
Once the changes are applied, click on "Close & Apply" under the "Home" tab.
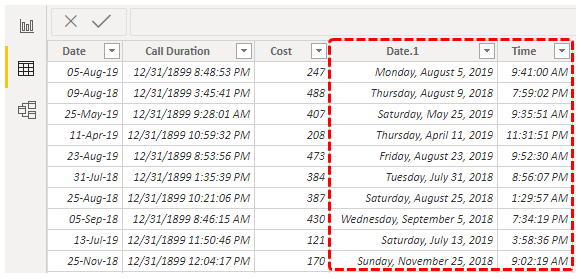
It will again upload the data to the "Power BI" file with applied changes. Now we can see new columns under the "Data" tab.
Note: Power BI Date Formatting file can also be downloaded from the link below, and the final output can be viewed.
Things to Remember Here
- The date format in Power BI is similar to the one in MS Excel.
- We have pre-defined date formats in Power BI.
- By default, if the system date format is in the US, it will also apply the same date format to Power BI.

