Table Of Contents
Aggregate Functions in Power BI
When we combine or summarize the numerical data, it is called "Aggregation." The output we get from this is called "Aggregate." So, the common aggregation functions are SUM, AVERAGE, MIN, MAX, COUNT, DISTINCTCOUNT, and so on. To use all these aggregate functions, we need some data that should be alpha-numerical. An aggregate function can be applied only for a numerical data set, but there is a situation where it also works for alphabetical data.
Let us learn these Power BI aggregate functions with a practical approach now.
Examples of Aggregate Functions in Power BI
You can download the following workbook using the same file we used in this example.
- Below is the data we will use to demonstrate aggregate functions in Power BI. You can download the workbook and use it.
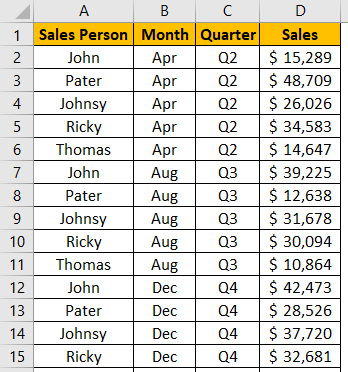
- We have already uploaded the above data table to the Power BI Desktop file. You can also upload the data table to start the DAX functions.

- We will create a new measure table to store all the aggregate measures, so go to the "Modelling" tab and click on “New Table.”
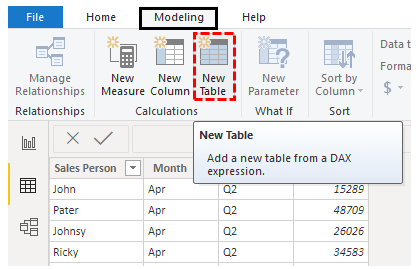
- It will ask you to name the table, so give the name “Aggregate Functions” and put an equal sign.

- Press on the "Enter" key to create a new table like this.
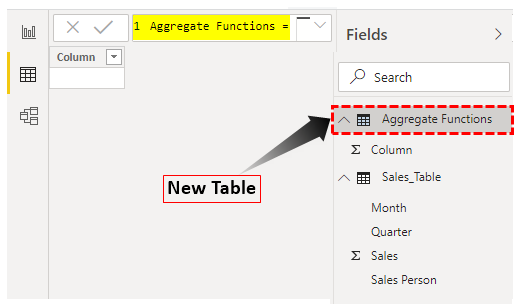
In this table, we will store all our new measures.
#1 - SUM
The steps to use the aggregate function in Power BI are as follows.
- So, our first attempt at aggregate function is SUM. So, right-click on the new table and choose “New Measure.”

- Now, name the measure as “1 Aggregate Function Sum.”
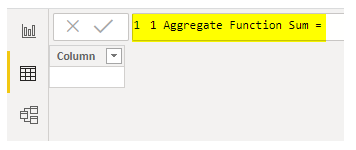
- We are adding or summing the sales value, so open the SUM DAX function.

- The SUM is very easy. First, we need to choose the column name we need to sum, so select the “Sales” column from the IntelliSense list.

- Close the bracket and press the "Enter" key to close the first aggregate function. So, our first measure for SUM is created in the new table.
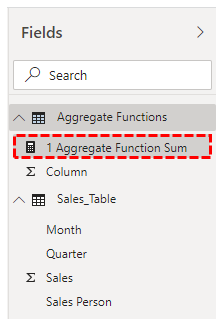
- Now, insert the “Card” visual from the visualization list.
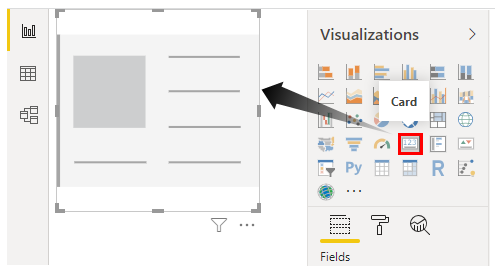
- For the field of this card, drag and drop the newly created measure to get the total sales value.
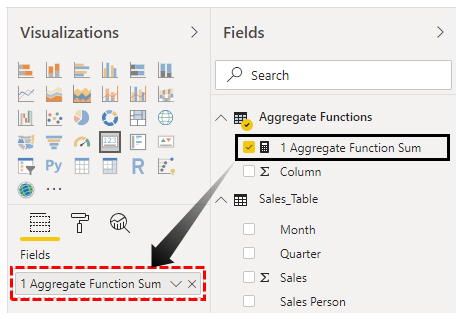
- We get the following result.
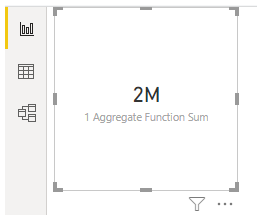
- We have total sales value using the same measure. We can also get a “Sales Person” wise summary using a “Table” visual.

- Drag and drop the “1. Aggregate Function Sum” from the first table and “Sales Person” from the second table.

- We get the following result.

#2 - AVERAGE
For the next Power BI aggregate function, we will learn “AVERAGE.” As we all know, we use this to find the average value by the selected category.
- Again, right-click on the new table, name the measure as “2 Aggregate Function Average,” and open the AVERAGE DAX function.

For this function, we need to select the column for which we are trying to find the average.

- Now, drag and drop this new measure to the table visual.
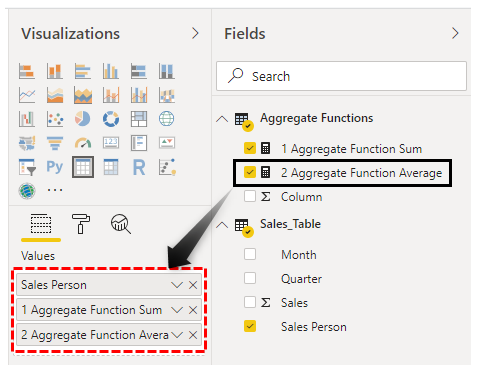
- We get the following result.
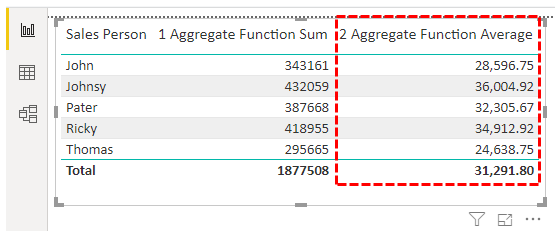
So, for each salesperson, we have got an average sales value.
#3 - COUNT
We have average sales value. It is calculated by total sales divided by several line items.
- Using the COUNT function in excel, we will find out how many line items are for each salesperson.

- Since we are finding the number of lien items for the “Sales” column, choose the same column from the table.

- Now, drag and drop this new measure to the table to see each salesperson's number of line items.
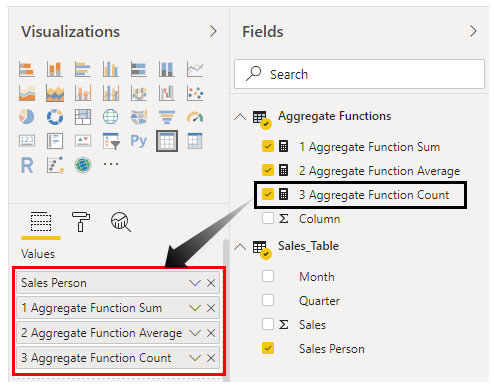
- We get the following result.

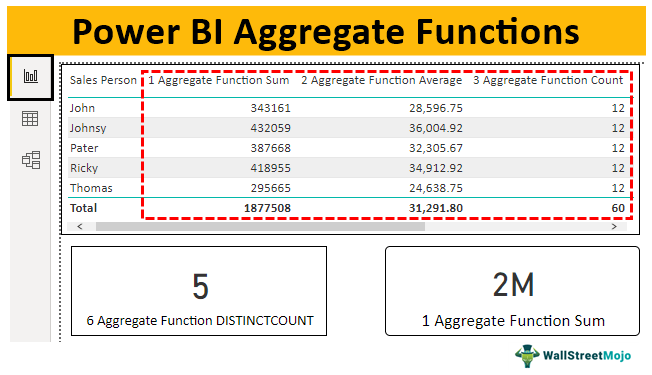
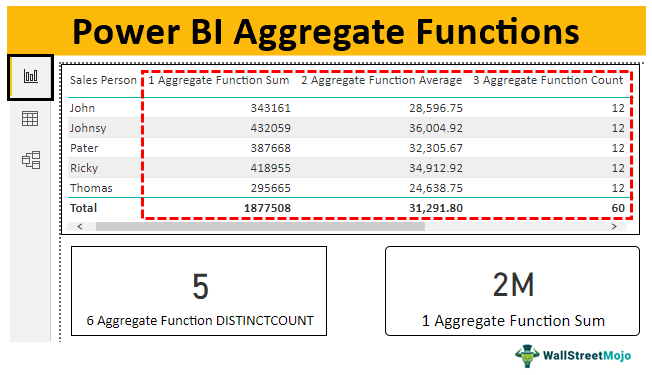
- For each salesperson, there are 12 line items. Now, we can understand how average values have arrived. For example, the salesperson “John” total sales are 3,43,161, and the number of line items he has is 12. So, Average = 343161 / 12 = 28,596.75.

#4 - MIN & MAX
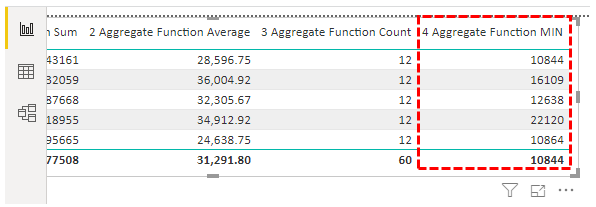
Similarly, from 12 transactions of each salesperson, we need to find the minimum and the maximum transaction. So, this can be arrived at by using MIN in excel and MAX functions in excel.
- Below is the measure to find minimum value transactions.

- Use this measure to find each salesperson’s minimum transaction.
- Similarly, the below-given measure calculates the maximum value transaction.

- We get the following result.

- We see the minimum and maximum value transactions here. With this, we can say that each salesperson’s maximum transaction value is above the average.
#5 - DISTINCTCOUNT
We can find how many unique values are present in Excel by removing duplicates. But in Power BI we need to use the DAX function to get this number, so the DISTINCTCOUNT function can get the unique values to count from the selected column.
- For example, from the “Sales Person” column, we may need to find how many salespersons are present. Below aggregate function will get the unique count of salespersons.

- Use card visuals to get the total count of salespersons.

So, there are a total of five salespersons.
Note: You can also download the Power BI aggregate functions file from the link below. You can view the final output.
Things to Remember Here
- The other aggregate functions are VAR, STD.V.
- The COUNT function counts only numerical values from the selected column. So if we want to count numerical and alphabetical values, we must use the COUNTA function.
