Table Of Contents
What Is MACRO in Excel?
A macro in Excel is a series of instructions in the form of code that helps automate manual tasks, thereby saving time. Excel executes those instructions in a step-by-step manner on the given data. For example, it can be used to automate repetitive tasks such as summation, cell formatting, information copying, etc. thereby rapidly replacing repetitious operations with a few clicks.
- The first is when you can record the macro, where Excel records every step automatically and then repeats it.
- The second is coding with VBA, which requires good subject knowledge
To gain a deeper understanding of how Excel macros can simplify accounting workflows and financial reporting, consider exploring an advanced Excel learning platform. Before recording a macro, the user has to activate the Developer tab in Excel. The Developer tab is a built-in option in Excel to create macros, generate VBA applications, design forms, import or export XML files, etc. Since it is disabled in Excel by default, it has to be enabled before creating and recording the macros.
Let us learn the method to enable the Developer tab in Excel.
Key Takeaways
- A macro in Excel is a series of instructions in the form of code that helps automate repetitive tasks like formatting and performing data imports.
- To enable macros, go to File -> Options -> Trust Center -> Trust Center Settings -> Macro Settings. Now, choose “Enable all macros.”
- Users can access the code using the keyboard shortcut “Alt+F11” or by editing the macro that was created earlier.
- To disable a macro, go to File -> Options. -> Trust Center > Trust Center Settings and select Macro Settings. Choose “Disable all macros without notification” or “Disable all macros with notification.”
Enable The Developer tab
Below are the steps to activate the Developer tab in the Excel toolbar.
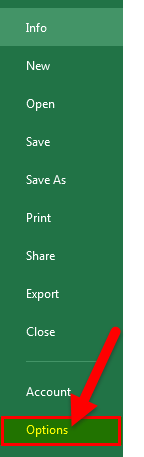
Click on "Options" in the File menu (as shown in the below image).
On clicking "Options," the "Excel options" window will pop up.
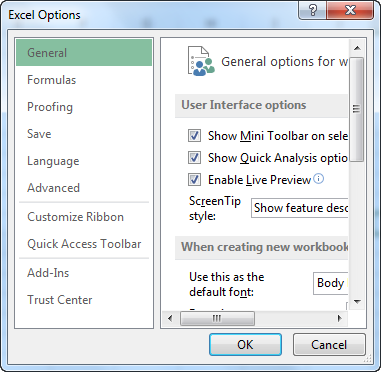
- Select "Customize Ribbon" in the "Excel Options" which provides a list of options in a dialog box.
Under "Customize Ribbon", select "Main Tabs" under the drop-down “Choose Commands from.”.
Among the list of checkboxes, select "Developer" and click "OK.”

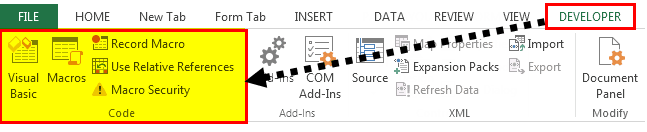
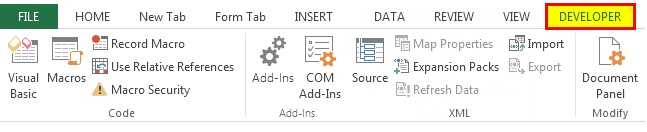
The worksheet displays the Developer tab, as highlighted in the image below.
The user can view options like "Visual Basic", "Macros", "Record Macro", etc. on the ribbon of Developer tab (as displayed in the image below).

Examples Of Macros In Excel
Let us understand how to add macros in Excel with the help of the following examples.
Example #1
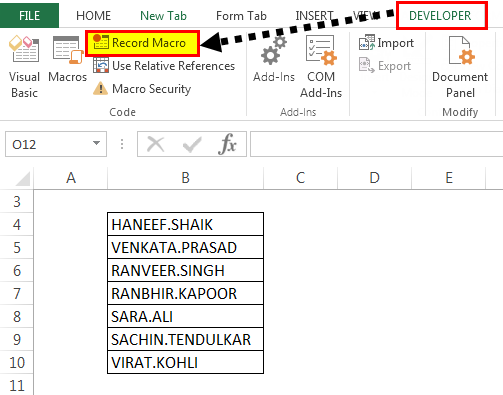
A list with different names is available in the table below. Some names have the “.” symbol. We wish to replace the “.”symbol with“_” using macros in Excel.

The steps to add an Excel macro are listed as follows:
- Click the “Record Macro” option in the Developer tab.
- The “Record Macro” window will pop out. Name the macro “ReplaceDot” in the “macro name” box. To assign a keyboard shortcut, type “Ctrl+q” in the “shortcut key” box.
- Select the option “This Workbook” in the “Store macro in” box, which will ensure the macro is stored in the particular workbook.
It is optional to fill the “description” box explaining the task. Finally, click the “Ok” button.

- The “ReplaceDot” macro will start recording the user actions in Excel. The user will observe the “stop recording” button appearing in the Developer tab.

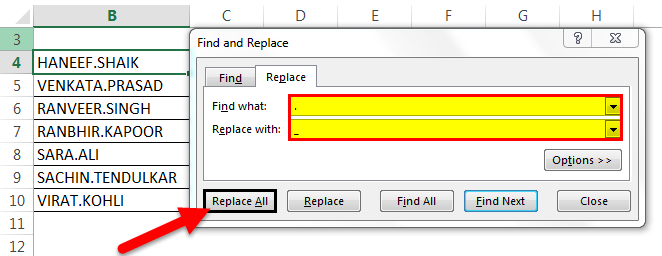
- Let us now start replacing the “.(dot)” in the names with “_(underscore)” by using the “find and replace” option. Enter “.” in the “find” and “ _” in the “replace” option, respectively. Then click the “replace all” button.
Note: Use the shortcut key “Ctrl+H” to use the “Find and Replace” option.

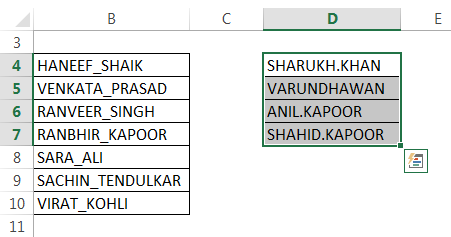
- The “replace all” option replaces all the “.” (dots) with the “_” (underscores). The number of replacements and the resulting output is shown in the succeeding image.

- The final output is displayed in the below image.

- In the end, click the “stop recording” button on the Developer tab to stop the macro recording.
Example #2
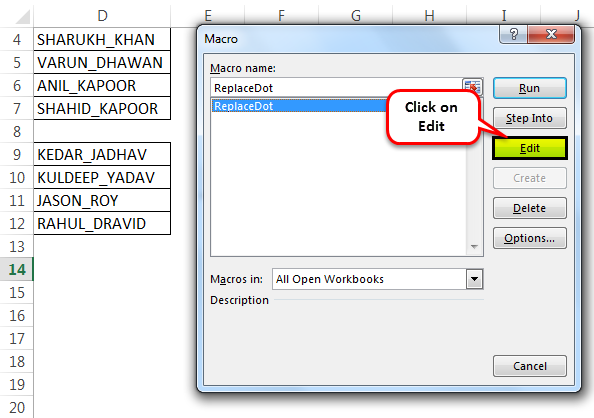
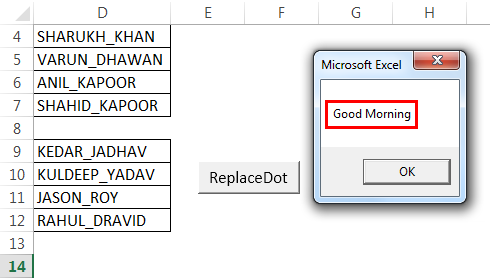
We want to run the same task for a new list of names (displayed in the below image). We will run the macro “ReplaceDot,” created in the Developer tab.
- Select the “Enable macro” option from the Excel ribbon under Developer to view the list of macros created in the Macro window. The users can choose and run the macros based on their requirement.
The succeeding image shows the result of macros running on the new list of names.

Adding The Macro Button - How To Run Macro By Clicking A Button?
Let us assign a button to the macro instead of choosing the “Enable macro” option.
There are many groups like Add-ins, Controls, and XML under the Developer ribbon.
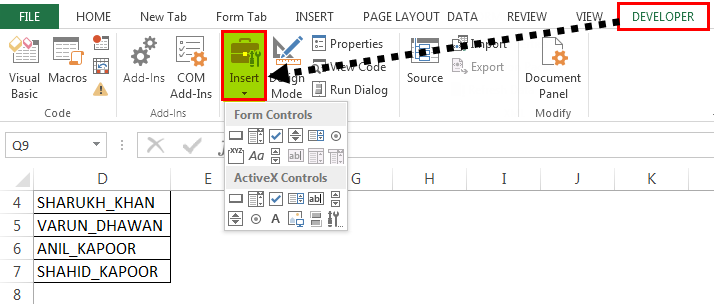
- The user can choose the type of button to be created. Select the first button from “form controls” in the Controls tab.
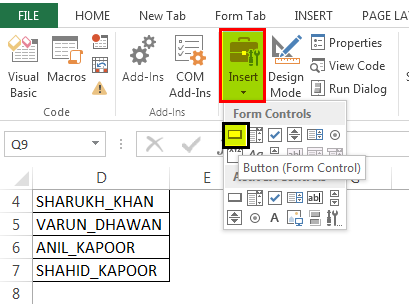
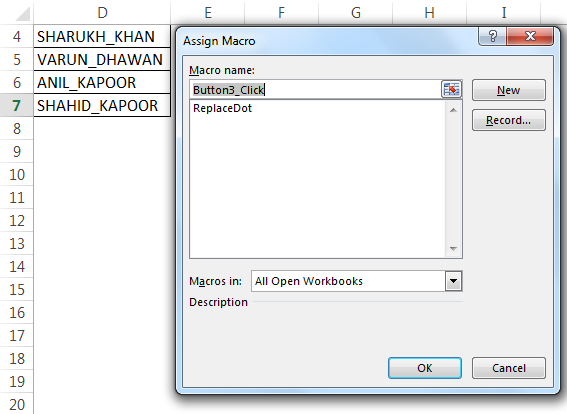
- Drag the selected button anywhere in the Excel sheet. The “Assign Macro” dialogue box opens. The macros to be assigned are listed in the “Macro name” box.
- Select the macro “ReplaceDot,” appearing in the list and click “OK”.
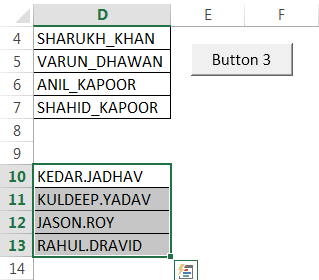
- A button appears in the worksheet. Right click the button and use “edit text” option to change the button text as “Button 3.” It is created on the right-hand side of the sheet, as shown in the below image.

- Select the new name list to implement the same task by running macros, as indicated in the previous section.
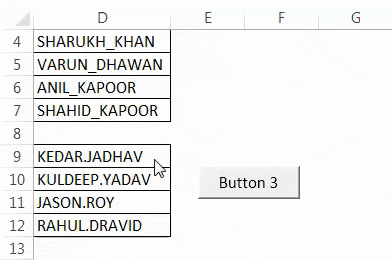
- Click the “Button 3” to run the assigned macro “ReplaceDot”.
- To change the button name, use the “Edit text” option to replace the text “Button 3” with “ReplaceDot”.

Using the above steps, we can create, record, and assign the macro for various tasks and automate it.
How To View The Code Of Macros?
The users can view the code for a recorded macro. Excel generates the code based on the steps carried out while recording the macro.
We can access the code using the shortcut “Alt+F11” or by editing the macro that was created earlier.
Let us view the code for the “ReplaceDot” macro using the following steps:
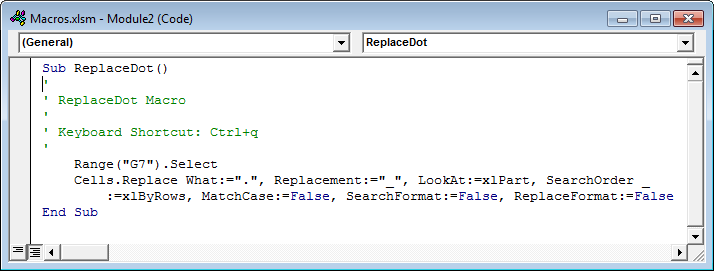
- Open the worksheet that contains the “ReplaceDot” macro. In the View tab, click the option “macros.” Select the “ReplaceDot” macro from the list and click the “edit” button.
- The “Microsoft Visual Basic for Applications” will be launched. The user can write or edit the code using this application. The below image shows the code of the “ReplaceDot” macro.
Creating Macro By Writing VBA Code
Before writing the VBA code, let us understand the “head” and “tail” of macros, which are the “Sub” and “End Sub.”
The user places the lines of VBA codes in the keyword “Sub”. It executes the instructions in the code. The “End Sub” keyword stops the execution of the “Sub.”
Generally, there are two types of macros.
- System Defined Function - It performs actions like creating a link of all the worksheet names, deleting all worksheets and so on.
- User-Defined Function - To create a User Defined Function (UDF) in macro, the user uses the “function and end function” as the “head” and “tail” of the codes.
Note: A function returns a value, whereas the Sub does not.
A macro is written on the Visual Basic Editor (VBE) of the “Microsoft Visual Basic for Applications”.
Let us learn the steps to write a simple macro in the VBA.
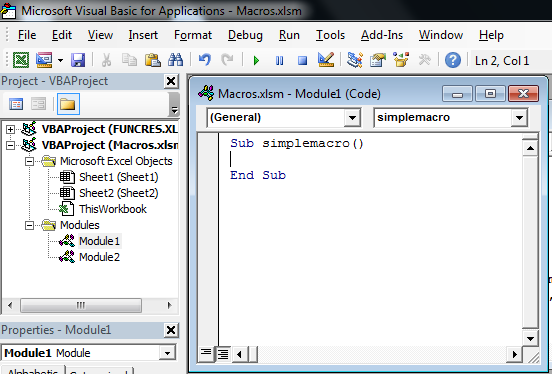
- Click the “module 1” in the “Module” properties displayed on the left-hand side panel of the VBE window, and start writing the macro.
- Begin with “Sub” followed by the macro name and end with “End Sub”. The code is written between the “sub” and “end sub.”
The below image shows the “Sub” and “End Sub” for the macro named “simplemacro ( ).”
- Write code to display text in the message box. The “MsgBox” displays an input text message. All text in VBA should be enclosed in double quotes.
For example, the code: MsgBox “Good Morning” (shown in the below image) displays the message “Good Morning” in the text box.
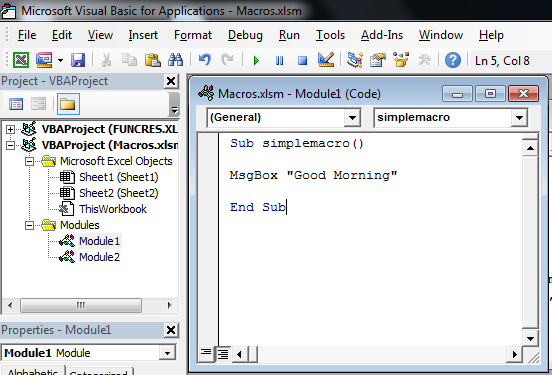
- The output is displayed in the succeeding image.
Hence, the same macro can be assigned buttons to automate the task.
How To Save The Recorded Macro In Excel?
After recording, the user saves the macro to reuse in any other worksheet in the future.
Let us follow the below-mentioned steps to save the macro:
- In the macro-enabled workbook, click “Save As.”
- Select the “Excel macro-enabled workbook” option in the “Save as type” box while saving the file.
- Finally, save the macros with the “.xlsm” file extension.

The guidelines for saving the macro names are stated as follows:
- Make sure that the name of recorded macros should start with letters (alphabets) or underscore.
- Use letters, numeric, and underscore characters.
- Avoid space, symbols, or punctuation marks.
- Maintain a maximum length of about 80 characters.
Note: When the user saves a macro’s name with space, Excel issues a warning (as shown in the succeeding image).

How To Enable “Macro Security Settings”?
In this section, let us learn to enable the “Macros security settings”.
When a user opens a workbook containing macros, a security warning - “Macros have been disabled” is displayed under the ribbon. Choose the “Enable Content” option in the box.

To eliminate the security warning, we need to change the “trust center settings” by using the following steps:
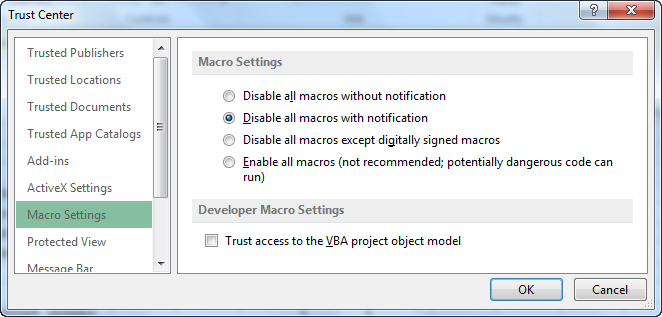
- Under the “Trust Center settings” in the File options, click “Macro settings.”
- You will get different options like
- Disable all macros without notification:
- Disable all macros with notification:
- Disable all macros except digitally signed macros:
- Enable all macros (not recommended; potentially dangerous code can run):
- Choose the button based on your security settings. Here, we choose, “Disable all macros with notification.”
- The security is enabled in the “Macro Security” of the Developer ribbon.
Note 1: The user can create absolute macros (functioning from cell A1) that help to reuse the macro in other worksheets.
Note 2: The usage of directional keys (rather than a mouse) for navigation in macros is reliable to add, delete, and change the data in the worksheet.
