Table Of Contents
What Is Track Changes In Excel?
Track Changes in excel helps us review the edits directly in the worksheet. It is a built-in feature in excel. In excel, we can highlight and review the changes made.
For example, consider the below table showing the marks obtained by students in subjects, English and Science.
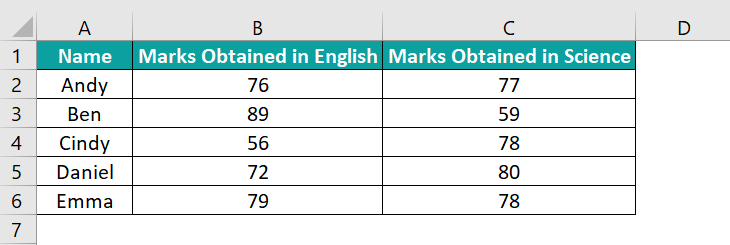
Assume that the marks entered in cell B4 is wrongly entered as 56, instead of 66.
After, we enable track changes in excel, we can see the changes made in the table as highlighted in the below image.
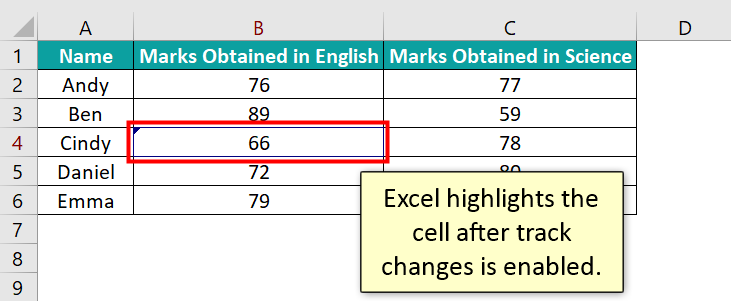
Likewise, we can track the changes made in excel using track changes feature.
Steps To Track Changes In Excel
Below is a sample table that shows how to track changes in excel.
Table of contents
- Track Changes in excel is used to track and review the changes made in the worksheet.
- Remember, track changes in excel is available only in shared workbooks.
- We have to enable track changes in excel from Review tab.
- Using track changes in excel, we can highlight the changes made and review the changes in separate sheet
- Also, we can accept or reject the changes made in the worksheet.
- We can disable track changes in excel by selecting Review → Track Changes and click on Highlight Changes.
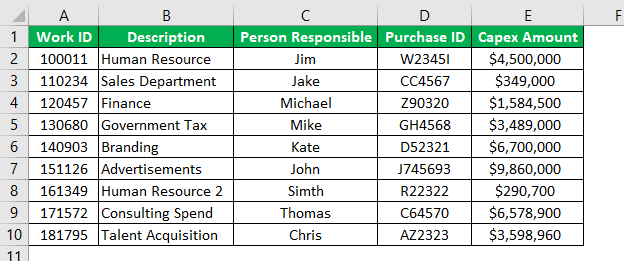
Consider the below table showing description and purchase ID of various employees.
The steps to track changes in Excel are as follows:
- Now, to enable “Track Changes,” we must go to the “Review” tab and click on “Track Changes,” and select “Highlight Changes.”

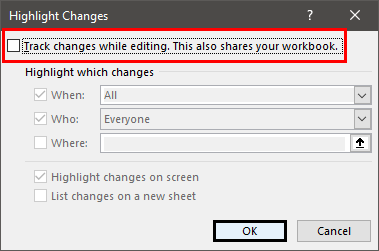
- After selecting the Highlight Changes, a window may pop up.

Highlight Changes detect any change in the workbook shared with other users. - Then, select the checkbox for “Track changes while editing. This also shares your workbook” Excel needs to keep track of records for any change made in the shared workbook.

- Now, select “When” for the desired time and the “Who” checkbox for whose changes need to be tracked and highlighted for changes.

- The “Highlight changes on screen” box is selected to indicate the cell where the records are changed and provide details in the comments at the corner of the cells. And click OK to save the actions in the workbook.

- Next, we would highlight any changes in the workbook in the cell borders and the details of users in the comments. The comments will be available in the upper left corner of the cell with the user’s name, who has made the changes to the cell, and the content change.

As we can see, we made the changes in two cells, D4. The comment box may appear by hovering the cursor over the highlighted cells.
Viewing Changes In Separate Sheet
- Step 1: First, remember that highlighting changes can also record changes made to the cells available in a separate sheet. It allows different users to make changes to the workbook. For this, we must go to Review → Share Workbook (Legacy).
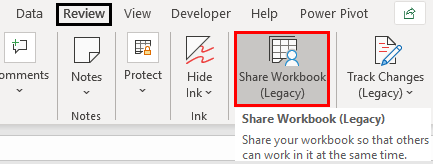
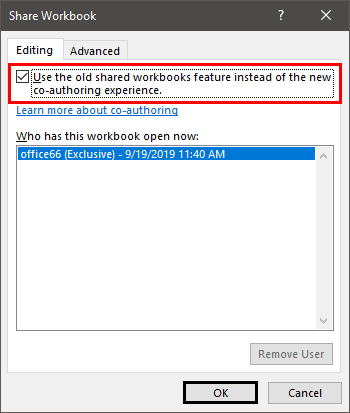
- Step 2: After selecting the Share Workbook (Legacy), a window may pop up. Now, choose the box to Use the old shared workbooks features features instead of the new co-authoring experience. Then click OK.
- Step 3: Next, go to Review → Track Changes → Highlight Changes, as shown in Step 1.
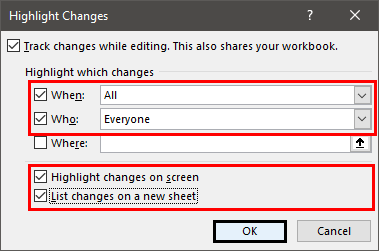
- Step 4: Then, select the Who checkbox to enable other users to change the workbook once the window pops up. Next, select the checkbox for List changes on a new sheet to view all the changes made in a new sheet. Then, click OK. Again, click OK for the prompt to save the actions.
- Step 5: Now, it will trigger a new sheet to generate named History tab, as shown below.

As we can see, Excel provides all the information related to any change in the cell. The Action Type and Losing Action indicate if there are any conflicting changes or changes done to the same cell by different users.
The History tab can be saved as a separate workbook or regenerated again to see any new changes done by different users. When selecting the List changes on a new sheet checkbox, they may merge the new changes into the existing records.
Accept Or Reject Changes In Workbook
- Step 1: To accept or reject the changes made by a different user in the workbook, we must go to Review → Track Changes → Accept/Reject Changes.
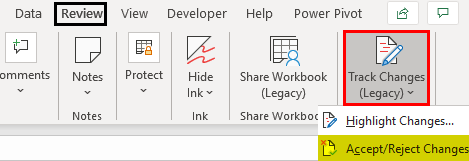
- Step 2: Accept/Reject Changes would pop up a window that needs to be configured for the selections below.
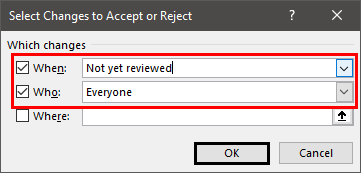
When checkbox selection would ask for the changes which have not been reviewed yet or since date.
Who checkbox selection chooses Everyone, Everyone but Me, or a specific user. Then, click OK.
- Step 3: Once the above selections are made, a pop-up may ask whether the changes made be accepted, rejected, or to keep the original content.
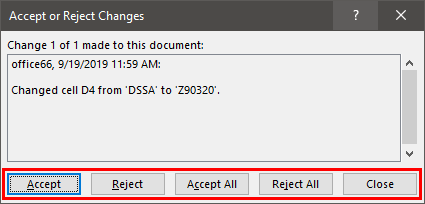
If there are any conflicts, if different users have made changes to the same cell, then the pop-up will list down all the changes made to the specific cell, and we can make the selections to accept anyone’s record.
How To Change Number Of Days For Maintaining Track History?
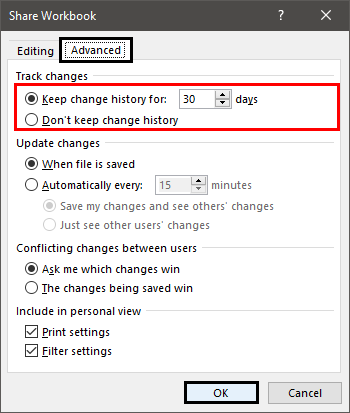
Generally, the track changes in Excel for the records are usually maintained for 30 days by default. However, we can change this as per convenience by going to Review -> Share Workbook (Legacy).
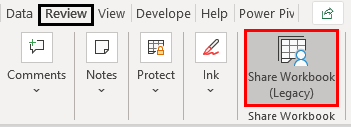
After the selections, a pop-up window will appear, as seen in the below image. Then in the Advanced tab, we can change the history to the desired number of days. Else, Excel would take the default settings. Then click on OK once the necessary settings are updated.
How To Disable Track Changes?
First, go to Review → Track Changes, then select Highlight Changes.
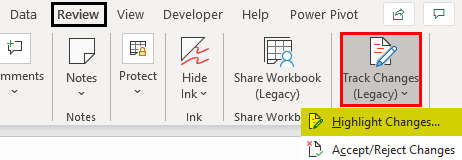
Once the pop-up window appears, uncheck the box for Track changes while editing. Click OK. Then, turn off tracking and stop sharing the workbook with other users.
Important Things To Remember
- Once the track changes are enabled, the workbook becomes a shared file, which means that other users could also access the Excel file.
- In cells, only content changes are tracked. Therefore, it would not consider other changes such as formatting or grouping.
- It will maintain the track record changes for only 30 days by default. It could be changed by following how to keep track of history.
- The option for undo is not available. However, once the changes are made to the cell, we can bring them to their original content by accepting or rejecting them in Track Changes.

