Table Of Contents
Track Changes in an Excel Workbook
Under the "Review" tab, we can track changes in excel that the users make. There are situations where users may make unintentional mistakes. Finding the error in the huge file could be a time-consuming job for anybody; since we have Excel's built-in function "Track Changes," which can easily track those changes.

To track changes, we have prepared below sample data.
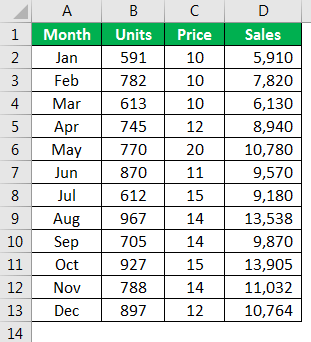
Before we share the workbook, we need to Track Changes in excel. Follow the below steps to enable track changes.
- Step 1: Click on the "Track Changes (Legacy)" drop-down list in excel and choose "Highlight Changes."

- Step 2: Check the box "Track changes while editing. This also shares your workbook."
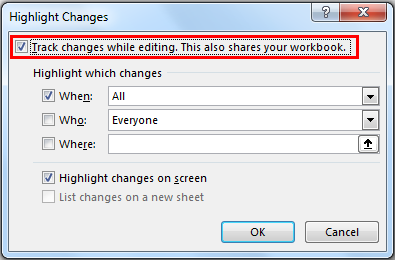
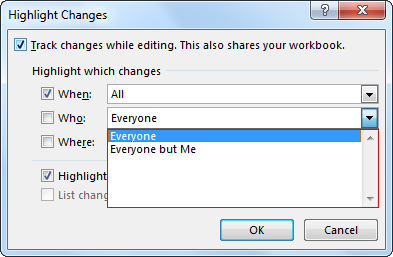
- Step 3: Now, in the same window, we can choose a variety of options like "from when we need to start highlighting the changes," "whose changes we need to highlight," and "which range or part of the cells we need to highlight."
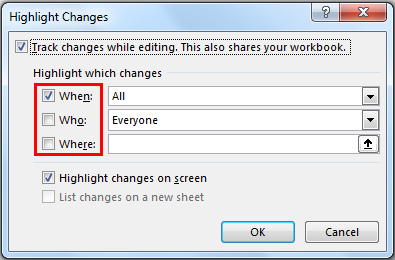
We can see three options "When," "Who," and "Where" in the above window.
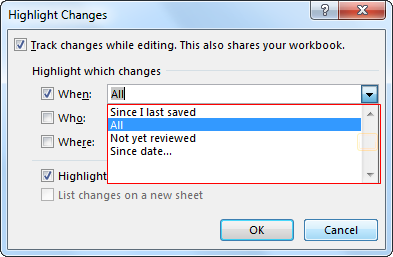
When: This includes options like when we need to highlight changes. For example, this option has items like "Since I last saved," "All," "Not yet reviewed," and "Since date."
Who: For whose changes do we need to highlight. In this, we can see two things: "Everyone" or "Everyone but Me."
Where: This is in which area of the worksheet we would like to highlight changes. If we do not want to track changes in the entire worksheet, we can select the particular area or range of cells.
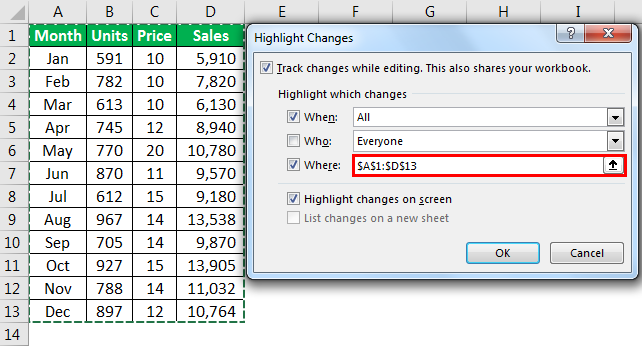
Once all the fields are filled, click "OK" to apply the changes. As soon as we click on "OK," we will see the below window.

Click on "OK" to save the workbook.
Now, what we will do is we will change one of the cells' data.
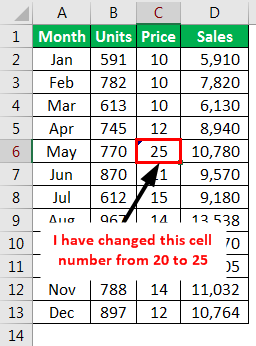
As soon as we press the "Enter" key, we can see the flag, which indicates the changes.
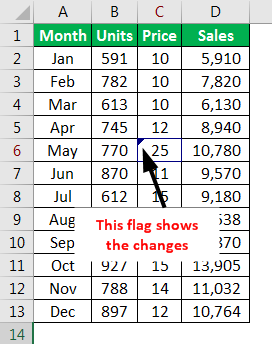
The cell flag also turned into different colors rather row header and column header.
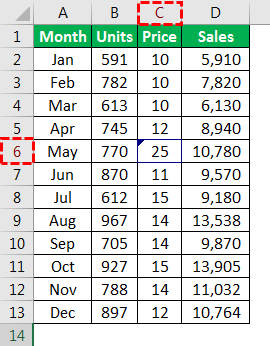
We must place a cursor on the cell that we have modified to see our changes.
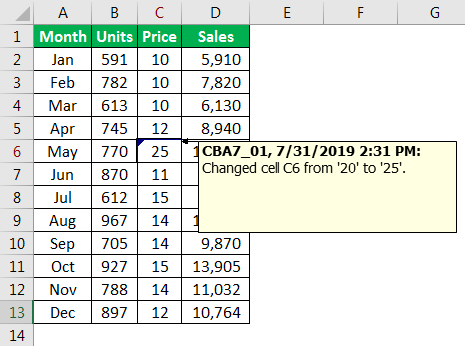
It indicates that on 31st July 2019 at 2:31 PM, we changed the cell C6 value from 20 to 25.
Now, we must insert the new value in cell E3.
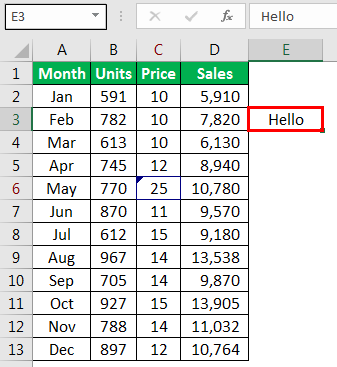
We cannot see any highlight changes for this cell because while making the settings of "Track Changes," we have selected the range of cells to be tracked only from A1 to D13.
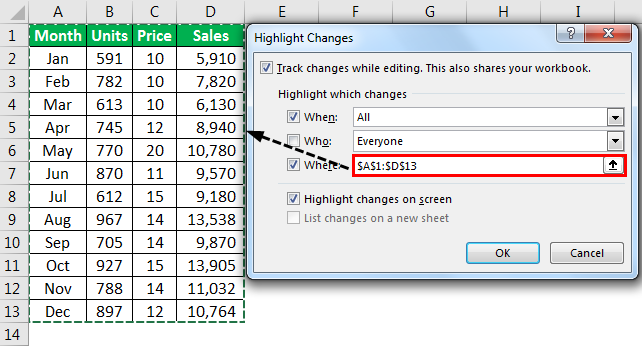
So, we cannot track any changes we made outside this range.
Accept or Reject Changes in an Excel Workbook
The beauty of "Track Changes (Legacy)" is not only limited to viewing the changes. Rather, we can also accept or reject the changes.
Under "Track Changes (Legacy)," click the option "Accept / Reject Changes."

In the below window, we can filter out whose changes we need to accept or reject and in which range we need to accept or reject changes.
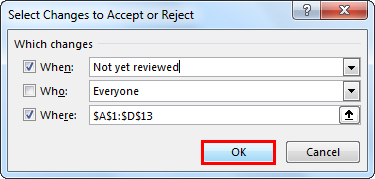
Click on "OK" to go to the next window.
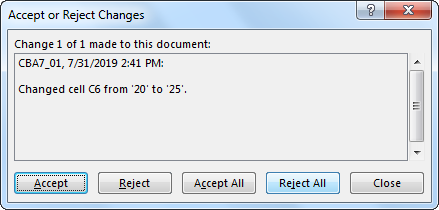
In the above, we can choose the changes. We can "Accept" or "Reject" changes. We can also do this if we want to accept all or reject all.
Things to Remember
- "Track Changes" comments are different, and regular comments are separate.
- We must always select the range of cells to be tracked, which affects the result area.
- We must Protect the workbook in excel before sharing it with anyone.
Recommended Articles
This article is a guide to How To Share an Excel Workbook? Here, we discuss how to share an Excel workbook and track changes in it with complete accountability on the workbook. You may learn more about Excel from the following articles: -
