Table of Contents
Free Timesheet Template in Excel
Tracking daily time for an employee is a task that almost every company does daily and may check weekly, biweekly, or monthly. Due to the versatility Excel possesses, it comes out in handy in this case. We can create a free timesheet template under Excel to capture employees' daily/weekly timings. However, due to the variety of customizations available, we cannot say there is one standard Excel template to track the time. It varies from organization to organization, and the format may also change. This article will walk you through the Excel timesheet templates, which are inbuilt and can be created simply from scratch.
We have two ways to create the Excel timesheet template:
- First, free Excel built-in timesheet templates are ready-made to download and direct use.
- We can also create an Excel timesheet of our own through absolute scratch.
We will walk you through these both ways one by one in detail.
How to Create a Timesheet Template in Excel?
Below are the examples for creating a timesheet template in Excel.
#1 - Free Built-in Timesheet Template in Excel
Follow the below steps to use the free built-in timesheet template in Excel.
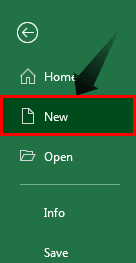
- We must first open a new Excel. Then, navigate to the "File" menu > click on "New." It will allow us to open a new template.
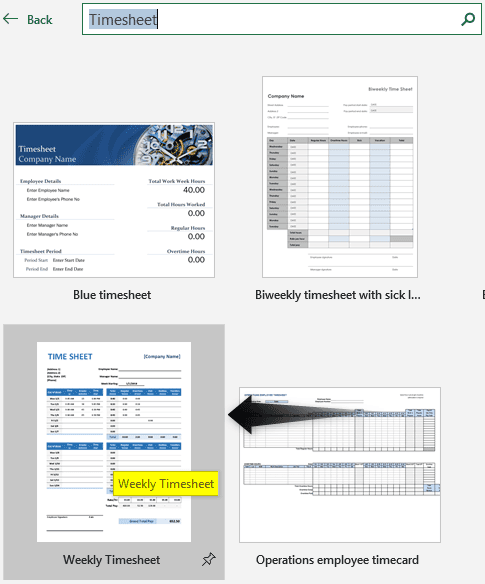
- Once we click on "New, " we may see a list of thousands of online templates under Excel that the user can use and download. For example, put "Timesheet" under the search box on the same sheet and then press the "Enter" to load all the timesheet templates. It will help if we are connected to a healthy network to download such templates.
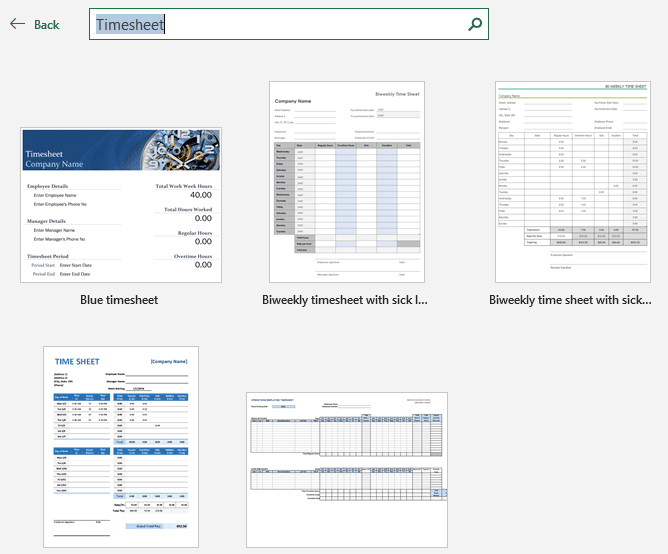
- We must click on the "Weekly Timesheet" template out of all the Excel templates.
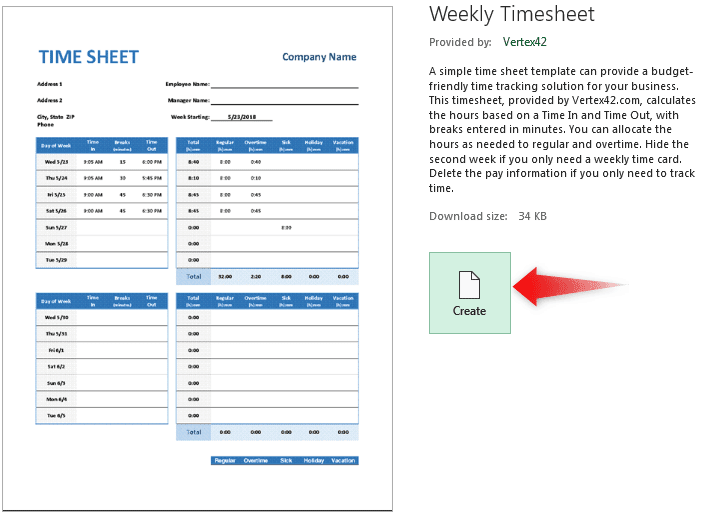
As soon as we click on it, a new dialog box may open with a template description and a "Create" button. Click on the "Create" button to download and use the file in the system.
We can see a partial screenshot of the worksheet below after downloading it.
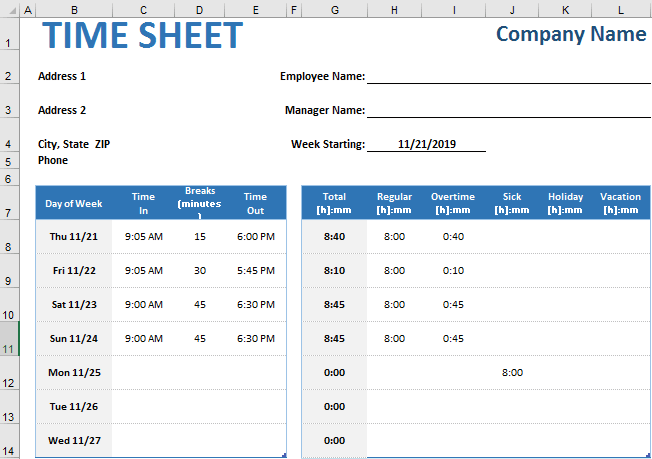
It is one way to create a timesheet template in Excel.
#2 - Creating Excel Timesheet from Scratch
Now, we are going to create an excel timesheet template from scratch. Follow the steps to do the same.
Step 1: We first need to add fields like "Employee Name," "Start Date," "Department," "Manager," etc., for the informative details. Then, populate these fields across the cells B2:C5. Format these cells with "Font"/"Font Size" – "Calibri"/"12," "Bold," "Border Type" – "All Borders.
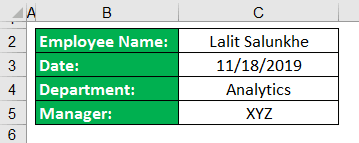
Step 2: Then, we must add the column labels for "Date," "Day," "In Time," and "Out Time" for "1st Half" and "2nd Half," "Hours Completed," "Overtime," "Sick Leave," "Personal Leave" across the cells B8 to K9. Also, keep five lines blank to add the data for 5 days (We assume the week is for 5 days and 2 days are off – Saturday and Sunday, respectively).

The data should be formatted as Font/Font Size – Calibri/12, Wrap Text, Merge and Center (for cells D8:E8 and F8:G8, respectively).
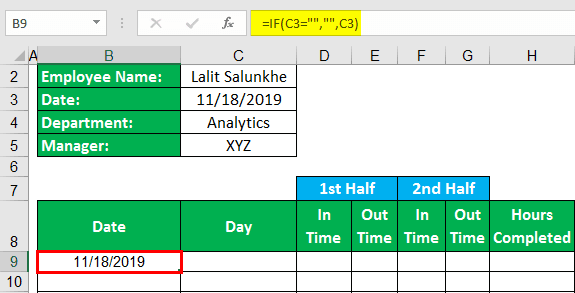
Step 3: In cell B9, use =IF(C3="","",C3) as a formula. These basic excel formulas capture the date in cell C3. We only need to change the date to C3.
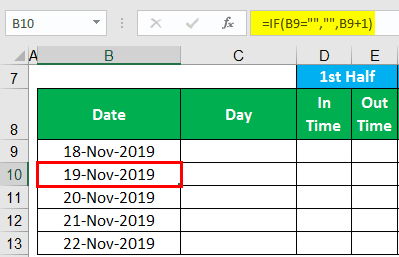
Step 4: In cell B10, we must use the formula =IF(B9=””,””,B9+1). This formula captures the date in cell B9 and increments 1 to get the next date. We can drag this formula across all the cells until B13 to get the dates. Then, change the date format to "Custom,""dd-mmm-yyyy."
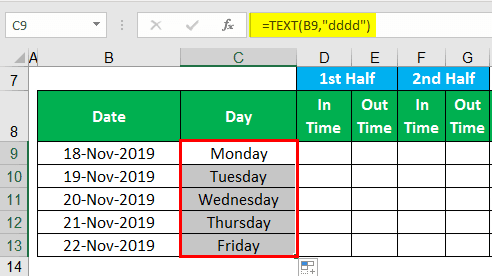
Step 5: Now, in column C across C9:C13, we need to extract the day for different dates in column B. Use, =TEXT(B9," dddd") in cell C9 to get the "Day" value as "Monday" and drag the formula until C13.
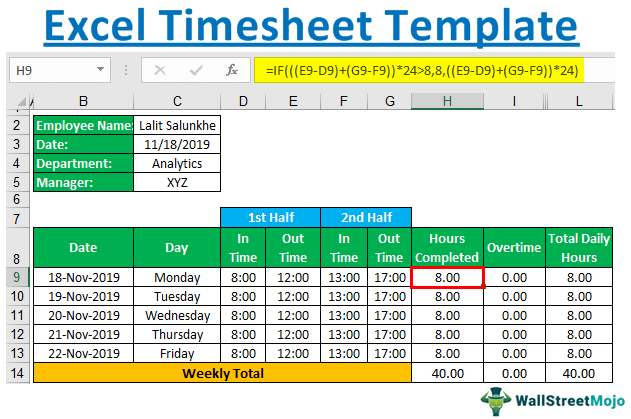
Step 6: Now, we need to capture the hours completed (Column H). Use, =IF(((E9-D9)+(G9-F9))*24 > 8, 8, ((E9-D9)+(G9-F9))*24) as a formula to capture the hours completed under column H.
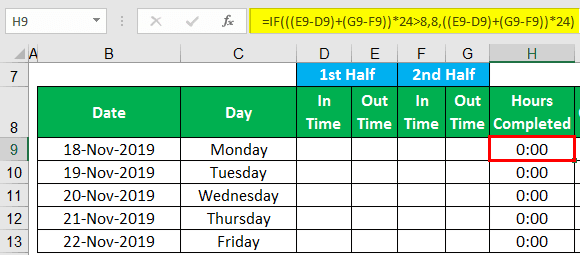
This formula checks if total working hours ("Out Time" – "In Time" for 1st half + "Out time" – "In Time" for 2nd half) are greater than 8 or not (24 is used to make the data convenient for 24 hours time format). If total working hours are greater than 8, it will be considered 8. Therefore, the total working hours captured by the formula will be considered. Drag the formula across the cells.
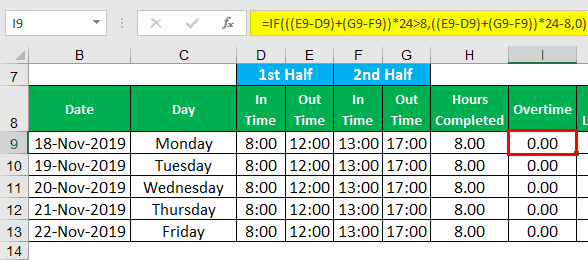
Step 7: Now, using the same logic, we will calculate the overtime value. Use =IF(((E9-D9)+(G9-F9))*24>8,((E9-D9)+(G9-F9))*24-8,0) as a formula under cell I9.
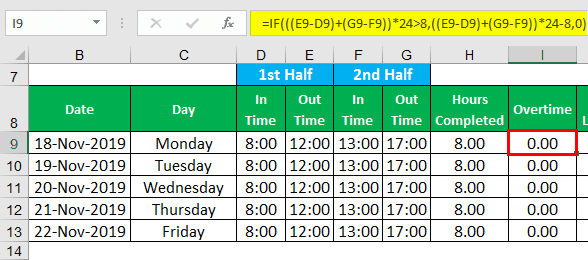
This formula finds that if the total working hours are greater than 8 for the day, the value after subtracting 8 hours from total working hours will result under cell I9 as "Overtime." Else, it will be zero.
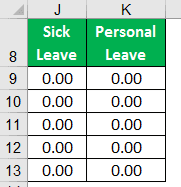
Step 8: We will set the default values as 00:00 for the "Sick Leave" and "Personal Leave" columns (Columns J and K, respectively). We cannot formulate the values of these columns as we perform for hours completed and overtime.
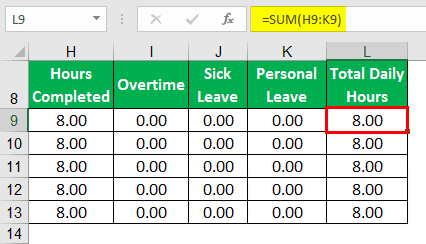
Step 9: Under "column L," add a new title as "Total Daily Hours." This column will be the one that can give all the daily completed hours. For example, we can use =SUM(H9:K9) as a formula under L9 to capture the "Total Daily Hours" for 18-Nov-2019. Then, we need to drag the formula across the cells.
Step 10: Across cells H14 to L14, we must use the sum function to get the total hours for the week associated with each column.
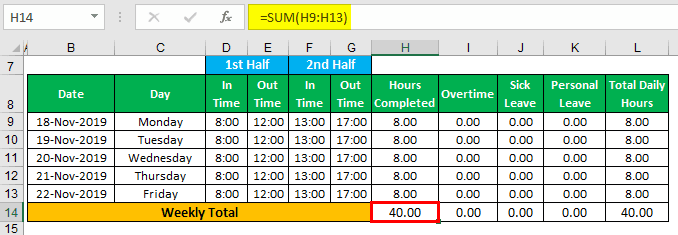
We have also added the "In Time" and "Out Time" in the sheet and could see the working hours reflected.
Things to Remember
- We must keep an eye on the cell format. We have used the 24 hours format for timings in each column.
- The timesheet template is a weekly planner and can be modified as a "Biweekly" or "Monthly" timing.
- Note that the sheet is protected. Hence, as a user, we may not be able to change the formatting.
