Table Of Contents
What Is Insert Shortcut In Excel?
Excel insert shortcuts is a quick method used to perform functions and activities in Excel. Microsoft excel is itself a user-friendly software. Using shortcuts, we can perform calculations and functions with ease in less time, thus saving user’s time and improving efficiency.
For example, consider the below table showing the names and age of various people in an organization.

Now, assume that we have to enter another employee in-between Darwin and George. Let us learn how to insert a row using shortcut keys in Excel.
The steps are:
Step 1: First, select the previous row where we want to insert a new row. In this example, we want to insert a new row between row 6 and 7. So, select row 7.
Step 2: Next, press the shortcut keys Ctrl + Shift + +.
We can see a new row in-between the data showing the names Darwin and George.

Likewise, we can insert shortcuts in Excel.
This article will show you how to perform shortcut keys in Excel.
Key Takeaways
- Excel insert shortcuts is used to perform functions and activities in the worksheet quickly, using shortcut keys.
- Shortcut keys, as the name suggests, helps users insert row, or column instantly.
- To insert a row, users should click on the data where we want to insert a new row and then, press the shortcut keys, Ctrl + Shift + +.
- Similarly, to delete a row, we can use the shortcut keys, Ctrl + -. This will open the Delete tab in Excel.
How To Insert Shortcuts In Excel?
Below is how to insert shortcut keys in Excel with examples.
Examples
Example #1 – Insert Rows & Columns Shortcut
Inserting new rows and columns in Excel is a common task we all do as part of the work. To insert new rows and columns, we can perform shortcut keys. So these shortcut keys are very helpful to us to increase efficiency and productivity.
- For example, look at the below data table.
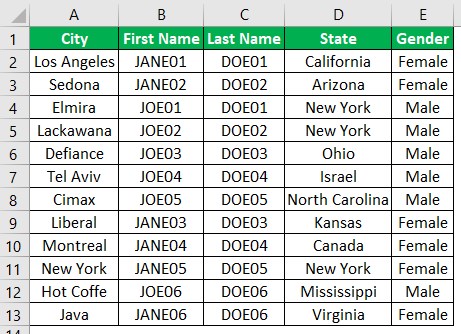
Assume we need to insert a new row after row number 4. We may follow the below steps to insert a new row using the Excel shortcut.
- First, we must select any of the cells in row number 5.

We have selected the A5 cell. - After the cell selection, press the shortcut key “Shift + Space” to select the entire row.

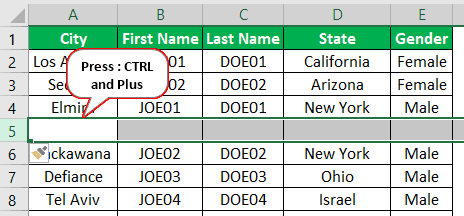
- We need to press “Ctrl and + (Plus)” to insert a new row by pushing the selected row down.

As a result, we can see a new row has been inserted.
- Assume we need to insert three rows instead of 1. Then we need to select three before pressing the shortcut key.
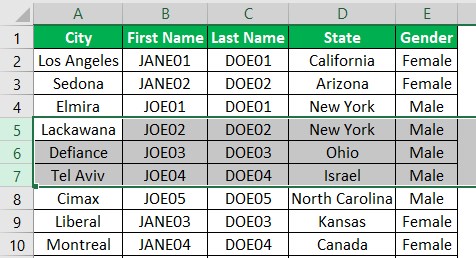
- Now, we must press the shortcut key “Ctrl and + (Plus)” to insert as many rows as selected above.
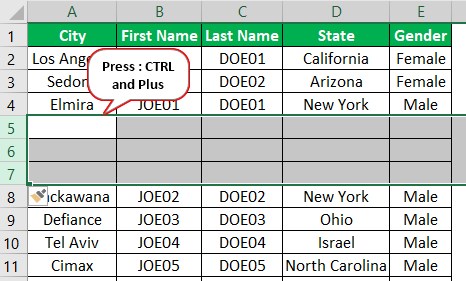
We have three new rows, so the inserted shortcut key may insert as many rows as we have selected when using the shortcut key. After performing the insert row option, if we press the F4 key again, it will repeat the last action of inserting rows and inserting three more rows.
- Similarly, we can also insert columns using shortcut keys. For example, in the same data table above, if we want to insert a column after column C, we must select the column after column C. So first, we must choose any of the cells in column D.
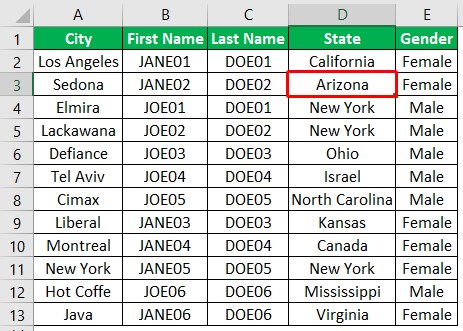
- Now, cell D3 has been selected, so to select the entire column of the active cell, we need to use the shortcut key “Ctrl + Space.”
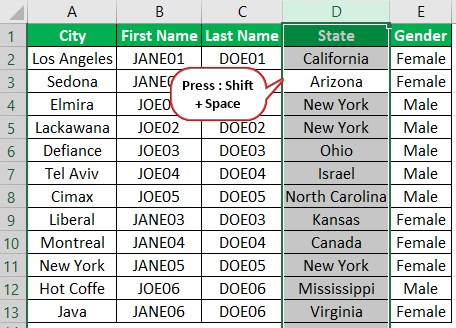
- Once the entire column has been selected, we can press the “Ctrl and + (Plus)” shortcut key to insert a new column.
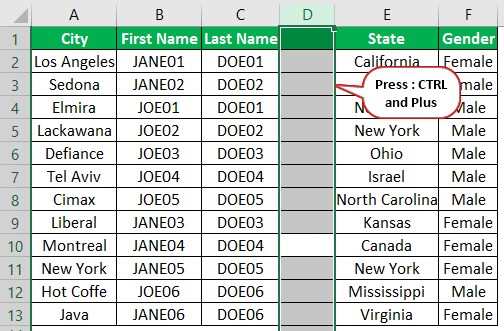
- We can apply the same logic as we have applied for inserting rows here. If we need to insert multiple rows, we must select the many columns we would wish to insert. For example, if we want to insert four columns, we must choose those many first.
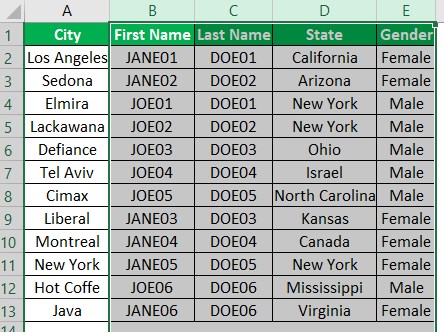
- Now, press the insert shortcut key “Ctrl and + (Plus)” to insert four columns.
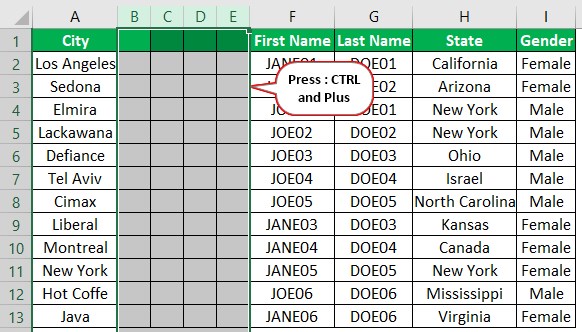
The insert shortcut key is to insert new rows and columns in excel.
Example #2 – Insert New Worksheet & Workbook
If we want to insert a new worksheet or workbook, it is easy using shortcut keys in Excel. However, as we keep working in Excel, we may need to insert a new worksheet to have some copied data. So, in that case, we can use the below shortcut key to insert a new sheet.
#1 - Shift + F11
The above shortcut key will insert a new worksheet in excel.
Similarly, if we want to insert a new workbook instead of a new worksheet, then the below shortcut key will insert a new workbook.
#2 - Ctrl + N
By pressing the above shortcut key, we can insert a new workbook from the active workbook.
Important Things To Note
- In Excel, we can perform functions and activities using shortcut keys.
- To remove or delete a row in Excel, we can simply select Ctrl and – (Minus Sign).
- The same shortcut keys can be used to delete a column in Excel.
