Table Of Contents
What Is The Autofit Column Width?
Excel column auto width option helps users adjust the width of the column depending on the size of the text string. The default column width in Excel is 8.43 characters, which is 64 pixels. When the text string is shorter or longer than the default width, we can use excel column auto width option.
For example, consider the below table showing text string, ‘Column Width’.

As we can see, the text string is longer than the cell width. So, now to adjust the text string, we can simply double click on the right-end of the column.
We can see the column width is adjusted in Excel.

Likewise, we can use excel column auto width.
Table of contents
- Excel column auto width is a method used to automatically adjust the width of the column based on the length of the text string.
- The shortcut keys to adjust width are ALT + H + O + I.
- We should do a double click at the end of the right corner of the column.
- To AutoFit the column width to the entire column, we need to select the whole column and perform the AutoFit activity. Otherwise, only the selected cells will be AutoFitted.
Default Column Width In Excel
When we open a new Excel workbook, it comes with default settings for column width and many other settings. So, to view the default width of the column, we must place a cursor on the end of the column and see a four-way arrow keys symbol.

When we move the arrow, we can see the default column width.
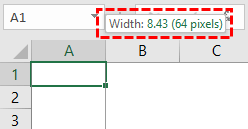
We have the default column width as 8.43 characters, equal to 64 pixels.
We can change this column width by dragging the column edge to the right by holding the left click of the mouse.
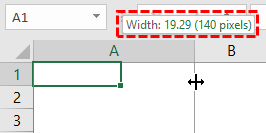
We can see in the above image when we are dragging the right corner of the column to the right side, column width changes. Like this, we can set the column width to our reference by dragging.
We can also select column width under the Excel “Home” tab. For example, our current active column is “A.”

Under the “Home” tab, we must go to “Format” and click on the drop-down list in Excel to see many formatting options. From that, choose the “Column Width” option.
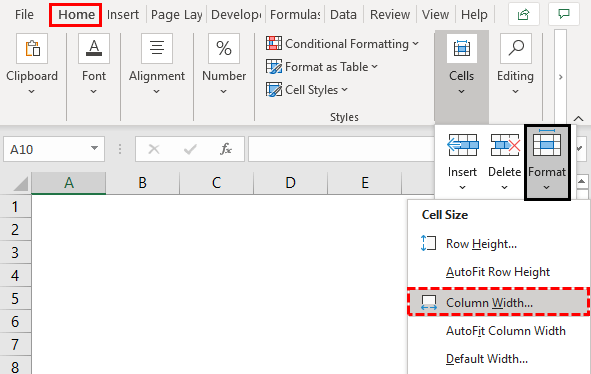
Subsequently, this will open below the “Column Width” window showing the current column width.
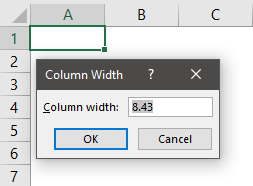
Since the current column has the default width, it only shows the width as 8.43 characters. We can also open a column width setting by using the shortcut key ALT + H + O + W.

This shortcut key is used to open up the above “Column Width” window, and as per the character number, it will adjust the column width accordingly.
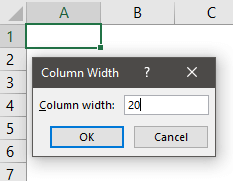
We had given the width as 20. If we click on “OK,” it will adjust the column width to 20.
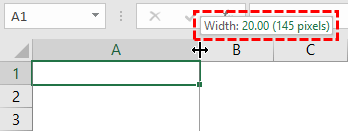
The current column width is adjusted to 20 from the default 8.43.
Column Width Is Not Auto Adjusted To The Largest Value In The Column
When we type some data into the cell, that value is not necessarily within the default width of the column. When the cell value is more than the default character width, that cell’s respective column would not automatically change its width.
- For example, look at the below image.

In cell A1 we have typed “Google Inc,” which is surely over the default column width. - Since there is no value in cell B1, we can still see the full value of cell A1. But when we insert some other value into cell B1, we no longer see the full value of cell A1.

We cannot see the full value of cell A1 and the same case with B1 as well this cell value too over the column width. - Now, we need to adjust the column width to the cell value, so to auto-adjust the column width to the Excel cell value, place the cursor first on the right corner of column A.

- On seeing the four-way arrow key, double-click on the mouse to auto-adjust the Excel column width, equal to the highest lengthy value in the column.

When we double-click on the column in the right corner, it has adjusted the column width, equal to the value in cell A1 which is 9.57 characters. - Similarly, we can do the same thing for column B.

The column B auto width is adjusted to 12.43.
AutoFit Column Width Using Excel Shortcut Key
We can also autofit column width using excel shortcut key ALT + O + C + A.

For example, look at the below data.

As shown above, we have three values in three cells. First, place a cursor on the A2 cell.

Now press the shortcut key ALT + O + C + A.
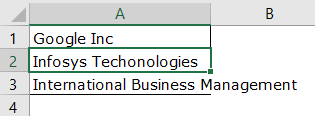
As seen above, upon pressing the Excel shortcut key, it has auto-adjusted the column width to fit the A2 cell value only. Unfortunately, the A3 cell value is still not adjusted to the column width, so we need to select the whole column and press the shortcut key to impact the entire column.
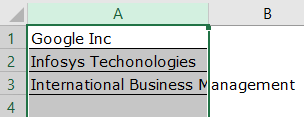
Now, press the shortcut key ALT + O + C + A.

So, the entire column will be adjusted, equal to the highest value in the column.
Important Things To Note
- Excel column auto width option is used to adjust the width of the column in Excel.
- We can simply click on the right end of the column.
- The shortcut keys are Alt + H + O + I.
Frequently Asked Questions
Excel column auto width option, as the name suggests, helps users adjust the width of the column based on the given text string.
Consider the below table showing text string, ‘Attendance’.
As we can see, the text string is longer than the cell width. So, now to adjust the text string, we can simply double click on the right-end of the column.
We can see the column width is adjusted in Excel.
Likewise, we can use excel column auto width.
The shortcut to adjust column width in Excel is Alt + H + O + I.
Recommended Articles
This article has been a guide to Excel Column Auto Width. Here, we discuss how to autofit column width (manually, dragging, and with a shortcut key) in Excel. You may learn more about Excel from the following articles: -
