Table Of Contents
How to Evaluate Formula in Excel?
We can evaluate a basic excel formula by using two methods -
- Using F9 Key
- Using the "Evaluate" Tool
Now let us discuss each of the methods in detail and an example.
#1 - Evaluate Excel Formula Using F9 Key
To understand big formulas, we need first to understand parts of the formula step by step, and this is called an evaluation of the formula or debugging.
Example 1
For example, look at the below formula for this example.
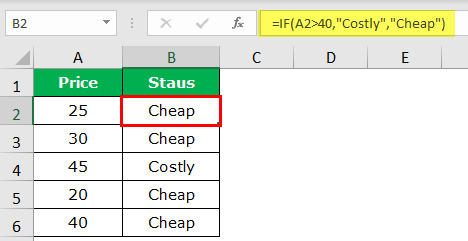
If you do not understand anything from the formula, we can evaluate it by pressing the F9 key.
The F9 key is used to quickly evaluate and debug the formula to understand and efficiently work with Excel. Using this F9 key, we can determine only the part of the formula by replacing the actual formula with the result of the formula.
IIn the above example, we have applied a logical test, i.e., A2>40. Based on the logical test, we are analyzing the price status. If the price is >40, then we need the result as “Costly,” or else we need the result as “Cheap.” So, IF condition tests the logical test and returns “Costly” if the logical test is "TRUE" or if the logical test is "FALSE," it will return "Cheap."
In the B2 cell, we have got the result as "Cheap" to understand how we got this result. Let us evaluate the logical part of the formula.
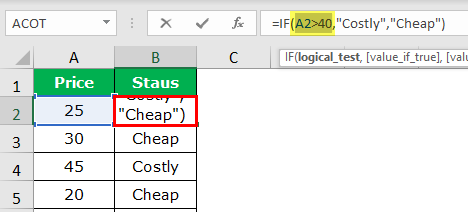
In the formula, the bar selects only the logical test part of the formula.
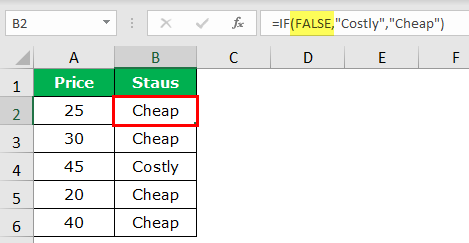
Once the logical test part is selected, press the F9 key, and see what the result is.
It says "FALSE" because the A2 cell price value is not >40, so the logical test is "FALSE." Since the logical test is FALSE, we got the result as "Cheap."
Now, we need to go to cell B4, where we have the result of "Cheap." Select the logical test part and press the F9 key in that cell.
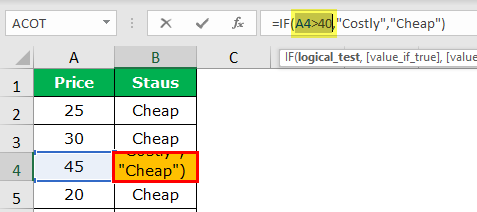
Now, press the F9 key to see the result of the logical test.
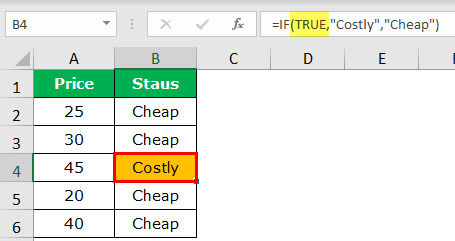
The logical test result is "TRUE." Since we have applied the result as "Costly" for the TRUE part, we got the same result in the B4 cell because the price of the A4 cell is >40.
But when it comes to cell B6, we got the result as "Cheap" even though the price is 40; we have applied the logical test as >40, not >=40.
Example #2
Now, take a look at one more example of evaluating the formula. Let us take a look at the below data.
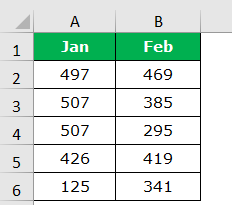
We need to check whether Jan’s total equals Feb's total in the above table. If both the totals are equal, we should get the result as “Same” or “Not Equal.”
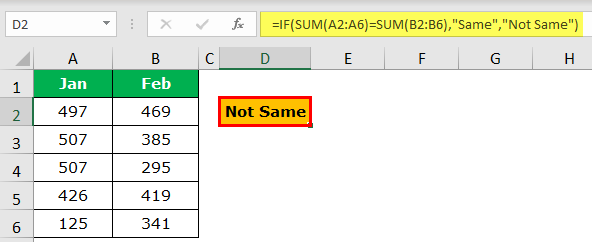
We have applied the formula below:
=IF(SUM(A2:A6)=SUM(B2:B6),"Same","Not Same")
We have applied two SUM functions to get the total Jan and Feb, respectively. Therefore, we must select both the SUM functions in the excel equation in the formula.
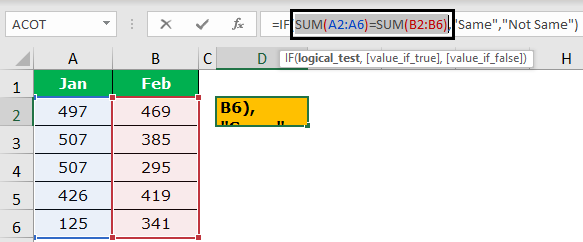
Press the F9 key and let us see what the result is.
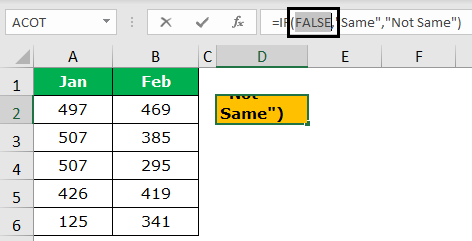
We got the result as "FALSE" because Jan's total equals Feb's total. So, how do we know Jan’s total is not equal to Feb's total?
Select only the first SUM function and press the F9 key to check only Jan total.
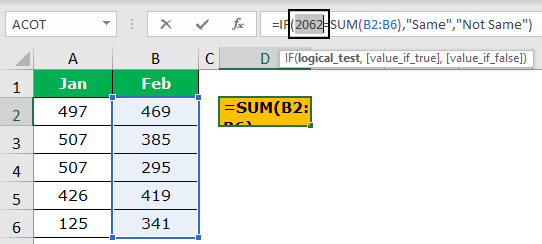
So, Jan’s total is 2062. Similarly, evaluate Feb's total.
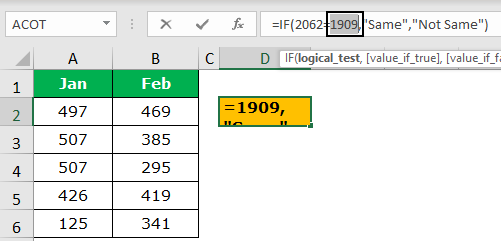
Feb total is 1909, so the logical test is "FALSE," and the result is "Not Same."
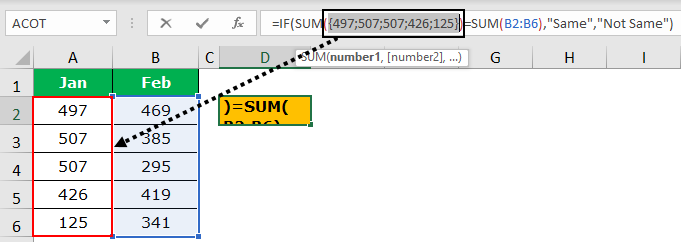
To see the values of the SUM function, consider selecting only the cell range part in the SUM function.
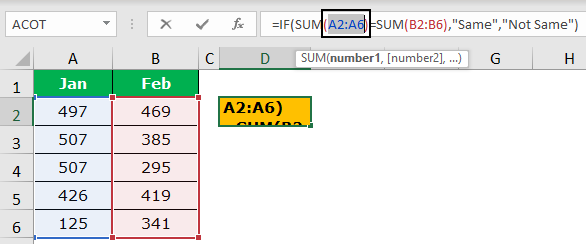
Now press the F9 key; we should see all the cells' A2 to A6 values.
#2 - Evaluate Formula by Using EVALUATE FORMULA Option
One more way of evaluating the formula is using the built-in excel feature "Evaluate Formula" option. This option is available under the "FORMULA" tab.

- Step 1: To use this feature, we must select the formula cell we want to evaluate and click on.
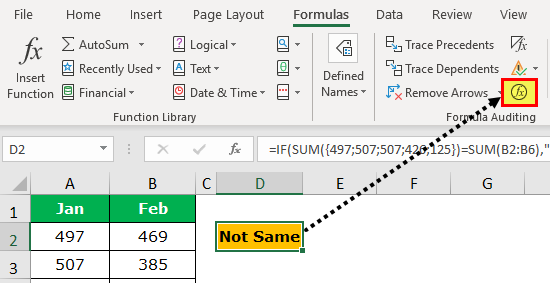
- Step 2: As soon as we click on this button, we get the below window.
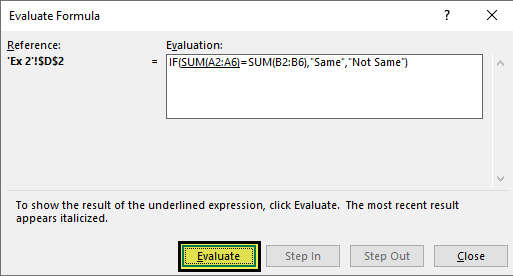
- Step 3: Now click on "Evaluate" it will evaluate the underlined part.
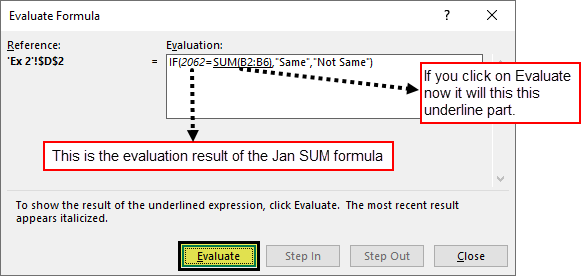
- Step 4: Click on "Evaluate" to evaluate the second SUM function.
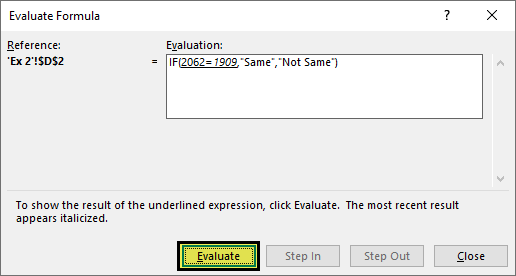
- Step 5: Now, both the equations are selected simultaneously. Click on "Evaluate." It will show whether the logical test is "TRUE" or "FALSE."
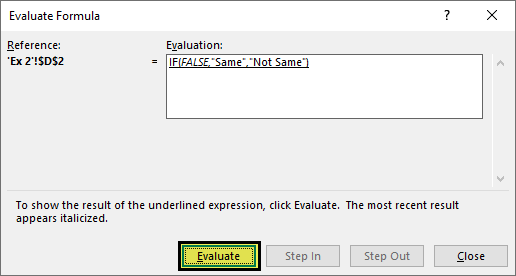
- Step 6: Now, the entire formula is selected, so click on "Evaluate" one last time it will show the final result.
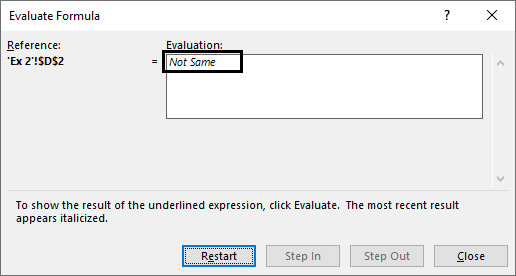
So, the result is "Not Same" because Jan’s total is not equal to Feb's total.
Things to Remember
We need to be wary of the F9 key because we should consider and press the "Esc" key when evaluating the formula. Otherwise, it will replace calculated results.
For example, we have evaluated all the cell values in the above example.
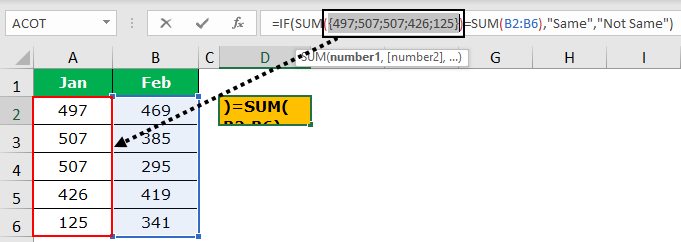
Now, if we press the "Enter" key, we may get the formula as it is.
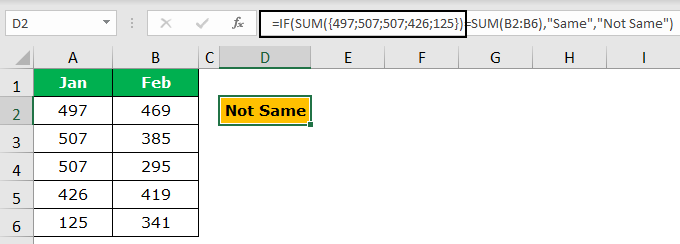
So, we need to be careful in this aspect of the F9 key. Furthermore, once its calculated values or cell values replace the formula, it is no longer a dynamic formula. So, we need to be careful in this area while debugging the formula.

