Table Of Contents
How to Create a Custom List in Excel?
Let us learn how to create a custom list in Excel using practical examples –
Example #1 - Custom List Created Manually in Excel
Let us follow the below steps:
- First, we must open Excel. Then, go to “File” and select “Options.”

- Then, choose “Advanced” and click on “Edit Custom Lists.”

- Then, we need to click on “New List,” then click on “Add.”

- Next, we must write details in the “List Entries” box. Then, press “Enter” after writing each entry. Finally, click “OK” after writing all the details.

- Click on the “OK” option.

- Then, we need to go to the Excel file. And type the first name only from the entry list.

- Then, drag from the first entry done in the Excel file.

- As a result, details are now automatically updated, without the need to type manually in an Excel file. It is an example of a custom list created manually by a user in Excel.

- Days of the week need not be created manually in the Excel custom list, even if the first day of the week is inserted.

Then the first entry cell is dragged, and other weekdays get auto-populated. This list already exists in Excel and cannot be deleted by the user.
Months of the year also exist in Excel. Therefore, there is no need to manually create a list for days of the month in Excel. - Then, we must write the month name in a cell and drag that cell. Consequently, the month's name gets automatically populated.

- A manually created list by the user is now visible in the Excel custom lists. In addition, we can click the Delete to delete the manually made list.

- We can create the list either horizontally or vertically.

Example #2 - Create List in Different Sheet
We can also create lists on a different sheet.
Step 1 - We must first enter the details in the new sheet.
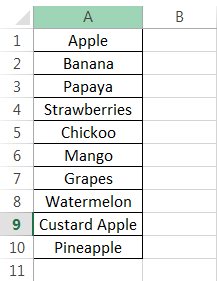
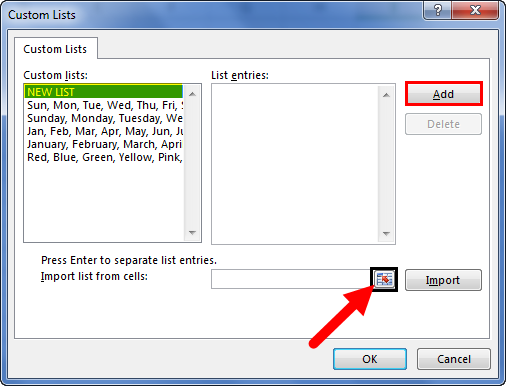
Step 2 - Then, we need to go to the new list. Click on “Add,” then click on “Arrow.”
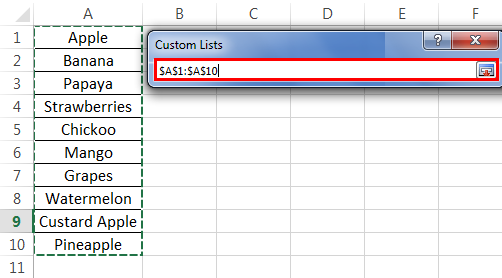
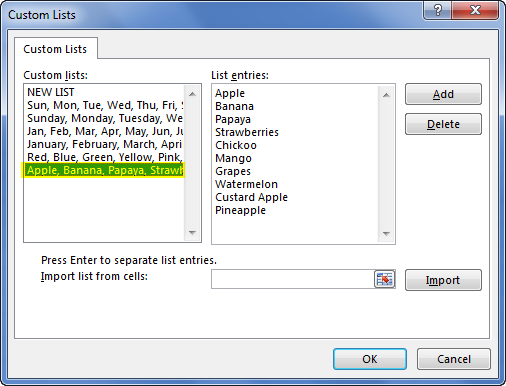
Step 3 - Custom list in Excel gets populated. Now, we must select newly entered details. Then, the dollar and semicolon sign automatically gets created. There is no need to make these signs manually.
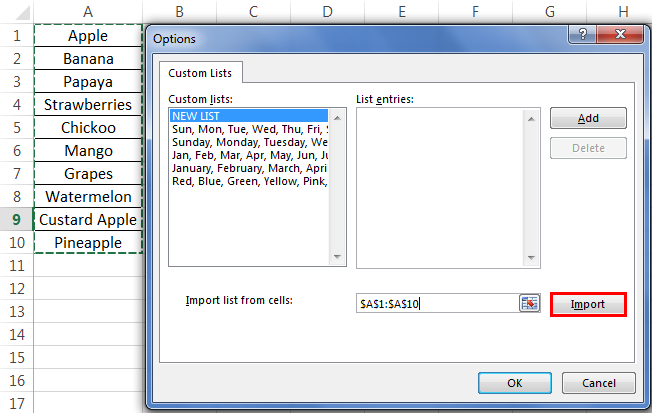
Step 4 - Next, click on “Import” and click “OK” twice.
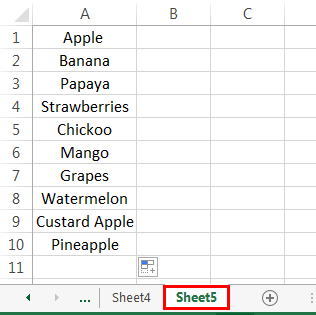
Step 5 - Go to another sheet. Again, we must type the first name from the entry list and drag the cell from the first entry.
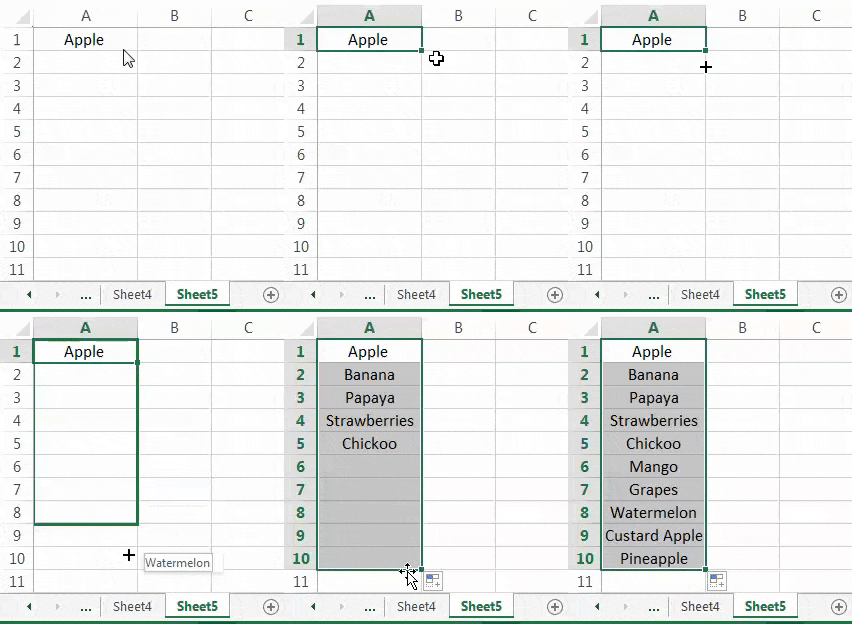
Instead, we can see this list on another sheet.
The user does not enter a comma. Instead, a comma gets automatically created in the custom lists dialog.
Note: The above examples were done in Excel 2013.

Go to File---options---advanced—edit custom list and follow the same steps as above for doing in Excel 2007.

TOOLS-- OPTIONS-- CUSTOM LIST and follow same steps as above for doing in Excel 2003.
Things to Remember
- Avoid creating a list that already exists. For example, days of the week, months in a year.
- Remember the first entry is made while preparing the list.
- Do not keep lengthy sentences on the list. A custom list in Excel helps in data collection and creating reports.
- Entries in a list can be either changed or deleted as per user preference.
Recommended Articles
This article has been a guide to Custom List in Excel. Here we discuss how to create it step by step along with examples. You may learn more about Excel from the following articles: -
