Table Of Contents
AutoCorrect Feature in MS Excel
An AutoCorrect feature is an excellent option provided in Excel Microsoft Office. This feature can automatically correct common misspelled words or finish a short phrase to a full sentence or even pop up a full form of an abbreviation. In addition, this option will fix the spellings of the words and autocorrects in Excel the capitalization of the first word that comes after a full stop.
For example, often, we make mistakes while typing or texting in Excel. In such cases, using the AutoCorrect feature can help us to avoid typo errors in important work-related data. We may also rectify misspelled words, change abbreviations to full texts, or replace longer phrases with shorter ones.
How to Select AutoCorrect Option in Excel (Simple and Easy Steps)
Let us follow the below steps to select the AutoCorrect option in Excel.
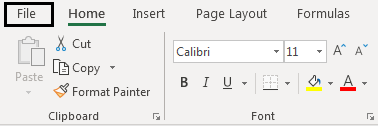
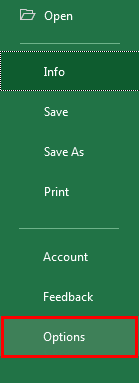
- After opening Microsoft Excel, go to the "File" menu and select “Options,” as shown in the screenshot.

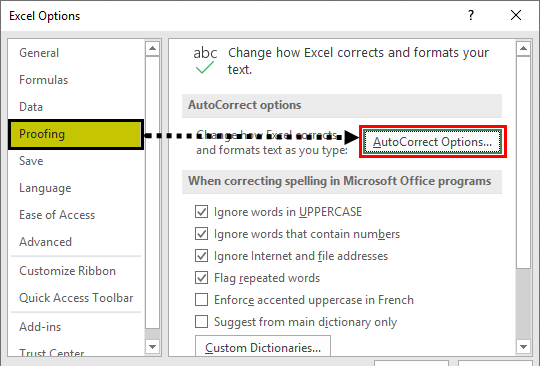
- Then, in the "Options," Go to the “Proofing” option.

- In "Proofing," click on Excel “AutoCorrect Options.”

- The "AutoCorrect Options" window will appear, as shown below. The "AutoCorrect" tab is the default option selected in the window of "AutoCorrect."

Here, the "AutoCorrect" option in Excel is checked by default. If we want to uncheck the autocorrect option, uncheck the option for “Replace text as you type.” Then after unchecking this, we may not see the Excel "AutoCorrect" option for spelling. For example, if you type “ehr,” it will be shown as “ehr” but not as “her.”
The option “Replace text as you type” is only for toggling auto-correction of spellings only in the written text before clicking the "Enter" button.
AutoCorrect Options Tab
There are many options in this window to check or uncheck them. By default, they are checked, and if you want to uncheck them or do not want to use them, you can uncheck the Excel checkbox.
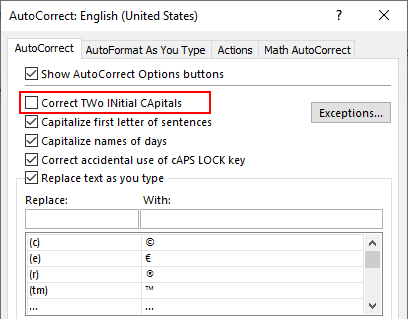
1) Correct Two Initial Capitals: If we turn off or uncheck the checkbox for this, you may be unable to correct the first initial capitals.
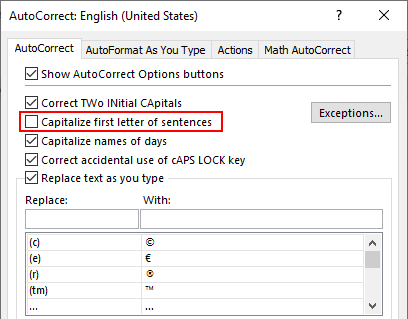
2) Capitalize First Letters of Sentences: This option will capitalize the first letter automatically. By turning off this option, you will not be able to use the auto-capitalization option next time.
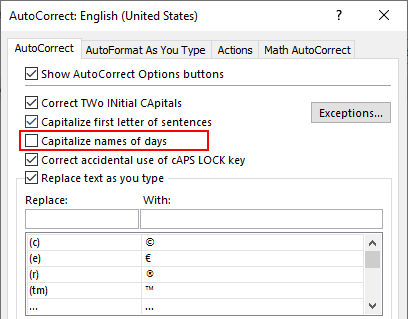
3) Capitalize Names of Days: This option will automatically capitalize the names of the days in a week.
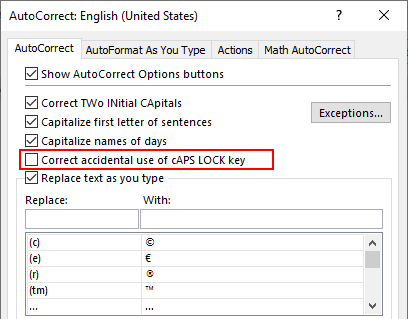
4) Correct Accidental use of Caps Lock Key: Accidentally, sometimes capital letters are used between the words. To correct those words or sentences, then this option is useful.
Examples
Example #1
If we type “ehr” in Excel and press "Enter," it automatically corrects the word to “her,” as shown in the below screenshot.
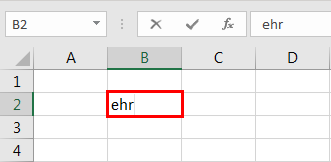
The above screenshot has the spelling “ehr” after clicking on "Enter." Then, it automatically changes the spelling to “her.” So, for example, we may see this in the below screenshot.
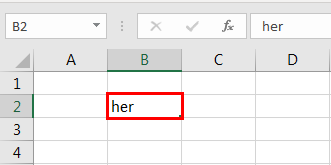
As we said, not all the spellings get Excel autocorrected with this feature. However, it has a list of words in that feature that autocorrects.
Example #2
In this example, the teacher's spelling is written wrong. The auto-corrected feature does not identify it. Now, we can add the spelling to the list and correct them. We can see this below.
The spelling is corrected.
The step-by-step process is as follows add the spelling to the list.
- Step1: Go to the "File" menu.
- Step 2: Now, we need to go to "Options."
- Step 3: After clicking the “Options” button. We can see a window of having many options, as shown in the below screenshot.
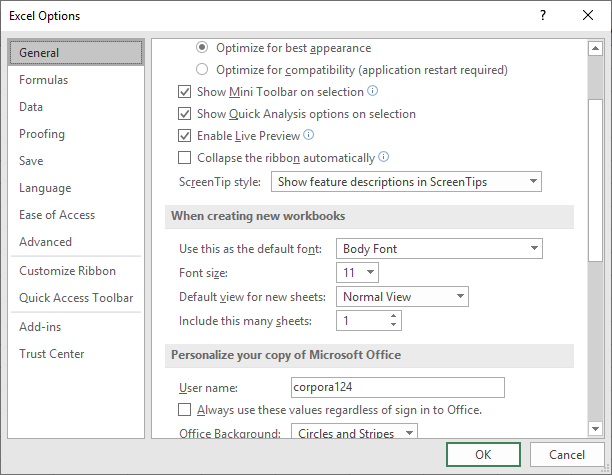
- Step 4: Now, we will select the "Proofing" option. Then again, another window will open. Select “AutoCorrect Options” in that window, and another window will be seen, as shown in the below screenshot.
- Step 5: Now, it will open another window for “AutoCorrect Options." The Excel "AutoCorrect" is the default tab selected in that window, as shown below.
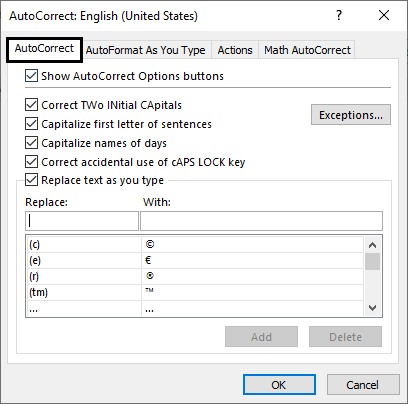
- Step 6: All the checkboxes are checked by default in that window. It means all the features are applied automatically. If we want to turn them off, we can uncheck the checkbox beside the feature.
Now, we are required to add the user-defined text to replace the text. We can write the misspelled word in the “replace” text field and correct spelling in the “with” field.
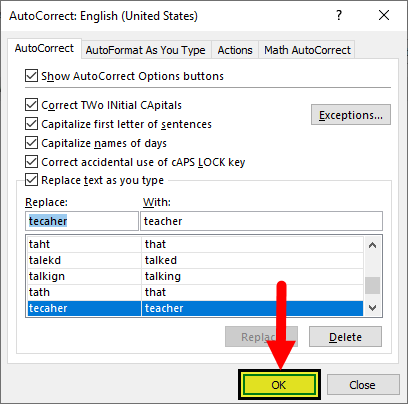
Write the word to be replaced in the “replace” field, and the word is returned in the “with” field. Now click on the "ADD" button and click “OK.” Then click “OK” again in the main “Proofing” window. It will add user-defined text to the list. Now, we can use the added text next time. The wrongly spelled word is now corrected to the right spelling.
The screenshot for that would be as shown below.

Here, we can see that the text has been corrected. The correct spelling can be seen in the highlighted cell.
Usage
- This feature’s main purpose is to correct the spelling of the words in a sentence if they are wrongly written in spellings.
- The next feature also auto-capitalizes the first letter of every word in a sentence. We can turn off this option, as discussed above.
- As a part of the auto-capitalization feature, this option automatically capitalizes the first letter of every word of a day in a week.
- Sometimes, we write capital letters accidentally in between the words. Capital letters also can be corrected into small letters with this feature.
- The first two initial words also can be made capitalized with this option. One can even turn off this feature, as discussed above.
- We can even add user-defined spellings, which can be wrongly spelled in the replace text field space, as there are only some words in that list.
- Not only are words symbols that the user thinks he is frequently using. In any case, they also do not want to misspell the spelling. In this case, symbols can be added to the list not to be missed.
For example, in Copyright ©, we can use the symbol by using the text “(c).”
Drawbacks
The drawback of this feature is that it does not correct all the words spelled. Instead, it has a list of words shown in the window if we observe that some most common terms are present in the list. Also, there is another option of adding your text to be corrected. It is shown in the below screenshot.
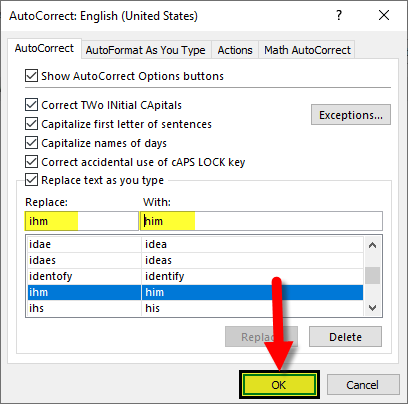
In the above screenshot, there is an option to add the user-defined spellings for the auto-correction of spellings. First, write the wrongly spelled word in the text field and the correct spelling in the “with” field. After entering the text, click on "OK" and click "OK" in the "Proofing" window. Now, you can use the user-defined words for auto-correction of misspelled words.
Important Points to be Remembered
- This feature has only a list of words for the auto-correction of spellings.
- It is, by default, applied in Microsoft Excel. As per the requirement, we can turn off this feature.
- It is automatic. Some unwanted changes also may happen due to this auto-feature option. Then, we need to turn off the options that are not necessary for that particular time so that our work is not interrupted.

